How to Save and Reuse Issue Filters in QA Touch
The Save Filter feature in the QA Touch Issues module lets you save frequently used filter combinations, such as Status, Priority, Severity, Assignee, and more, and reuse them anytime. You select your filter options in the filter panel, click Save, and give the filter a name. You can then apply the saved filter in one click, update it by saving again, or click Clear to return the issue list to its default view.
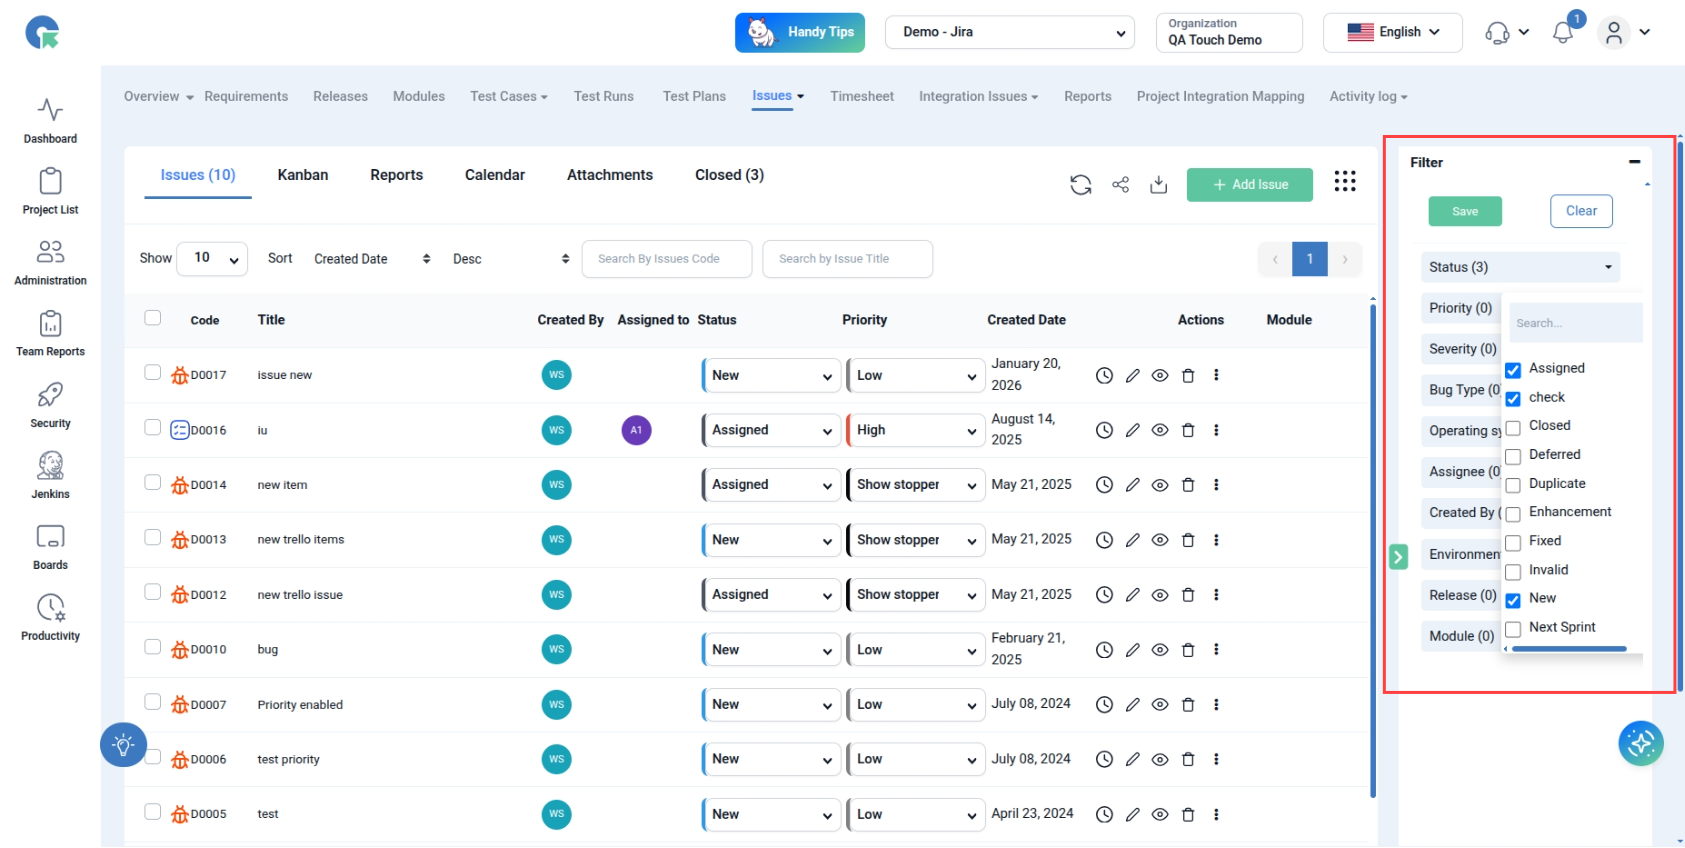
At a Glance: Save Filter in the Issues Module
| What it does | Saves filter combinations in the Issues module for reuse |
| Where | Issues module → filter panel on the right side |
| Filter options | Status, Priority, Severity, Bug Type, Assignee, Module, Release, and more |
| Save | Click Save and enter a Filter Name |
| Reuse | Select a saved filter to apply all its configurations instantly |
| Update | Apply the filter, modify it, click Save, and overwrite if prompted |
| Reset | Click Clear to return to the default issue list view |
What Is Save Filter in QA Touch Issues?
Save Filter is an Issues module feature that stores your filter selections under a name so you can apply them again instantly.
Save Filter helps you:
- Avoid reapplying the same filters repeatedly
- Quickly access commonly used issue views
- Improve productivity when working with large datasets
How to Create a Saved Filter in the Issues Module
To create a saved filter, open the Issues module, choose your filter options in the filter panel on the right side, click Save, and enter a filter name.
Step 1: Select Your Filter Options
- Open the Issues Module
- Use the filter panel on the right side
- Select required filter options:
- Status (e.g., New, Assigned, Closed)
- Priority (e.g., High, Low)
- Severity
- Bug Type
- Assignee
- Module, Release, etc.
- Click on the Save button
Step 2: Name and Save the Filter
After clicking Save:
- You will be prompted to enter a Filter Name
- Provide a meaningful name (e.g., High Priority Bugs, My Assigned Issues)
- Confirm to save
Your filter is now stored and can be reused anytime.
How to Access and Apply Saved Filters
Saved filters are available from the filter section. Select a saved filter to instantly apply all of its configurations.
- Saved filters can be accessed from the filter section (or saved views dropdown, if implemented)
- Simply select a saved filter to instantly apply all configurations
How to Update a Saved Filter
To update a saved filter, apply it, change the filter options, and click Save again.
- Apply the saved filter
- Modify the filter options
- Click Save again
- Choose to overwrite the existing filter (if prompted)
How to Clear Issue Filters
Clicking Clear resets all selected filters and returns the issue list to the default view.
- Click Clear to reset all selected filters
- This will return the issue list to default view
Frequently Asked Questions
Can I save filters in the QA Touch Issues module?
Yes. Select your filter options in the filter panel, click Save, enter a Filter Name, and confirm to save the filter for reuse.
Which filter options can I save?
You can save combinations of Status, Priority, Severity, Bug Type, Assignee, Module, Release, and more.
How do I apply a saved issue filter?
Select the saved filter from the filter section, and all of its configurations are applied instantly.
How do I update an existing saved filter?
Apply the saved filter, modify the filter options, click Save again, and choose to overwrite the existing filter if prompted.
How do I reset issue filters?
Click Clear to reset all selected filters and return the issue list to its default view.
What should I name a saved filter?
Use a meaningful name that describes the view, such as High Priority Bugs or My Assigned Issues.