Project Premission Setting in JIRA
How to Create a permission scheme
To create a permission scheme:
- Select > Issues.
- From the sidebar, select Permission Schemes. The Permission Schemes page opens. It displays a list of all the permission schemes in your Jira site and the projects that use each scheme.
- Select Add Permission Scheme. The Add Permission Scheme form appears.
- Give your new scheme a name, and add a short description of the scheme. Descriptions help you identify schemes in the future.
- Select Add.
Newly added scheme appears on the Permission Schemes page, but it’s an empty vessel. To use the scheme properly, you need to:
- Add users, groups, and roles to the scheme and grant their project permissions.
- Associate the scheme with the projects that should use it.
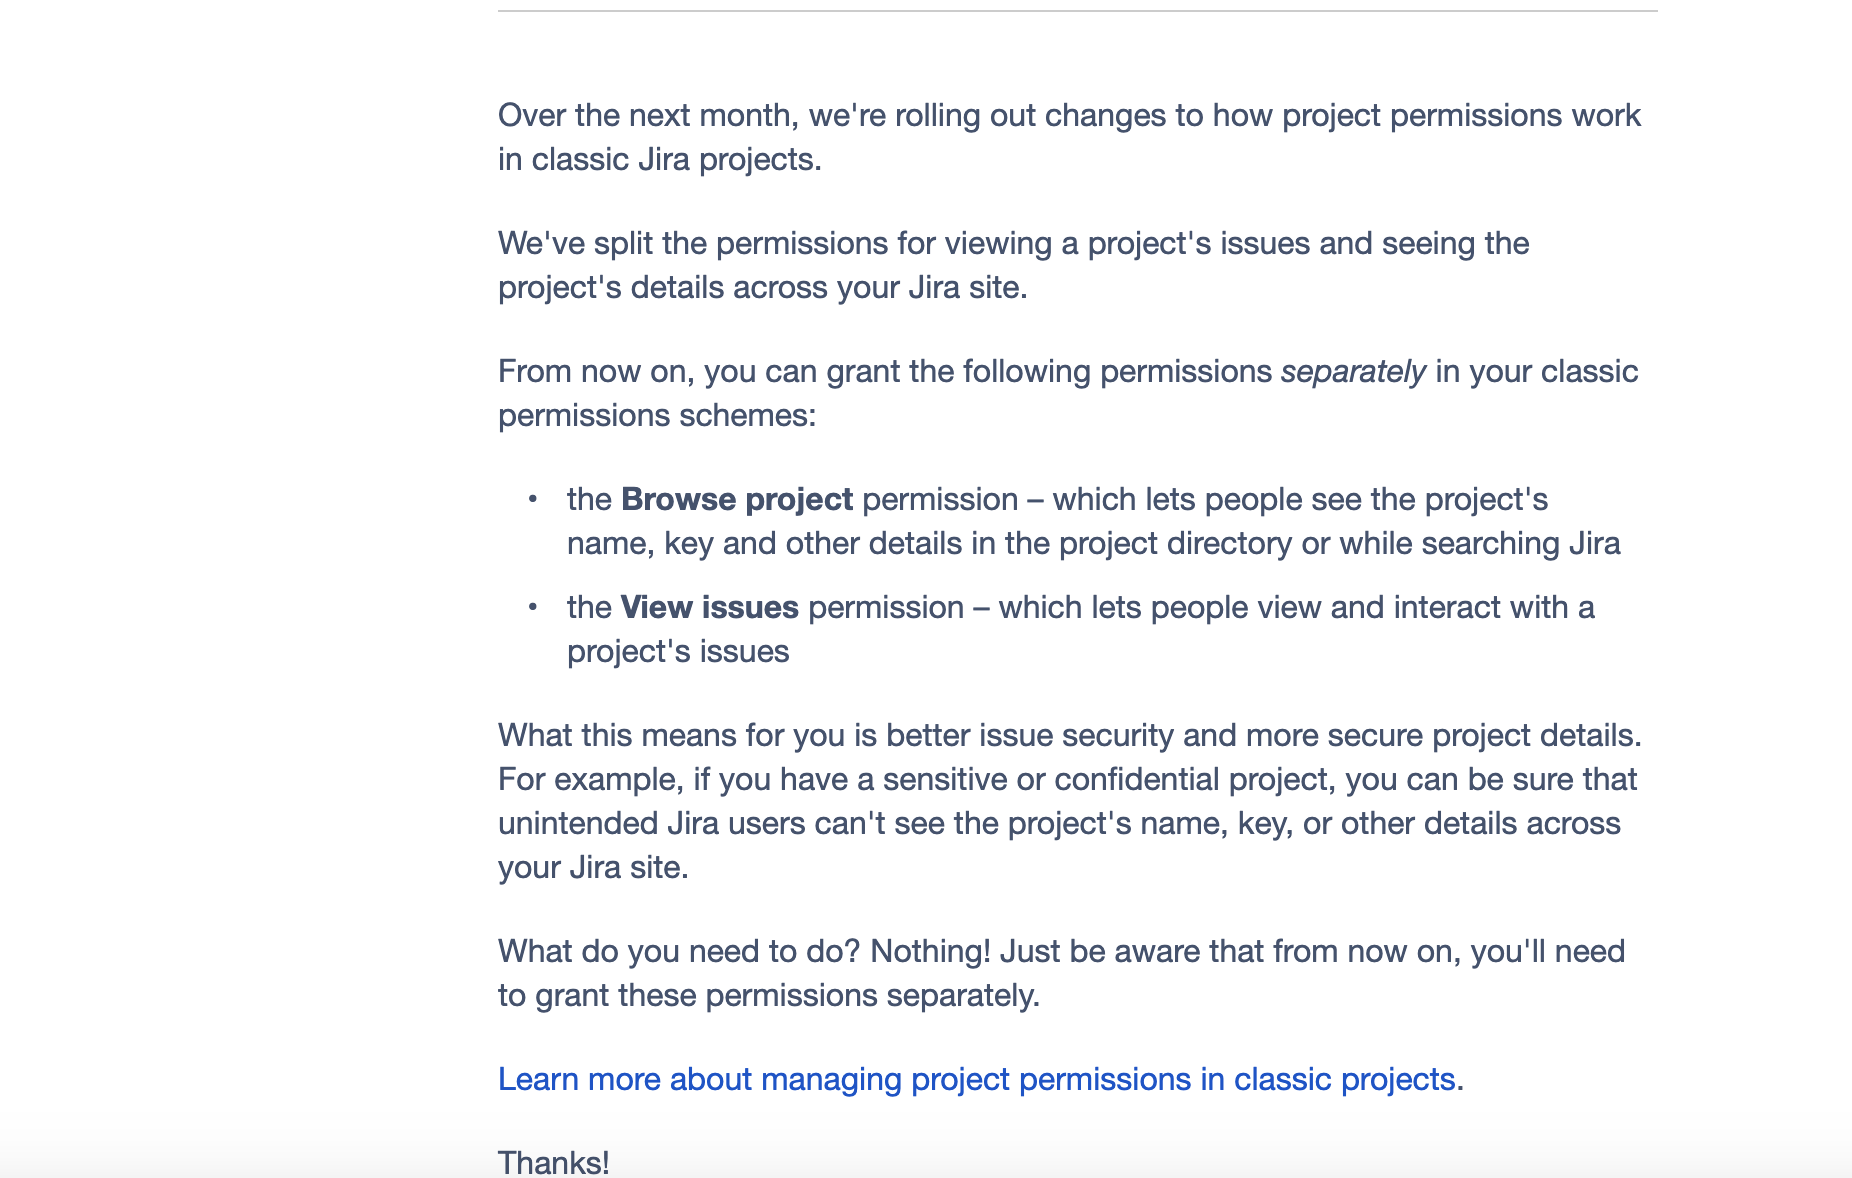
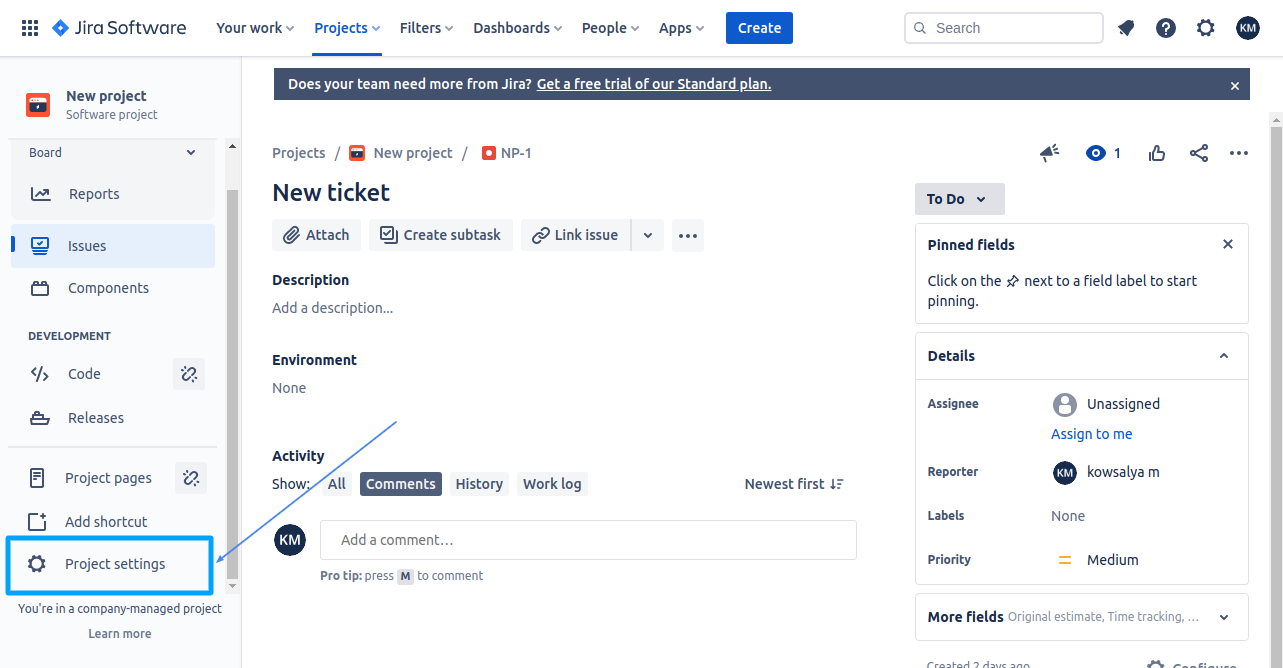
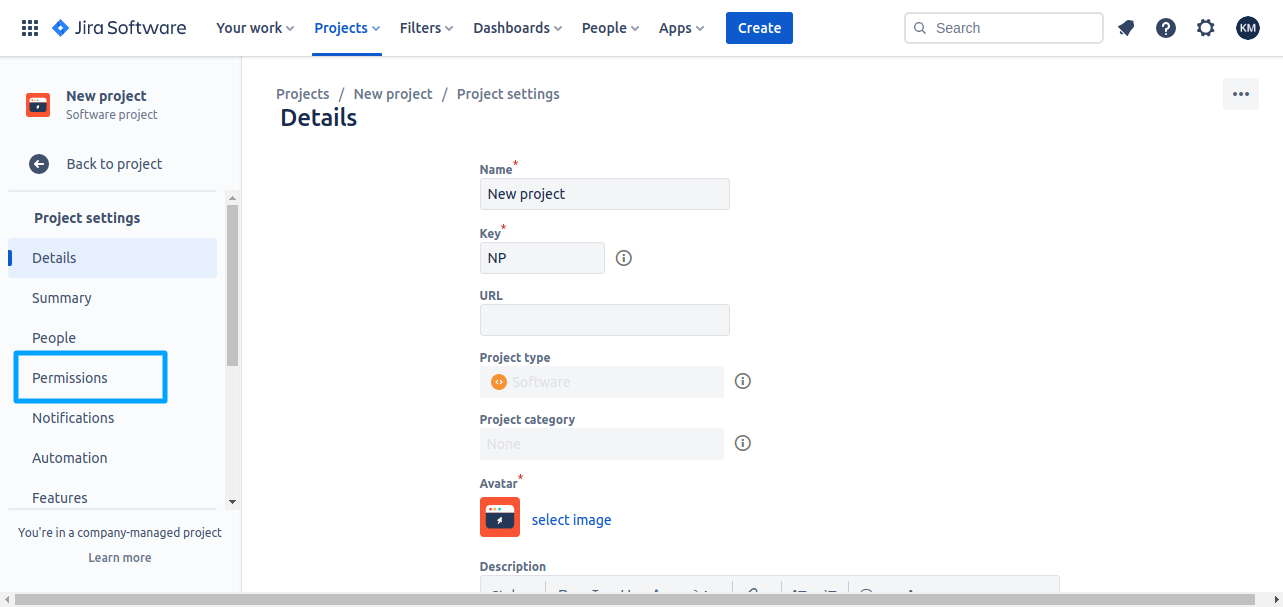
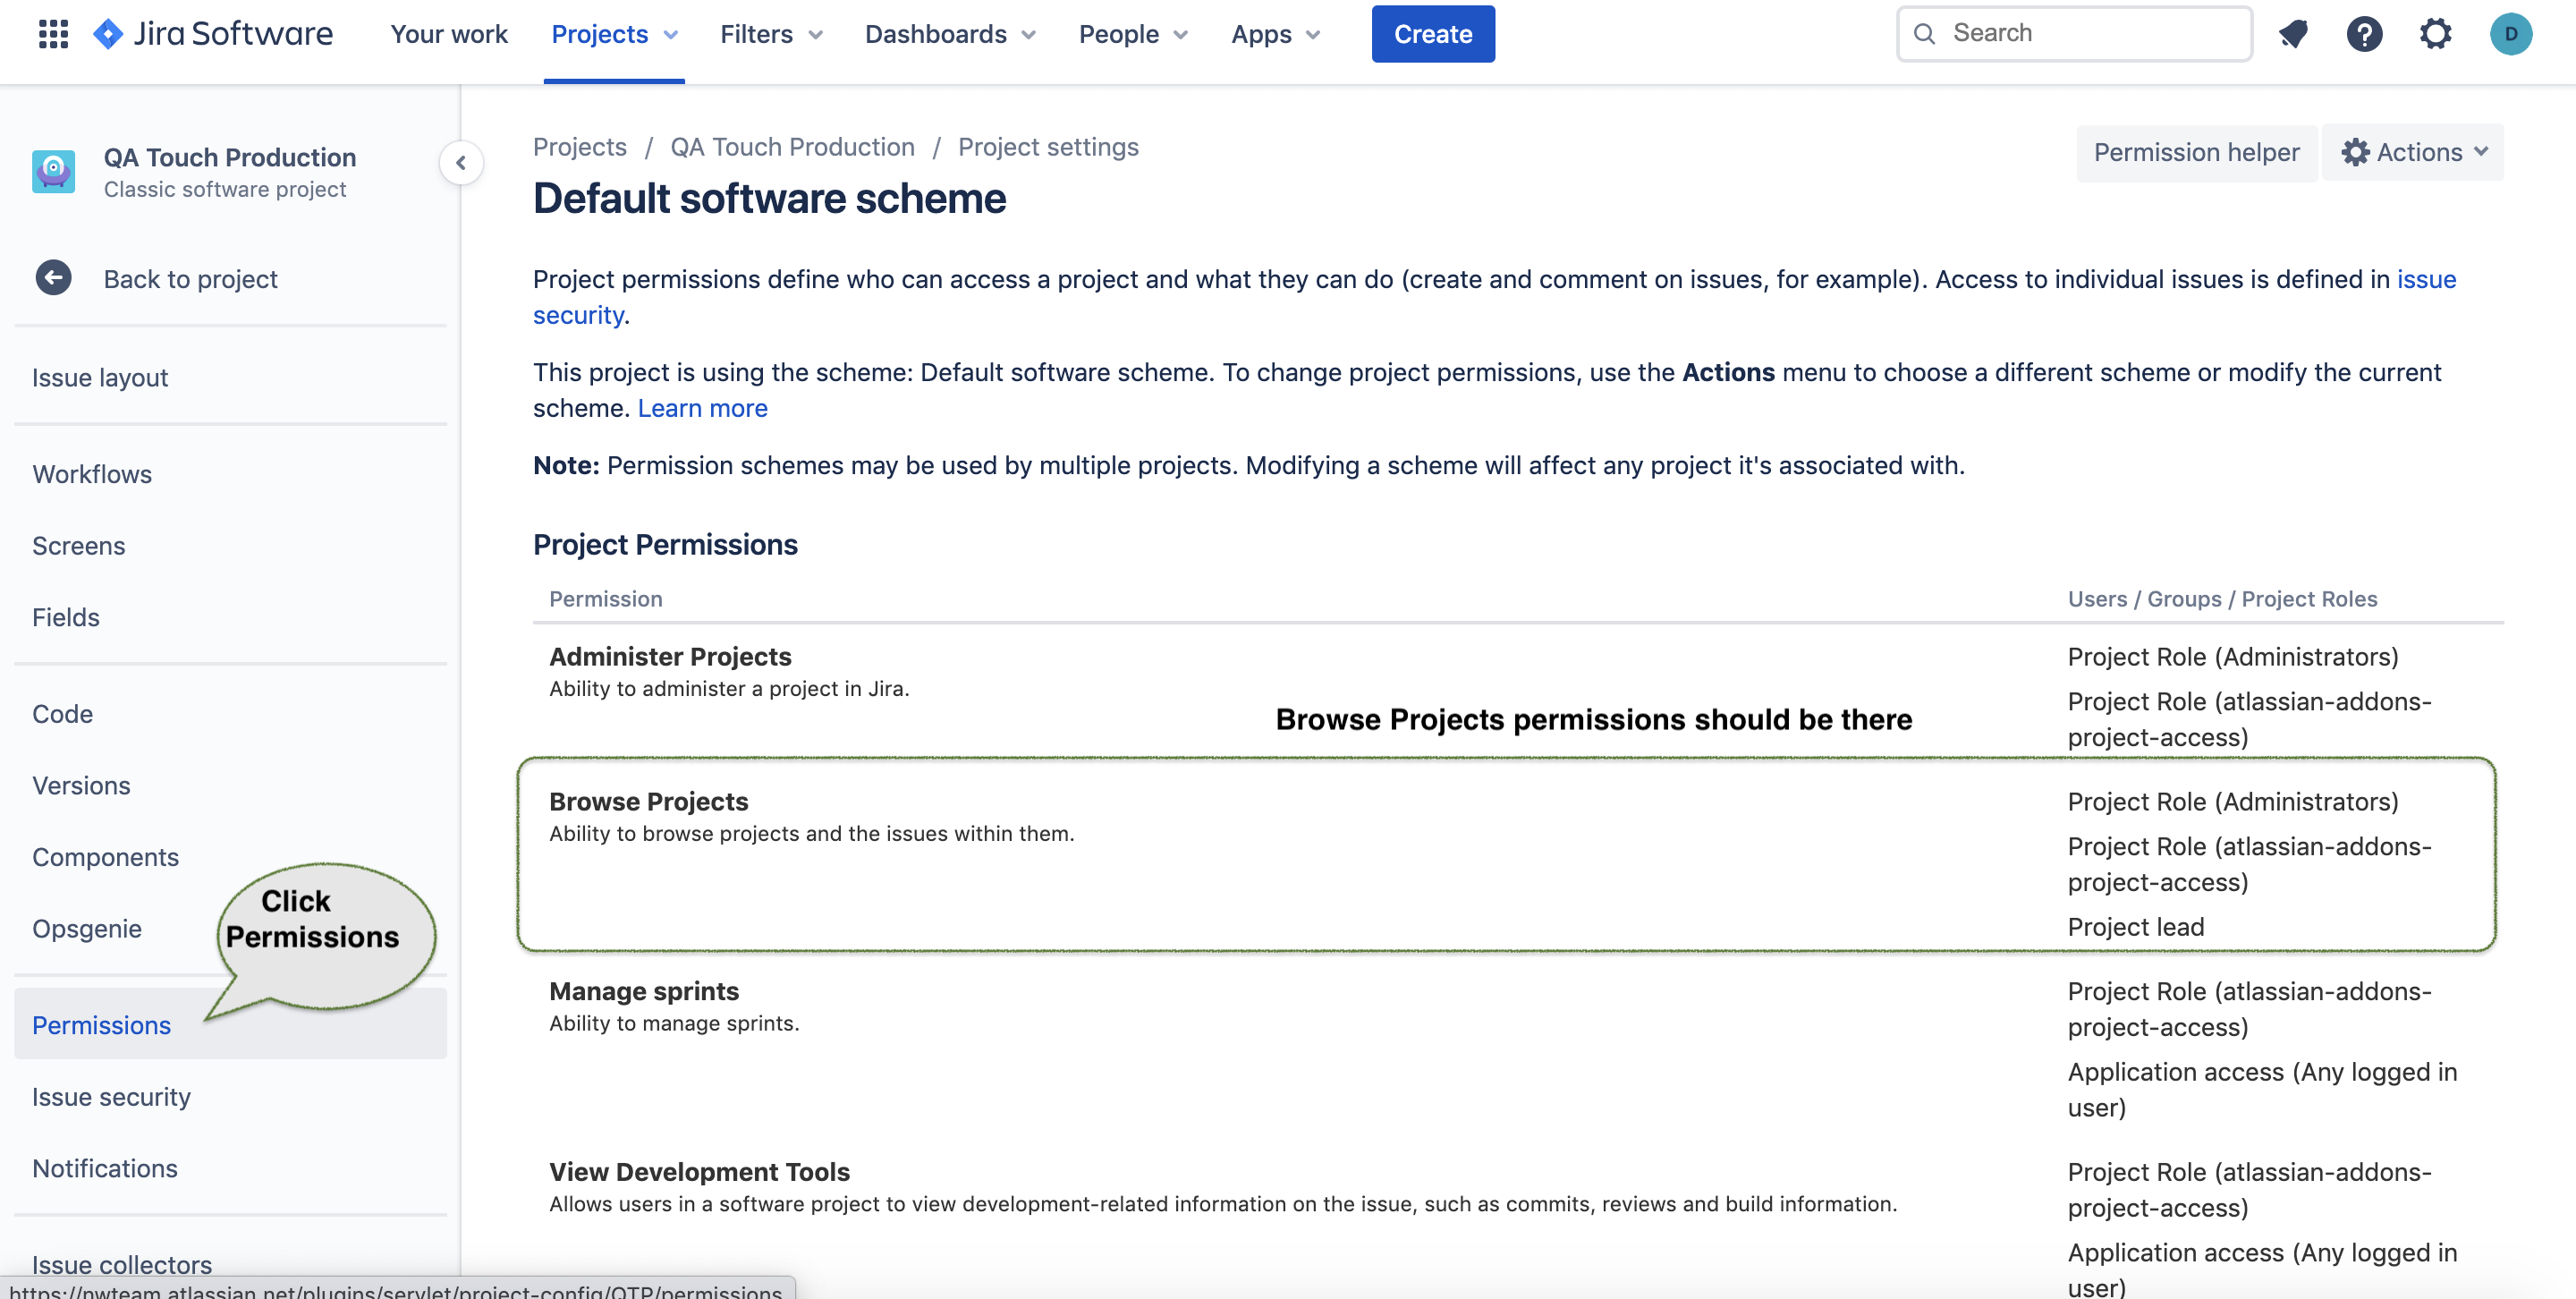
Enable List Project Permission in Jira
Click on Permissions Menu in the sidebar
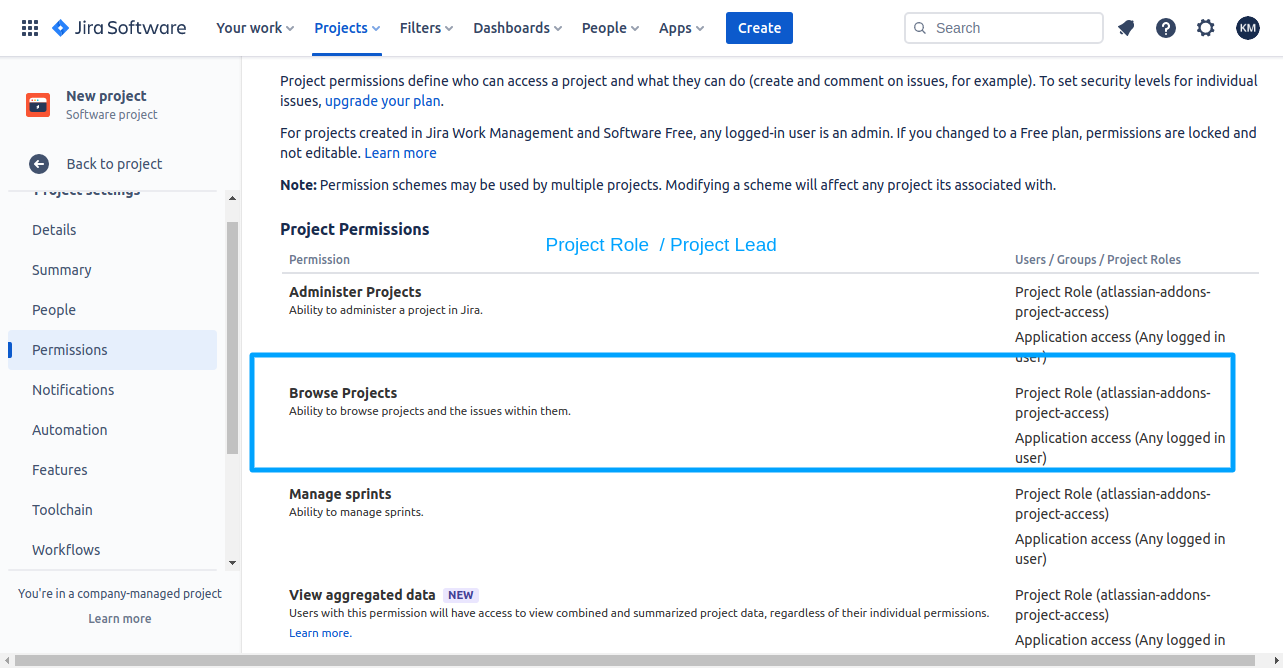
Check whether the Browse project permission is enabled for the user if not Give the permission
The below snapshots show the permission schemes in Jira and configure the same.

Re-Generate JIRA API Key
- Log in to https://id.atlassian.com/manage-profile/security/api-tokens
- Click API tokens, then Create API token.
- Use Copy to clipboard, and paste the token to your script This configuration has to be done with the Jira’s administrator mail id and the API key to avoid the Jira Project permissions.
Mapping Jira Requirements and Test Cases
There are multiple ways to mapping the Jira requirements and test cases.
1.Pull Jira Requirements and mapping the test cases
2.Mapping Jira Requirements while creating the test cases
3.Test case view - Fetch Jira Requirements.
Pull Jira Requirements and Mapping the Test Cases
When you wanted to add multiple Jira tickets(Epic, Story, Bugs, Tasks etc) to the test cases faster.
- After logged In QA Touch, access the project which is mapped with the Jira project.
- Click Requirements
- Click Jira Requirements button.
- By default, you will be able to see the Epics from your Jira project.
- You can select the other Jira ticket types from the Issue type filter.
- Select the Jira ticket id and click link test cases.
- In the resulting popup select the module or search by tags to get the test cases you want to map it.
- Click Close to close the popup.
- Click Save to complete the mapping.
Mapping Jira Requirements While Creating the Test Cases
When creating the test cases itself, if you have your Jira requirements ready, then you will be able to map it. After logged In QA Touch, access the project which is mapped with the Jira project. Click Test Cases - Add Test Case Select the module and fill up the other values. Click Jira Requirements and select the Jira ticket type and click Save.

Test Case view - Fetch Jira Requirements
After logged In QA Touch, access the project which is mapped with the Jira project. Click Test Cases - Click View icon. Click Fetch Jira Requirements. In the resulting popup, you can select and map the Jira Requirements.
After selecting the Jira ticket ids click save to complete the mapping. In the view page, you will be able to see the mapped Jira requirements.
Jira Requirements Traceability Matrix
When the QA Touch’s test cases and requirements are mapped, Jira Requirements Traceability Matrix will be generated automatically. The Jira RTM can be exported in .xlsx format. It will look like below:
Executing Test Run and Add Result into Jira
Go to the configured QA touch project’s test run, click Add Result. In the resulting popup click Create Issue in Jira. Select the issue type, and enter the details for summary, Description, Assignee, Priority and Click Add Jira Issue. Click Save Result. You can map your existing Jira tickets during the test execution, it is also possible to do that.
In the Add result page click Fetch Jira Keys. The Jira tickets will be listed. You can select the Jira ticket ids and click Link Issues. There are options to search the Jira tickets by Jira ticket ids or Search.
by title too to make it faster.
Once the tickets are linked, in the resulting page click Save Result to complete it.
- In the test run, you will be able to see the Jira tickets posted or You will be able to see the linked in the test runs will be available.
- You can export these tickets, you can access the Jira ticket from the link View in Jira.
- You can get the latest status of the Jira tickets, by clicking on the Pull Jira Status button.
Whenever an issue status in JIRA linked with QA Touch gets updated, the result will be pulled and updated in QA Touch. These status updates can be viewed under the JIRA issues section in the Test Run details page.
Creating issue or linking test results with JIRA issues will save all the test result details like issue summary, issue description and attachments in JIRA and QA Touch.
Prerequisite for seeing the QA Touch test results, QA Touch Jira App must be installed. Refer the following link to install and setup.
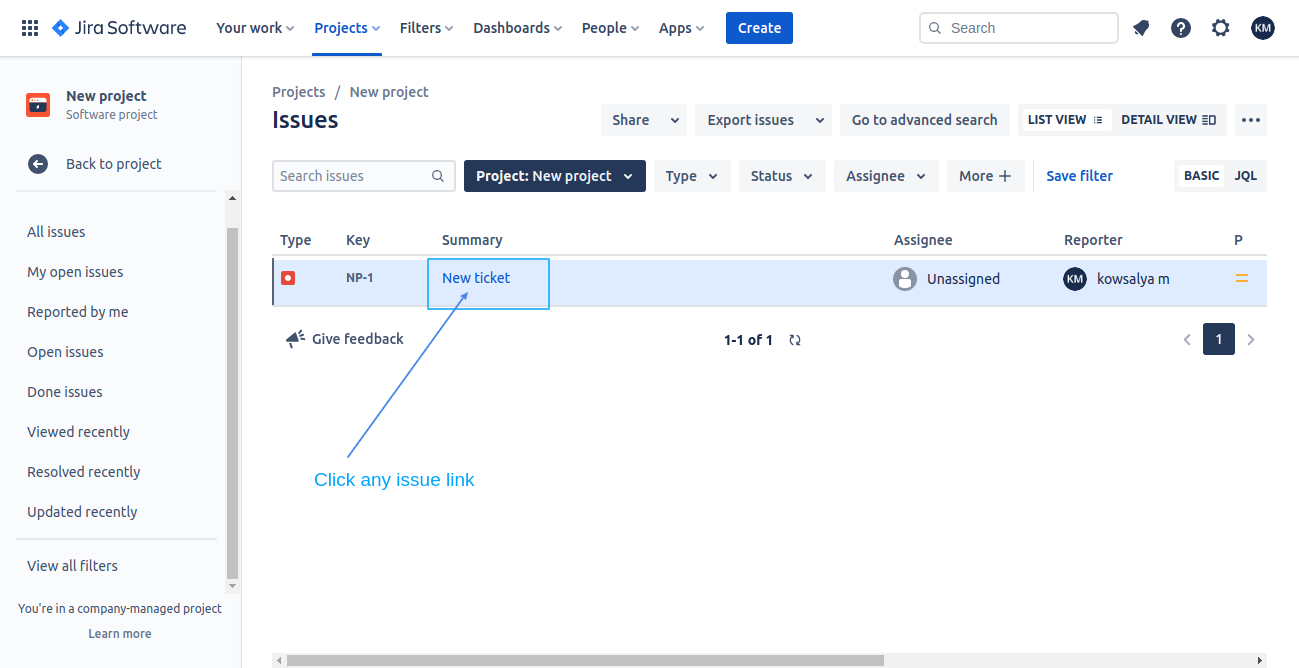
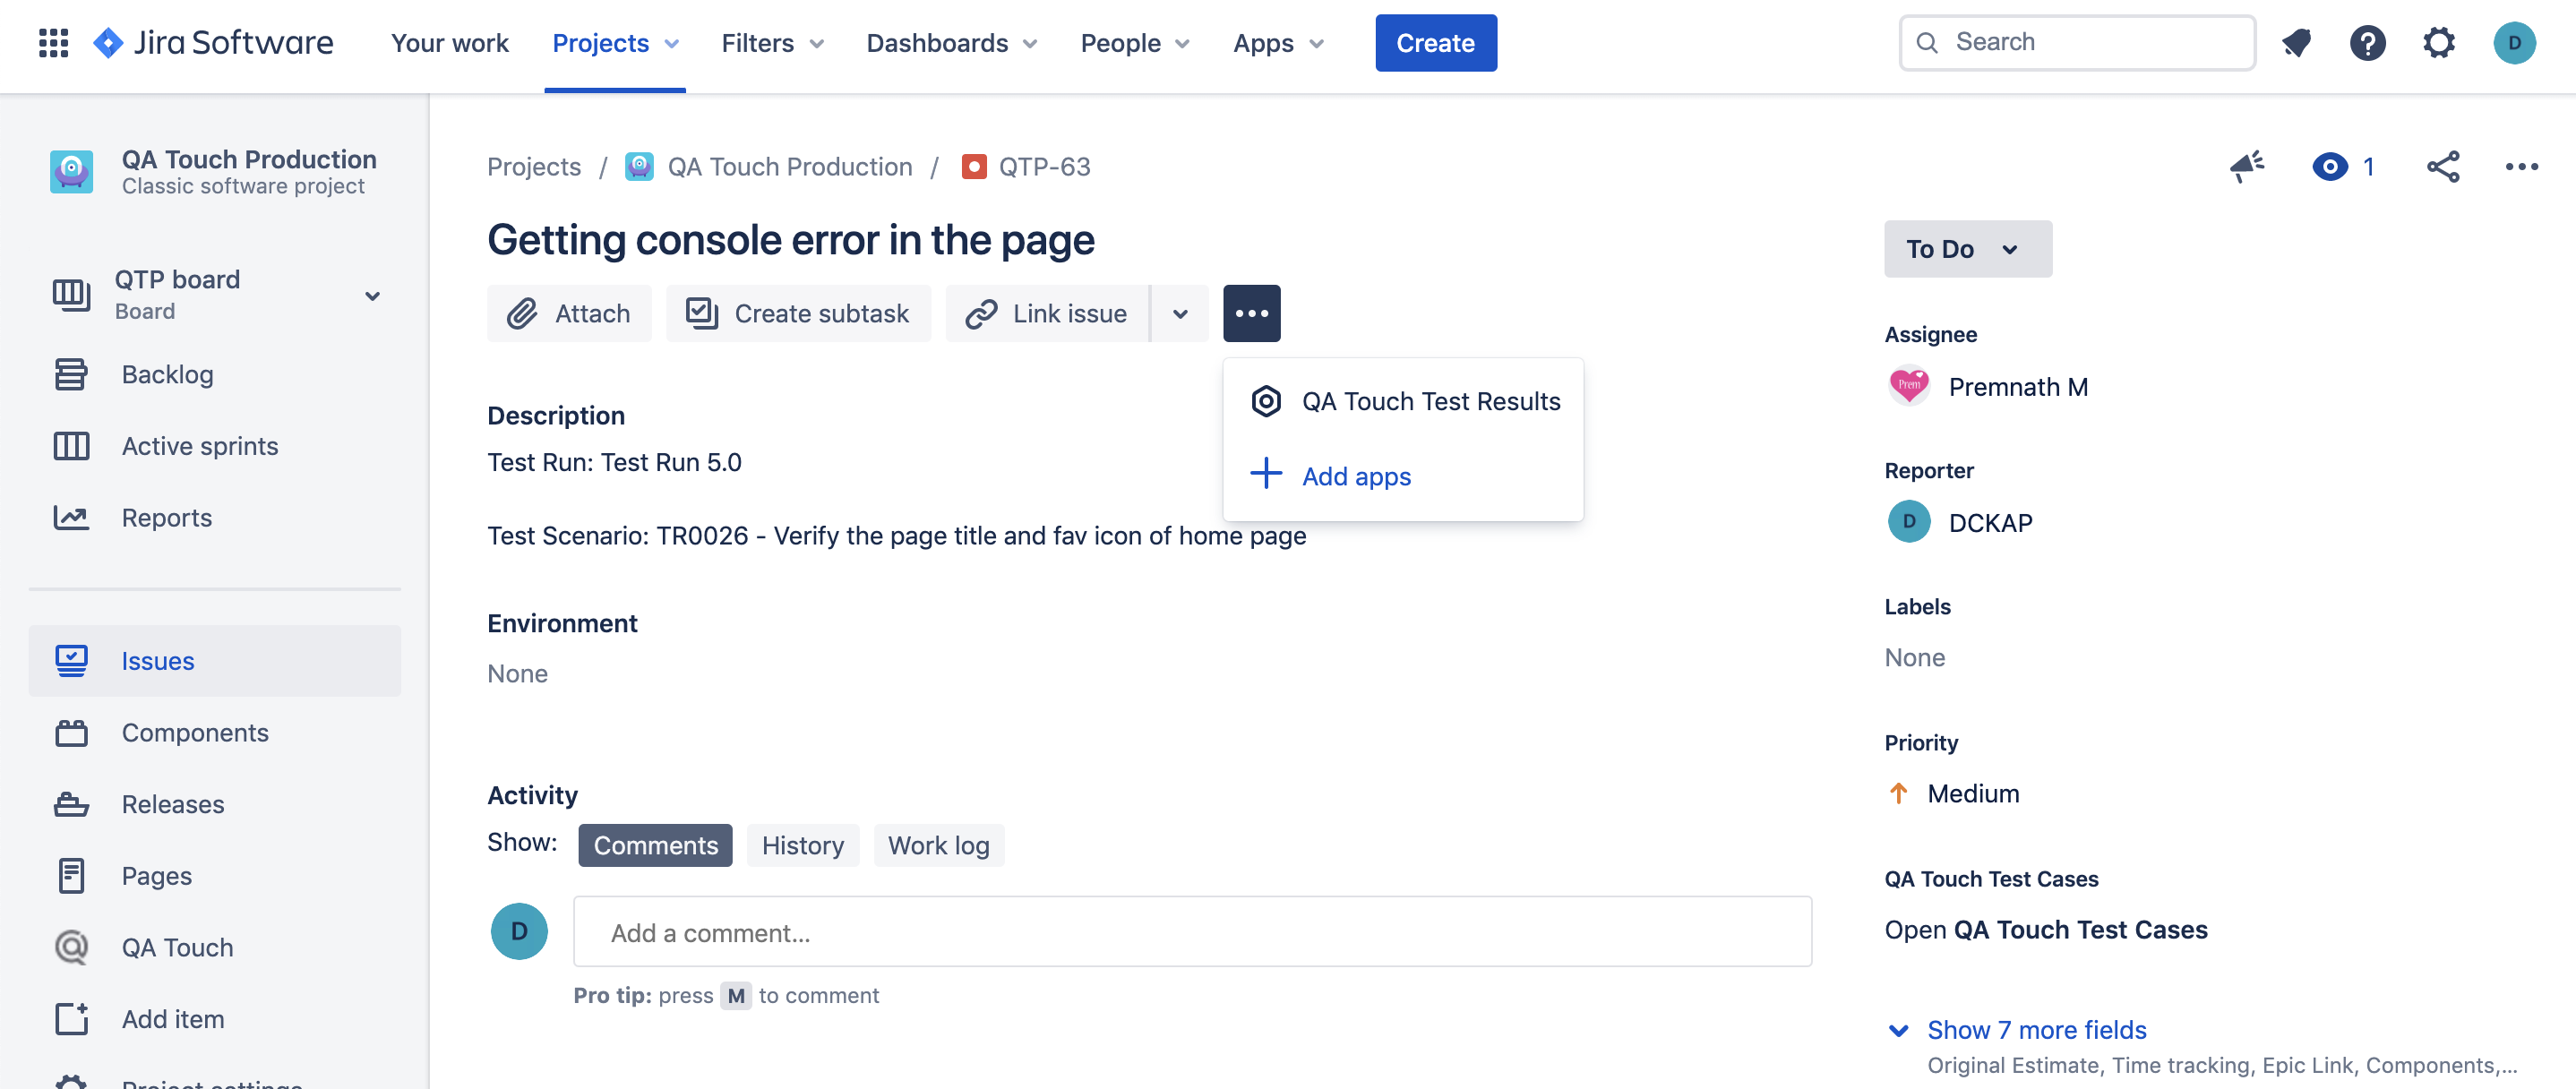
Next we are going to see how the created Jira ticket appears with QA Touch test results in Jira.
- In Jira access the newly created ticket created from QA Touch.
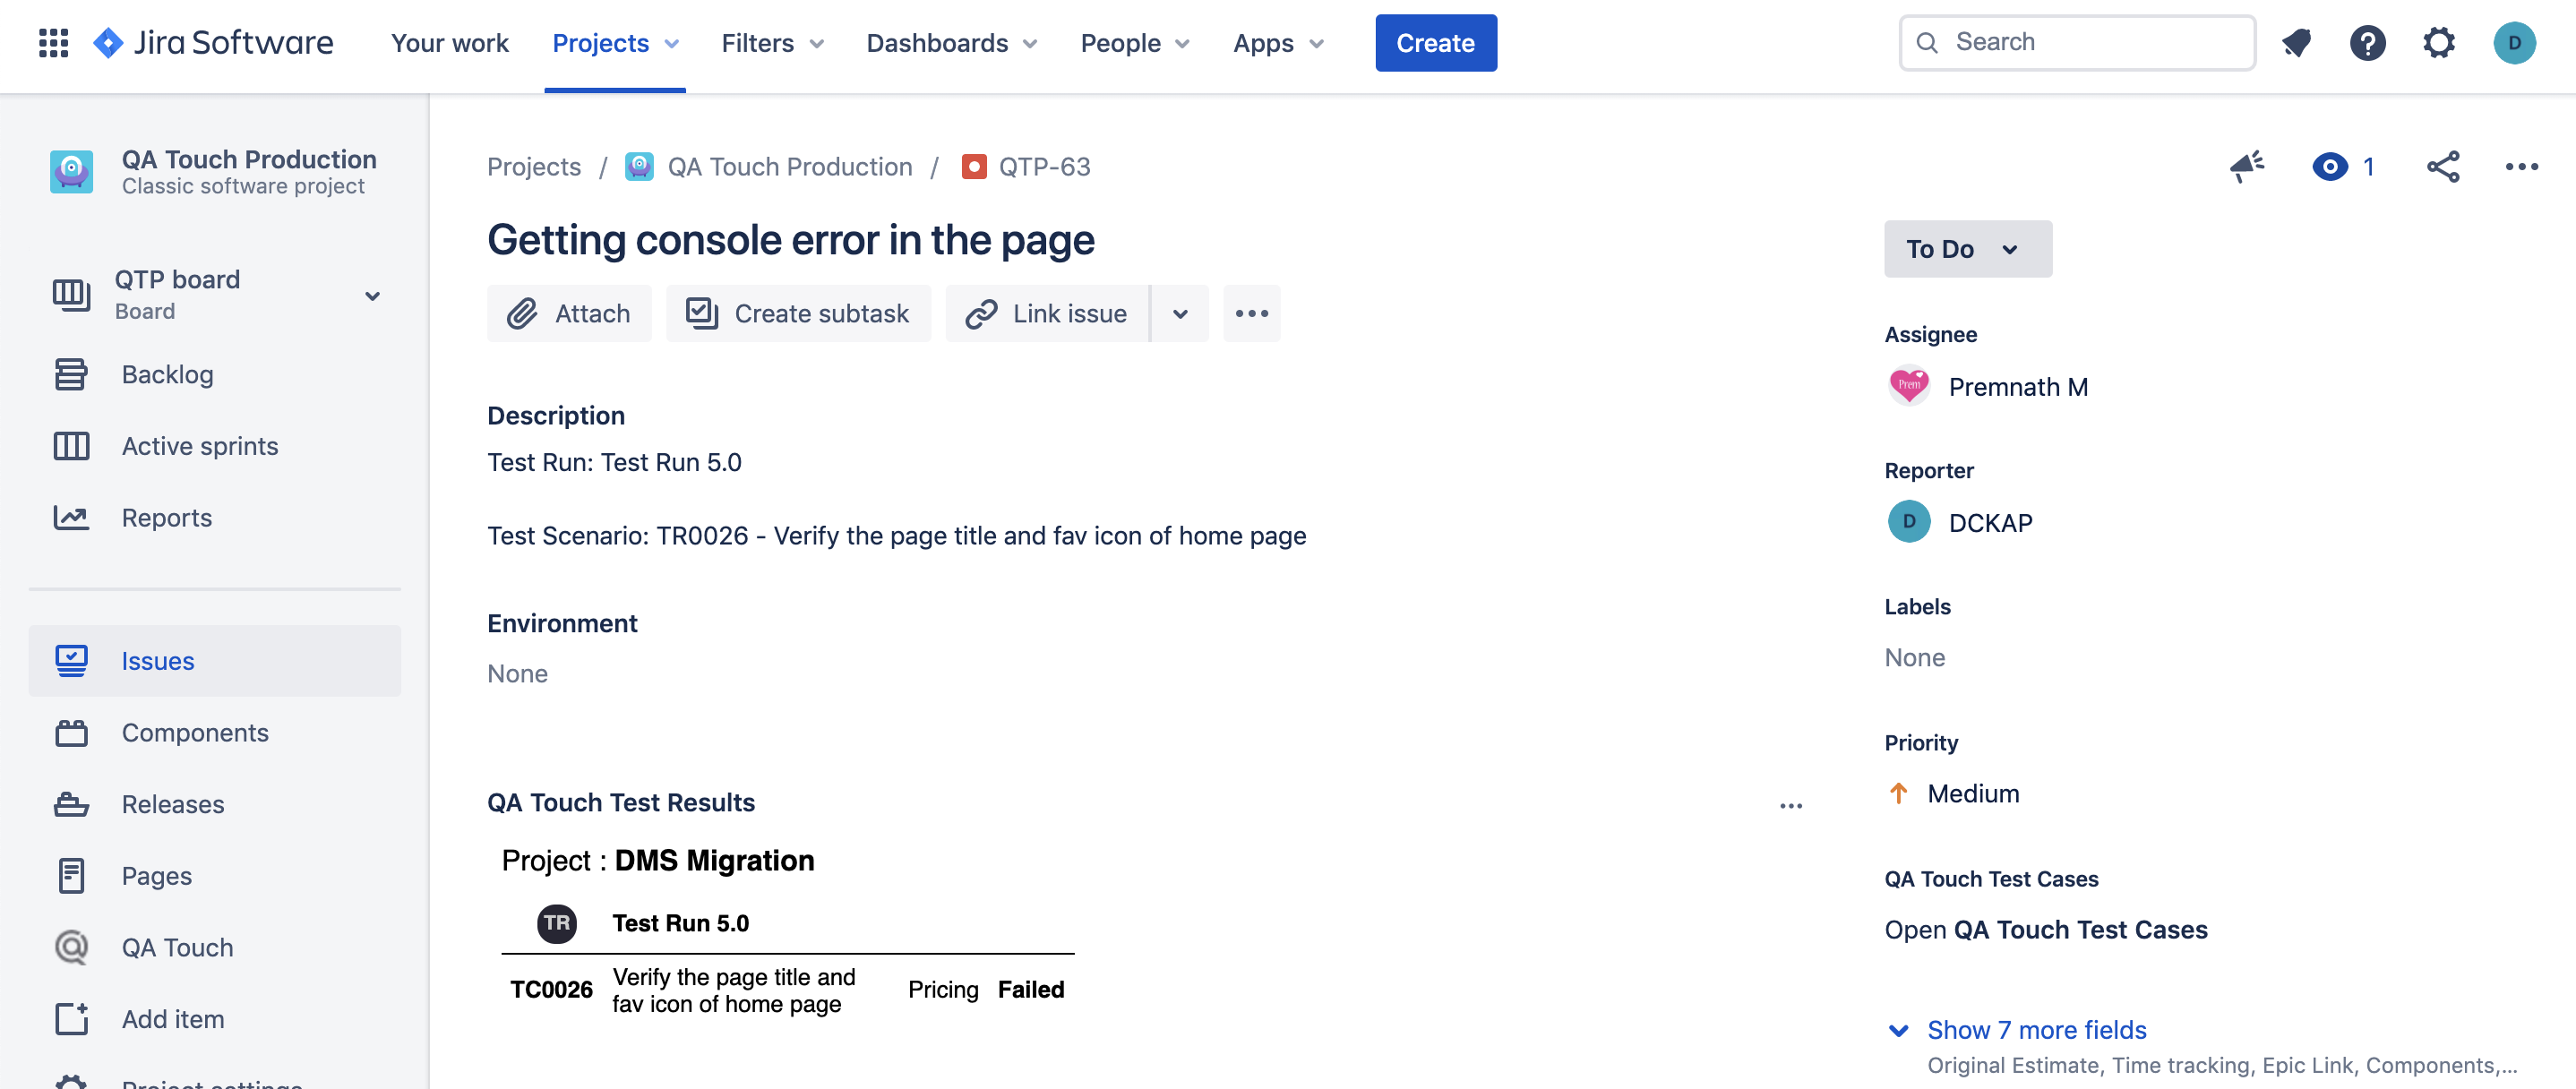
- The description and the details are appearing. Click the 3 dots and click QA Touch Test Results.
The test results will appear in the Jira as below.
We have introduced another way to post Jira tickets from QA Touch without creating a test run. Make sure you configure the Jira cloud API and other details before proceeding to this.
Add Jira Cloud Issues Without Test Run
You will be able to post issues from QA Touch to Jira Cloud directly without creating a test run after setting the Administration configuration steps. The project mapping steps are below:
- Click the mapped project’s Issues menu link from the left navigation menu.
- Click Add Issue – Click Add Jira Cloud Issue.
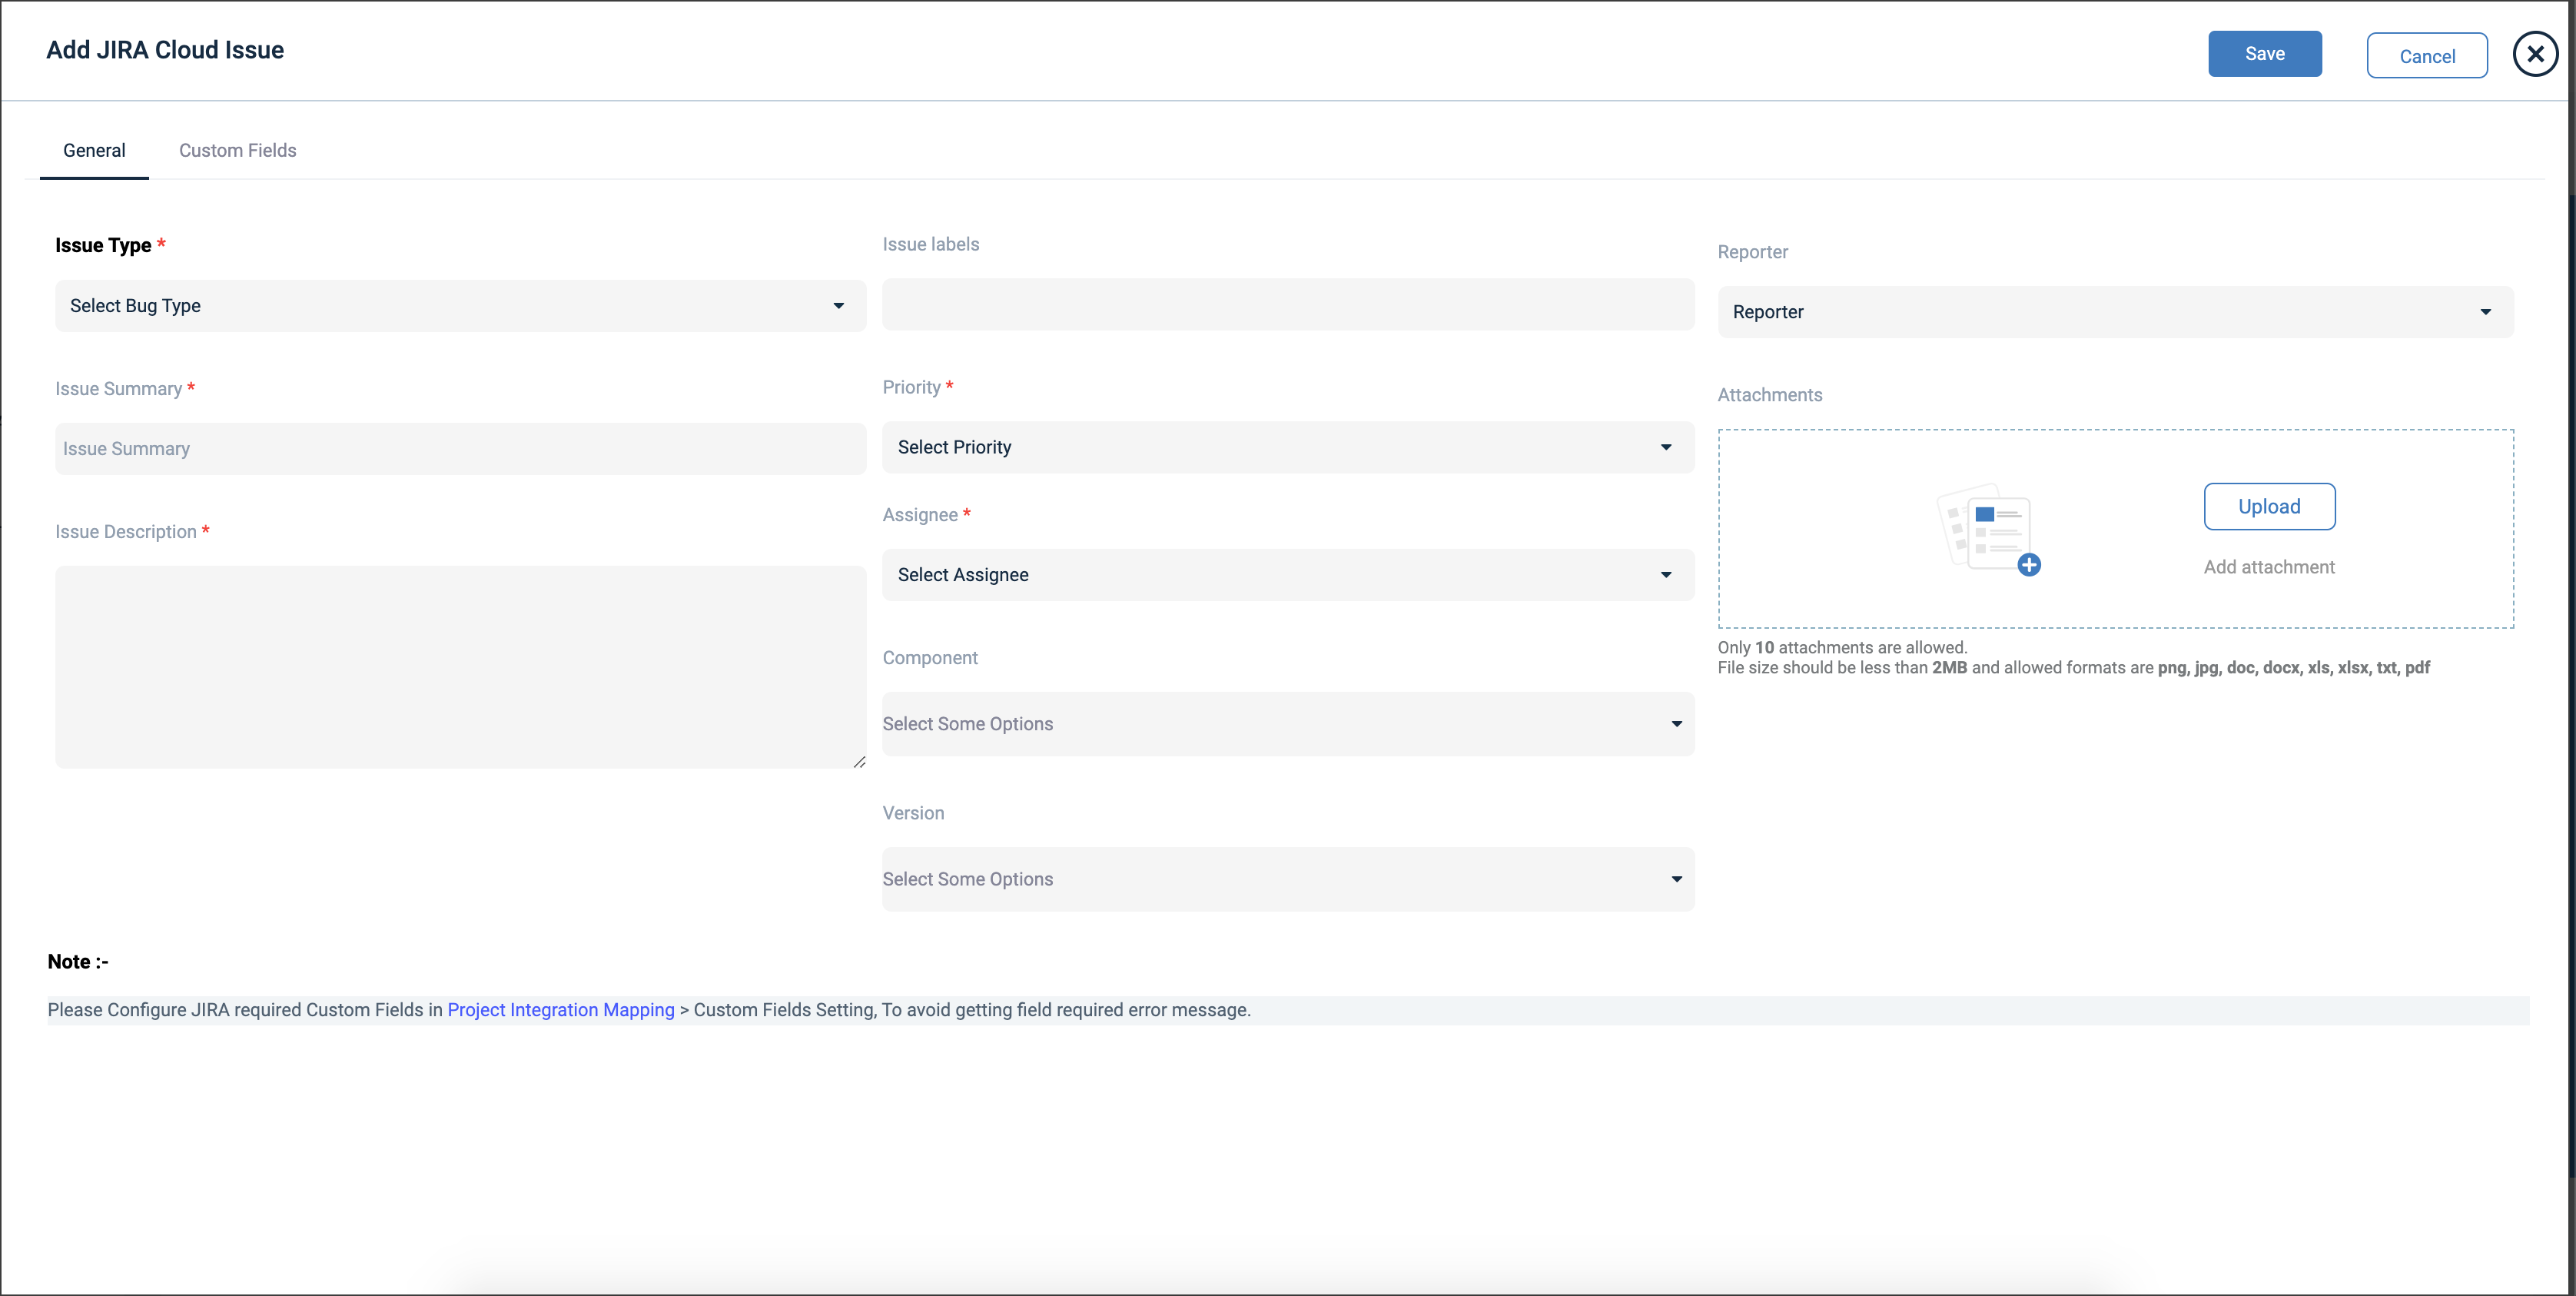
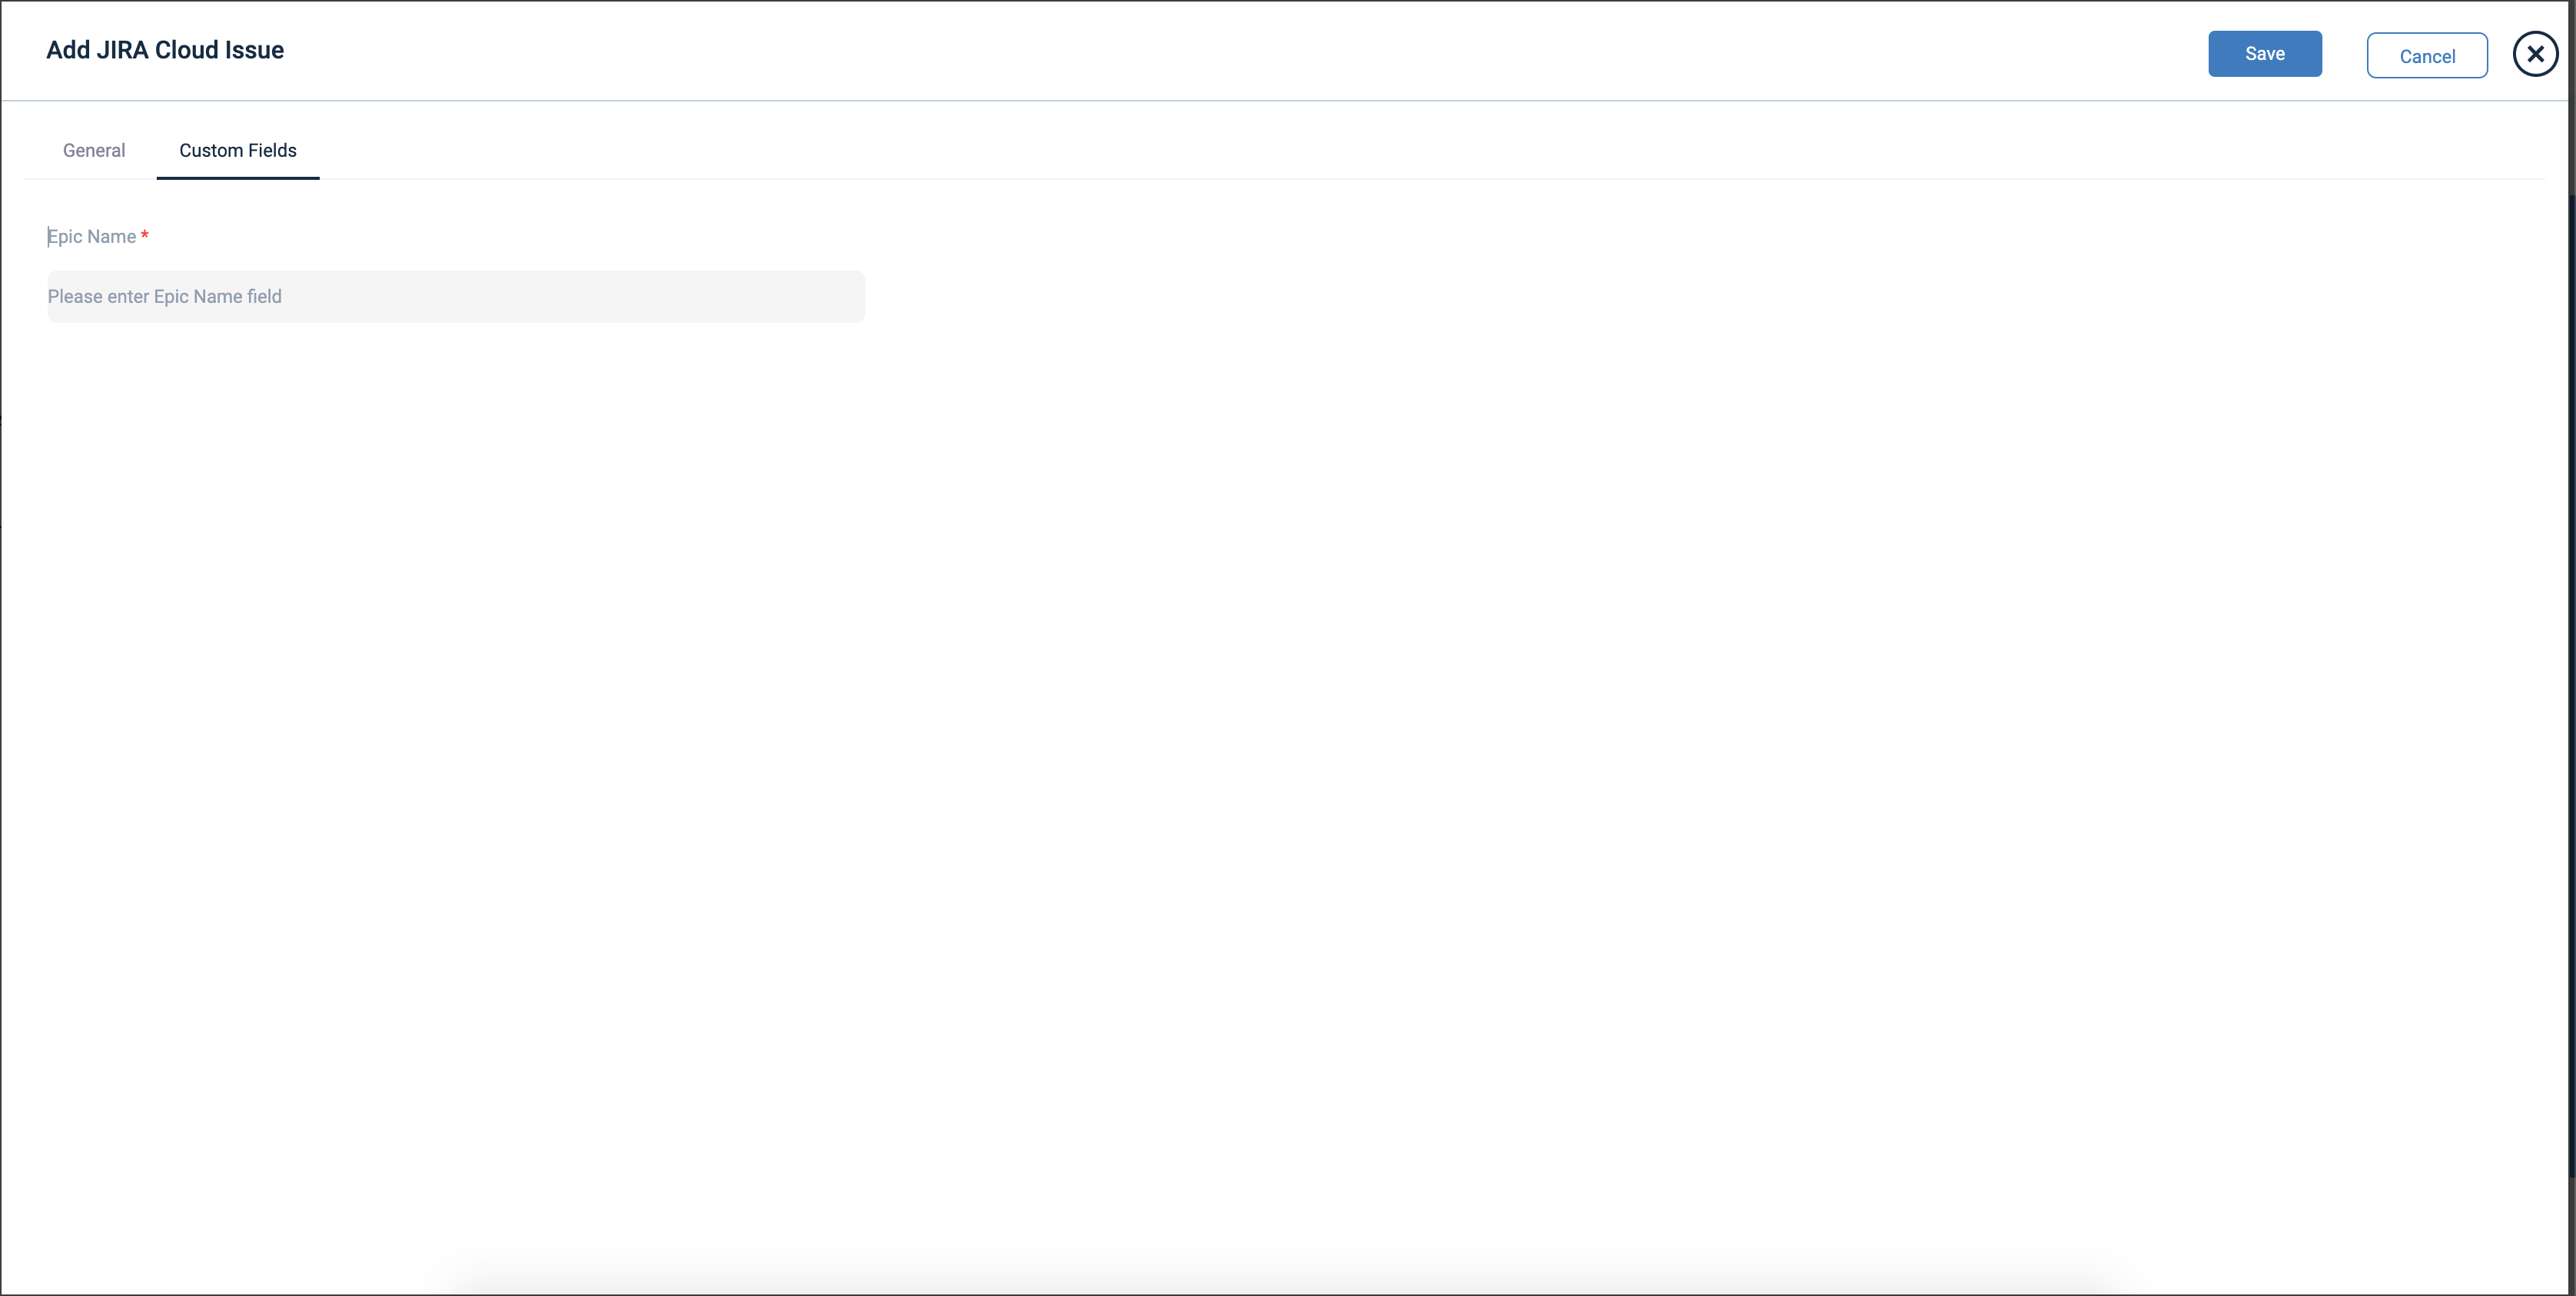
- Enter the details in Add Jira Cloud Issue and click save.
- The issue is posted in your mapped Jira Cloud project now.
- After saving the issue click View icon or click view more to see the linked Jira tickets.
- The linked Jira tickets appear like in the below snapshot. By clicking View in Jira, you will be redirected and able to access your tickets in Jira.
Jira Cloud Summary Report
- You will be able to generate reports for the Jira tickets posted from QA Touch’s Test run or without test run. The steps are below:
- Click the mapped project’s Reports menu link from the left navigation menu.
- Click Integration Reports.
- Click Add Report.
Select All Issues option and click Save.
This is to generate the report which will fetch both the Jira tickets mapped with test run as well as not mapped in test runs.
Click Integration Reports. You can download the report in csv, .pdf formats. Also you can share the report in email.

The sample output with the All issues option will look like this.
When you select Include Issues Mapped with Test Run option, you can select the test runs and click save.
- Click Integration Reports. You can download the report in csv, .pdf formats. Also you can share the report in email.
- The sample report output with the option Include Issues Mapped with Test Run.
Now, you have learned to know how to set up QA Touch and Jira Cloud and how to leverage its complete capabilities.
QA Touch is Two way Integrated with JIRA.
The Integration is continuously and automatically synced up between QA Touch and JIRA, allowing to manage the Issues and requirements with Ease.
How to Sync JIRA Cloud Custom Fields in QA Touch?
JIRA Custom Fields
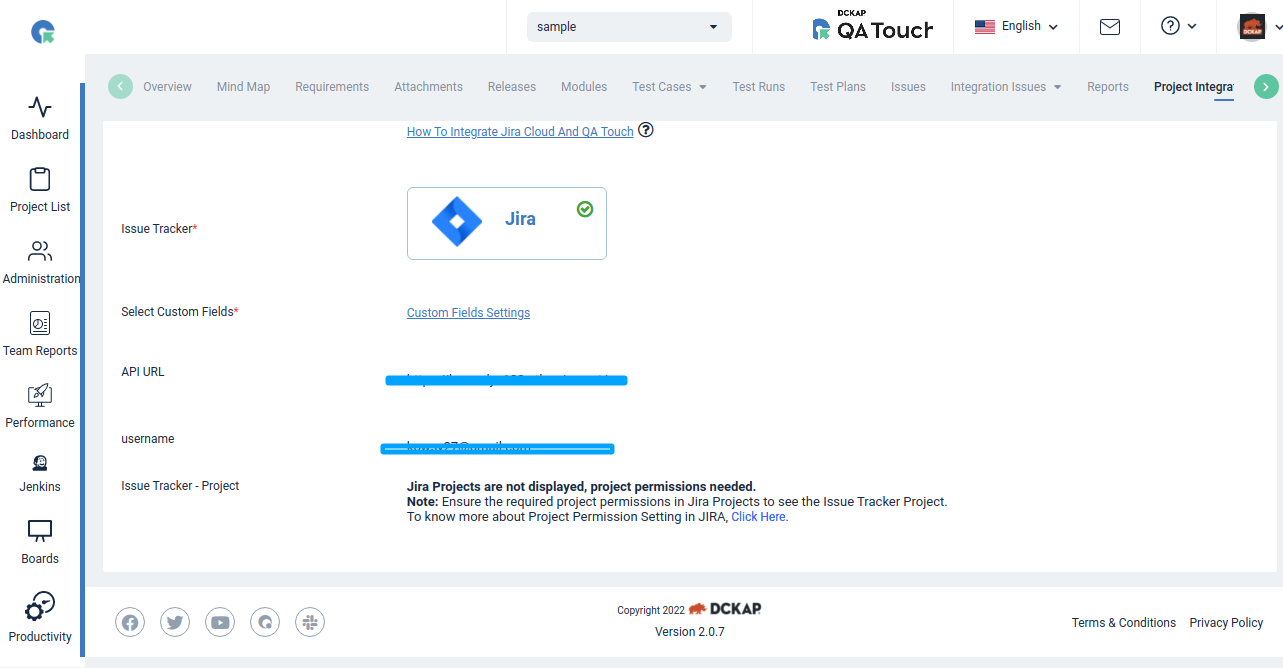
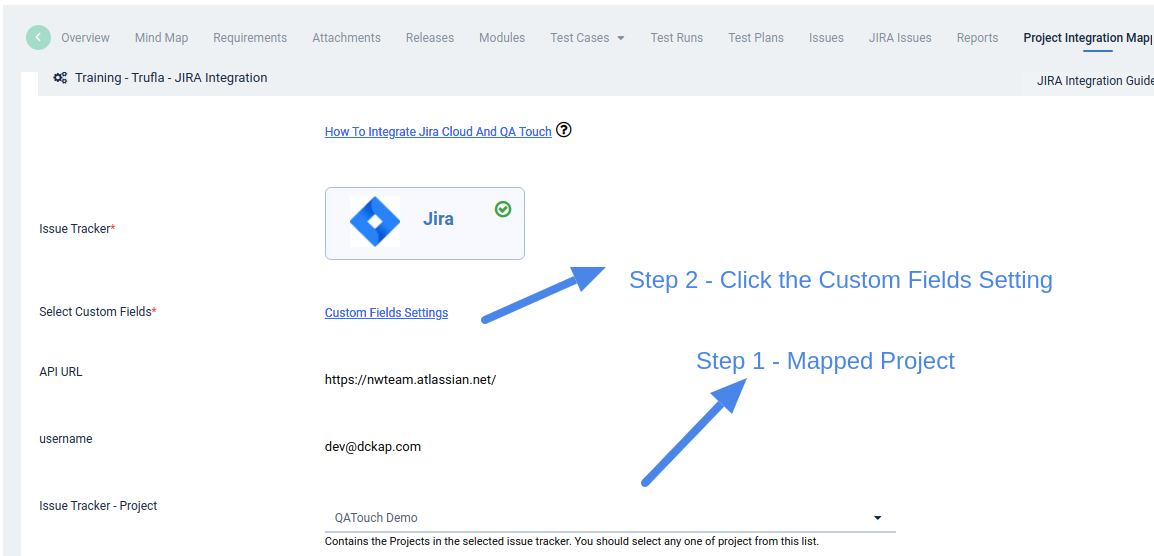
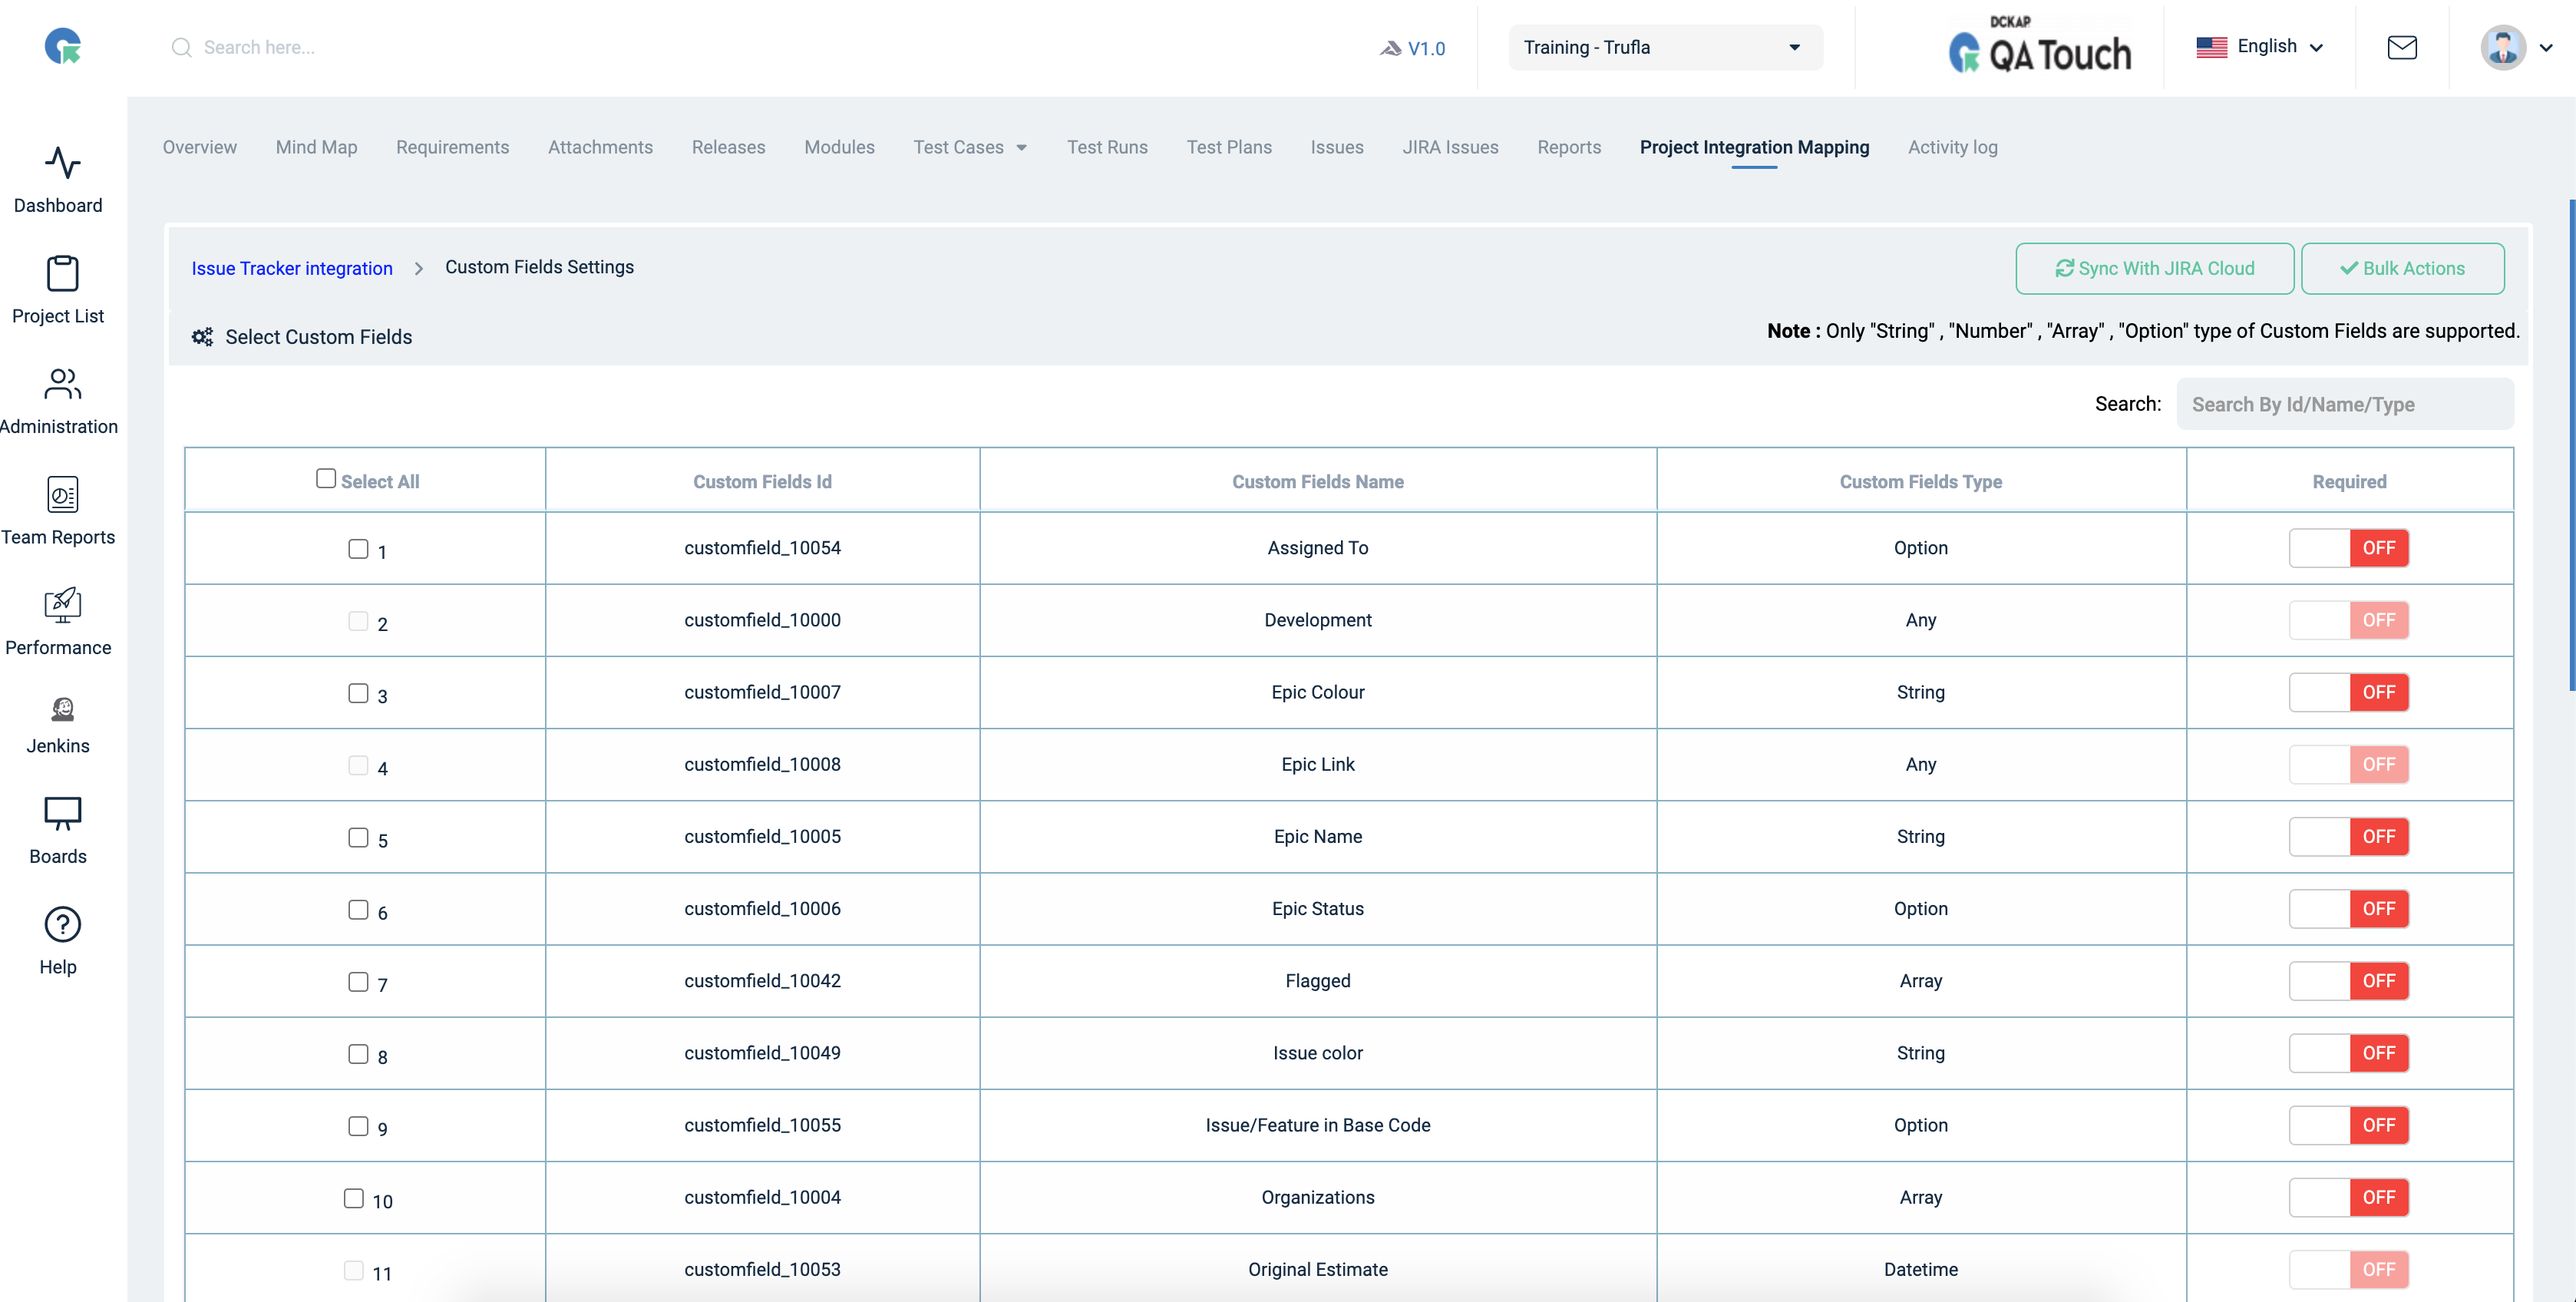
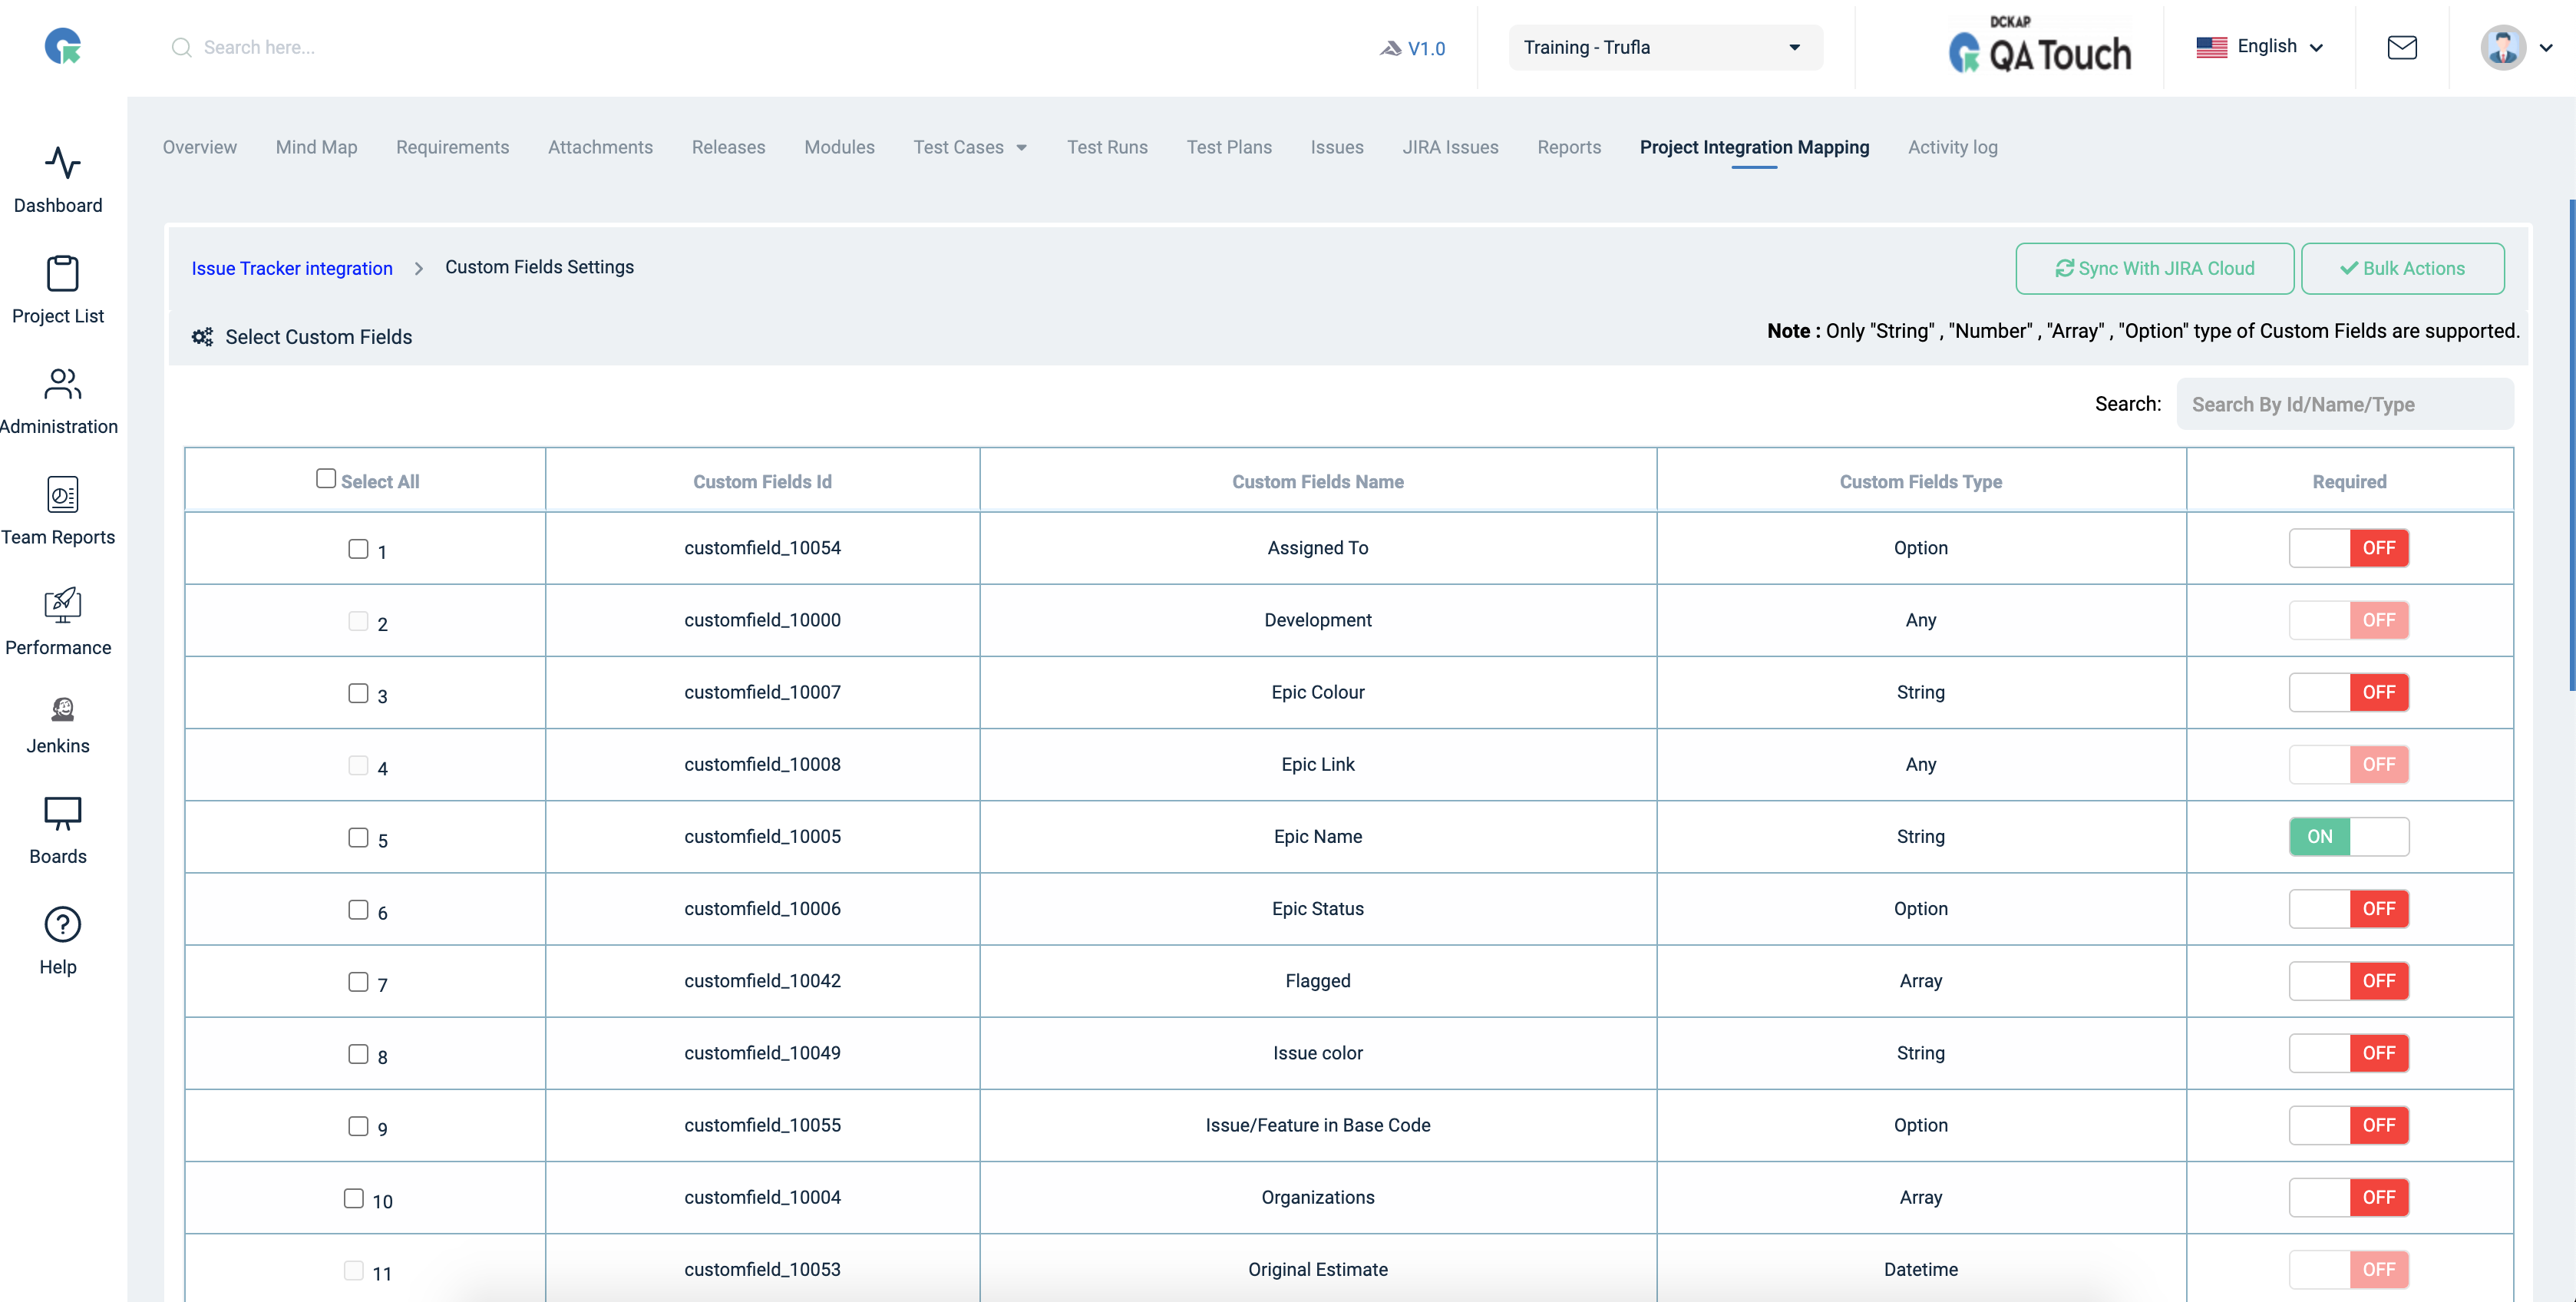
It is a paid feature You can sync your JIRA Cloud Custom fields to QA Touch Please see the screenshot below Navigation Link : Project Menu -> Project Integration Mapping -> Custom Fields Settings
We have listed all the JIRA Custom fields, you can select and enable the field with switch on. Note : Only “String” , “Number” , “Array” , “Option” type of Custom Fields are supported
Enable
Mapped JIRA Fields in the QA Touch Issue Note : Every project need to mapped JIRA Custom fields - Mandatory