Add, Import, Export and Approve Requirements | QA Touch
How to Add, Import, Export, and Approve Requirements in QA Touch
QA Touch lets you manage project requirements from the Requirements page of each project. You organize requirements under Requirement Types, add them one at a time or import them in bulk from a .csv file, and export them in .xls, .xlsx, or .csv format. Each requirement can be Approved, Rejected, or sent for Re-Verify with comments, and you can view the approval history or bulk update the approval status of multiple requirements.

At a Glance: Requirements Management in QA Touch
| Where | Project List → project → Requirements |
| Structure | Requirements are created under Requirement Types, which support hierarchies |
| Add | Title, Description, and Files (if any) |
| Bulk import | .csv file with Requirement Type, Requirement Title, and Description |
| Export | .xls, .xlsx, or .csv; Export (selected Requirement Type) or Export All |
| Approval workflow | Approve, Reject, or Re-Verify with comments and user tagging |
| Tracking | Approval history per requirement and bulk approval status updates |
How to Add Requirements to a Project in QA Touch
To add a requirement, open your project’s Requirements page, create a Requirement Type, then click Add in the Requirement Type menu and fill in the requirement’s title, description, and files.
-
Login to QA Touch
-
On the left panel, Click on Project List
-
Click on the project you want to add requirements
-
From the project submenu, click on the Requirements option
-
Click on Add Requirement Type.
-
Fill in the Requirement type and click Save.
-
Click on the Add button in Requirement Type Menu to add a requirement(s).
-
Fill in the Requirement such as:
- Title
- Description
- Files (if any)
Then click Save.
-
The requirement has now been created under the selected project.
How to Import Requirements in Bulk from a CSV File
To import requirements in bulk, click Import on the Requirements page, download the sample .csv file, fill in the Requirement Type, Requirement Title, and Description, and upload the file to QA Touch.
In the Requirements page,
- Click on the Import button in the right
- Download sample Requirements in .csv format
- In the .csv file, fill in the following, then save it:
- Requirement Type
- Requirement Title
- Description
- Upload the file in QA Touch.
- Now You can also import the Requirement Types with hierarchies from the import file. Simply use greater-than symbol (>) in the first column as a separator.
Example : Requirement Type > Sub-Requirement Type 1 > Sub-Requirement Type 2
All the requirements in the .csv file will appear in your QA Touch Requirements page.
How to Export Requirements from QA Touch
To export project requirements, click Export on the right end of the Requirements page and choose .xls, .xlsx, or .csv format. You can export a selected Requirement Type or all requirements in the project.
To export Project Requirements,
- Click on the Export button in the right end of the requirements page
- You can export in any one of the following formats:
- .xls
- .xlsx
- .csv
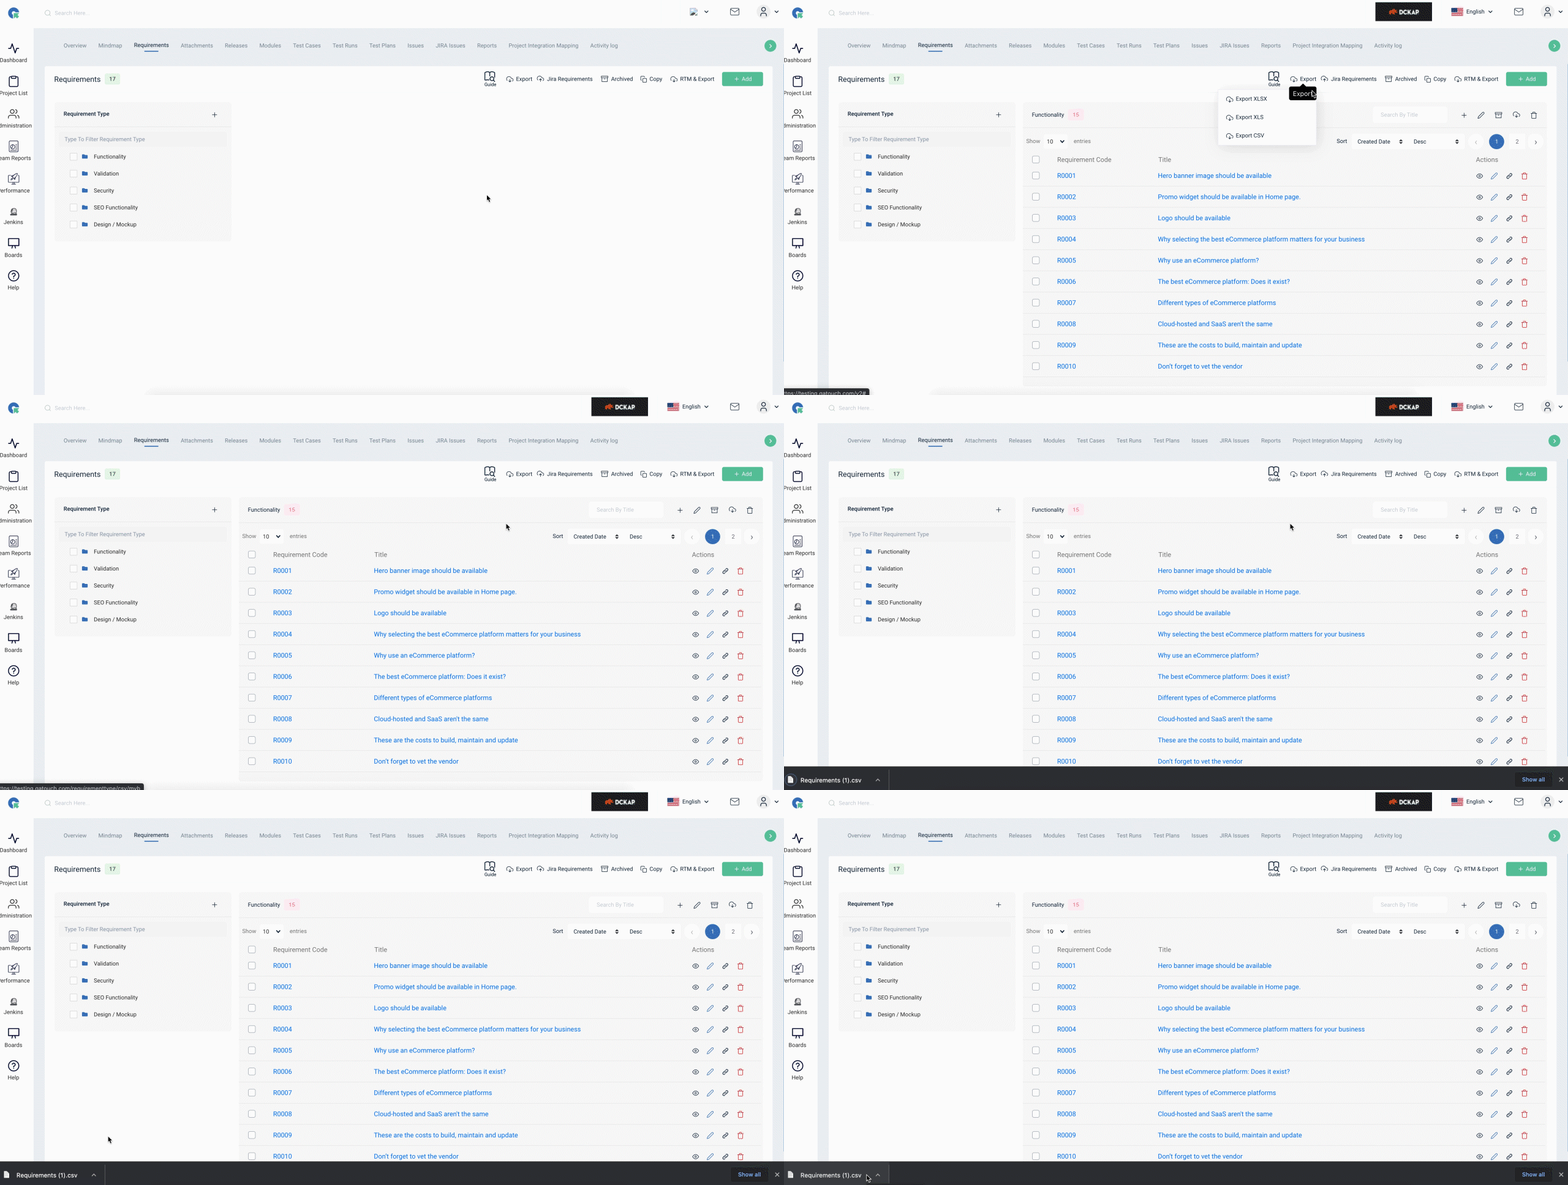
Export a Requirement Type or Export All Requirements
You can export either all requirements or a specific requirement type.
Click on the right of Traceability matrix and select either:
- Export
- Export All
If you select Export, it will only export the selected Requirement Type. If you select Export All, it will export all the Requirements in the project.
What Does the Exported Requirements File Contain?
The exported Requirements file will contain:
- Requirement Id
- Document Title (Requirement Type)
- Title (Requirement title)
- Description (Requirement Description)
- No of linked Test Cases Created Date
- Updated Date
How Does Requirement Approval Work in QA Touch?
The Requirements page allows users to manage requirements efficiently by providing options to Approve, Reject, or Re-Verify them, along with comments for better tracking and communication.
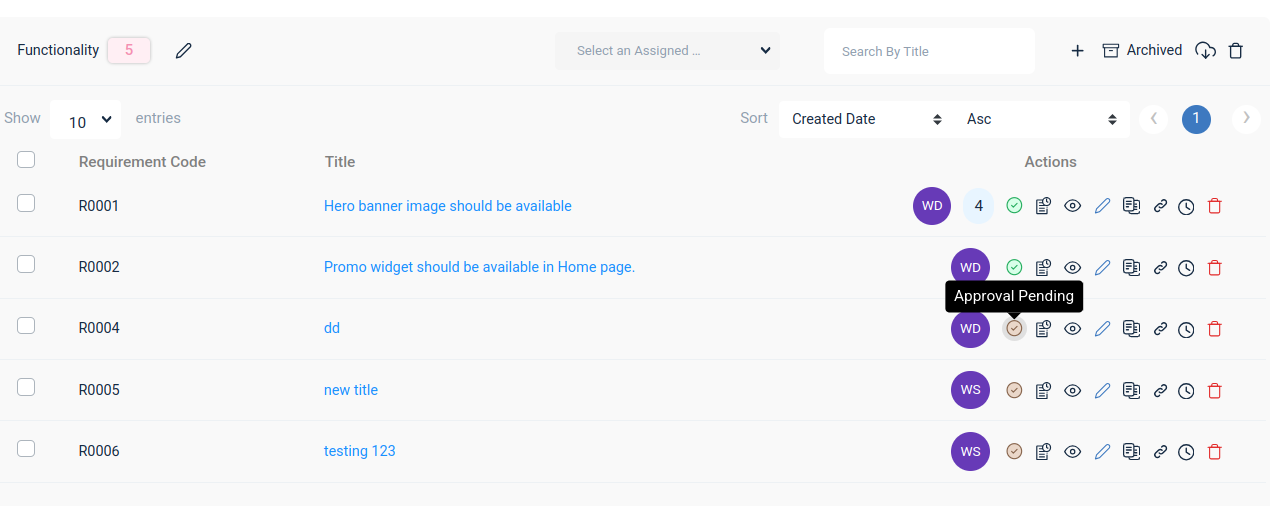
- Approve – Mark the requirement as approved for further processing.
- Reject – Decline the requirement with a reason, ensuring clarity.
- Re-Verify – Send the requirement for re-evaluation before final approval.
How to Approve, Reject, or Re-Verify a Requirement
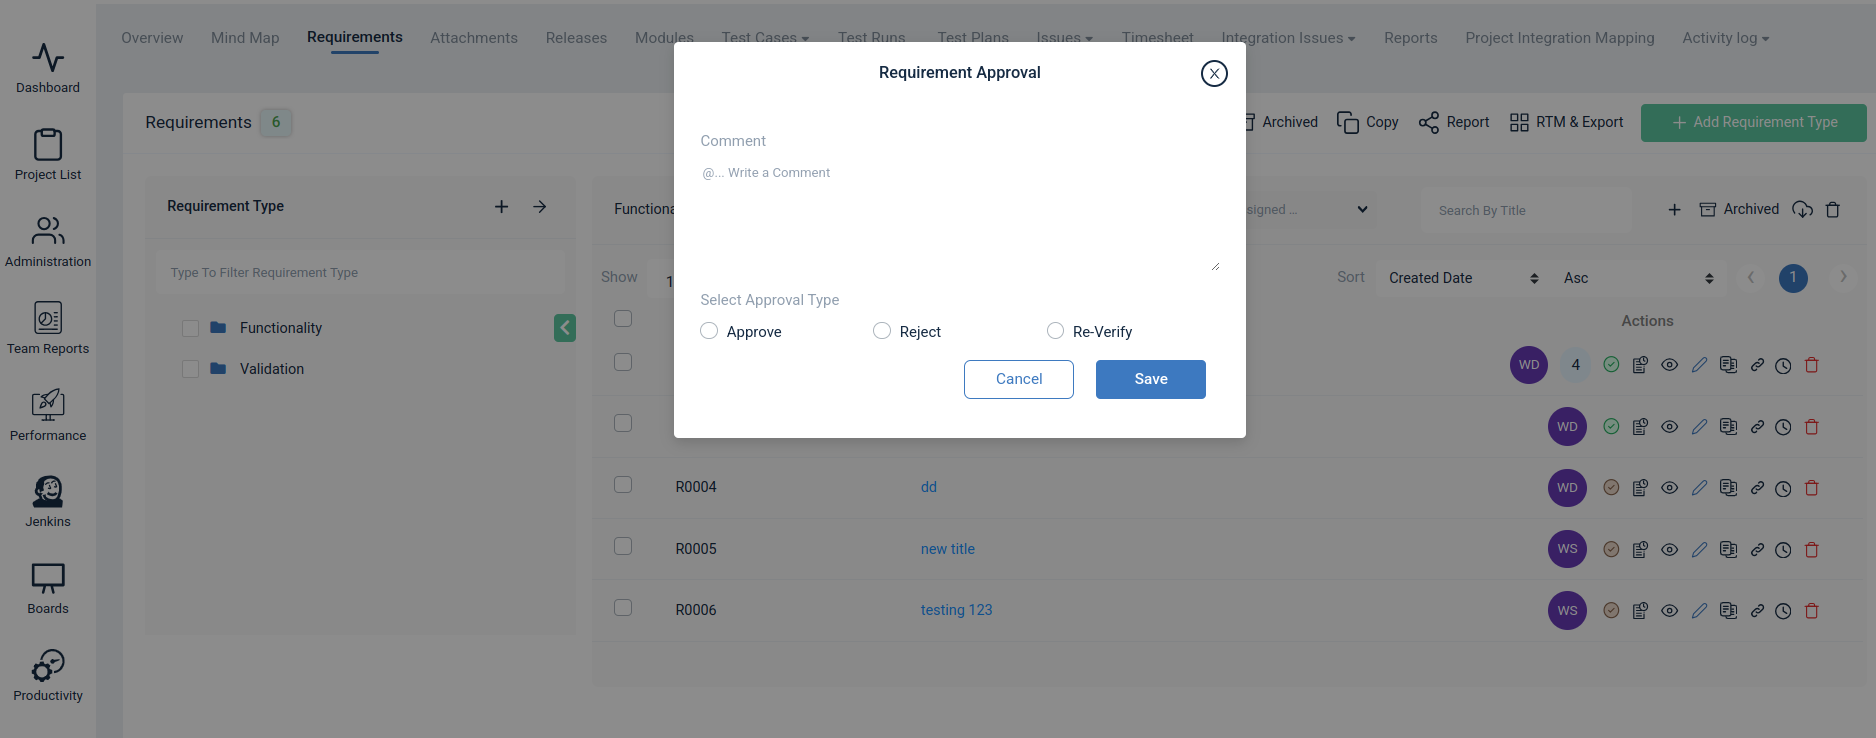
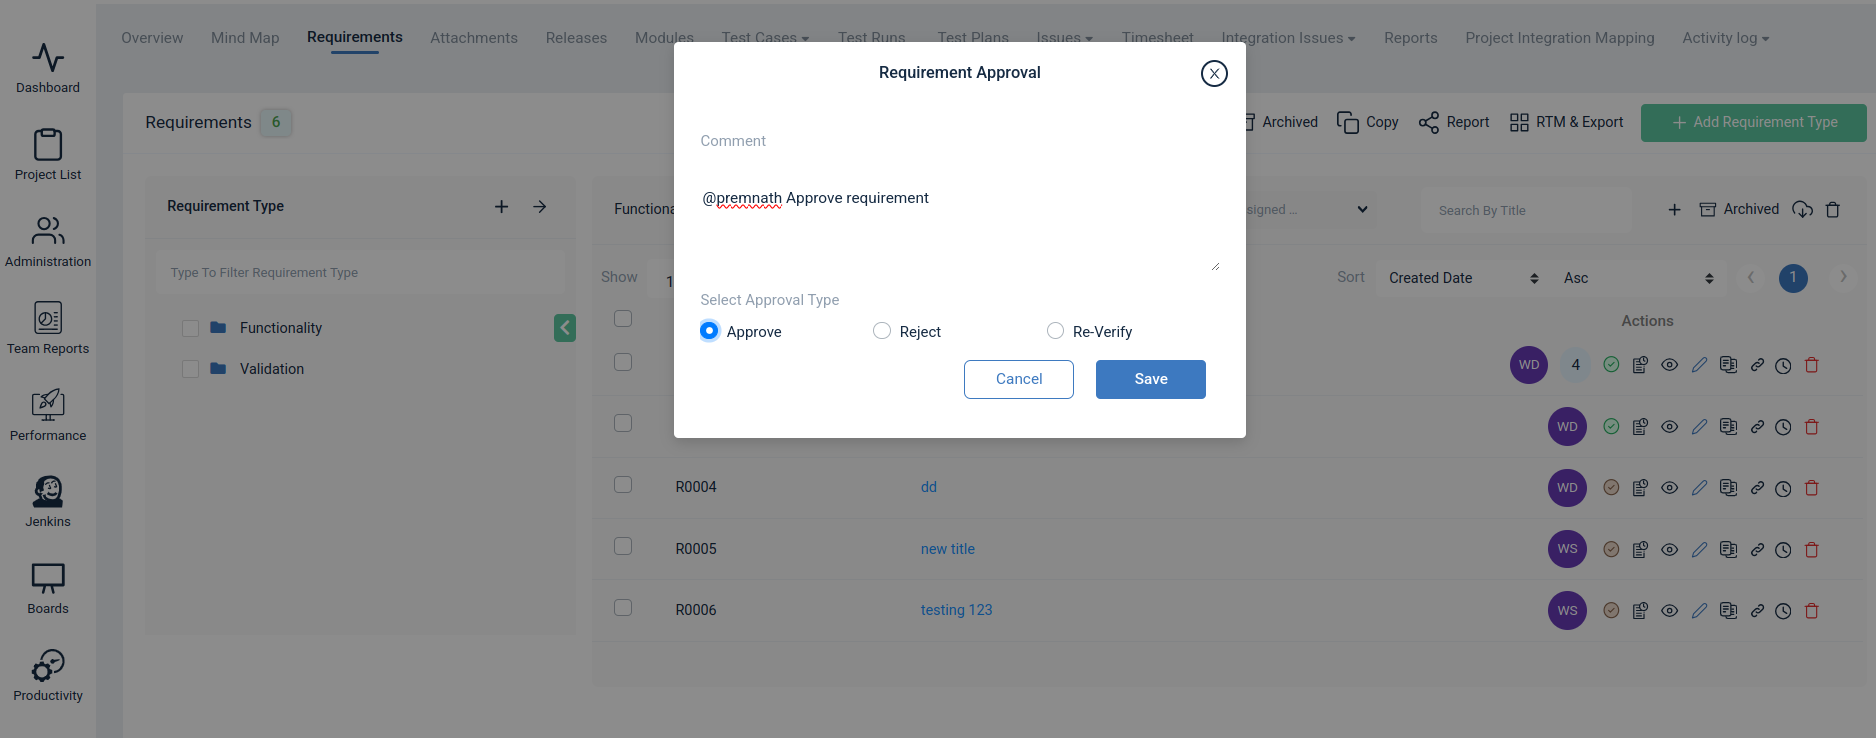
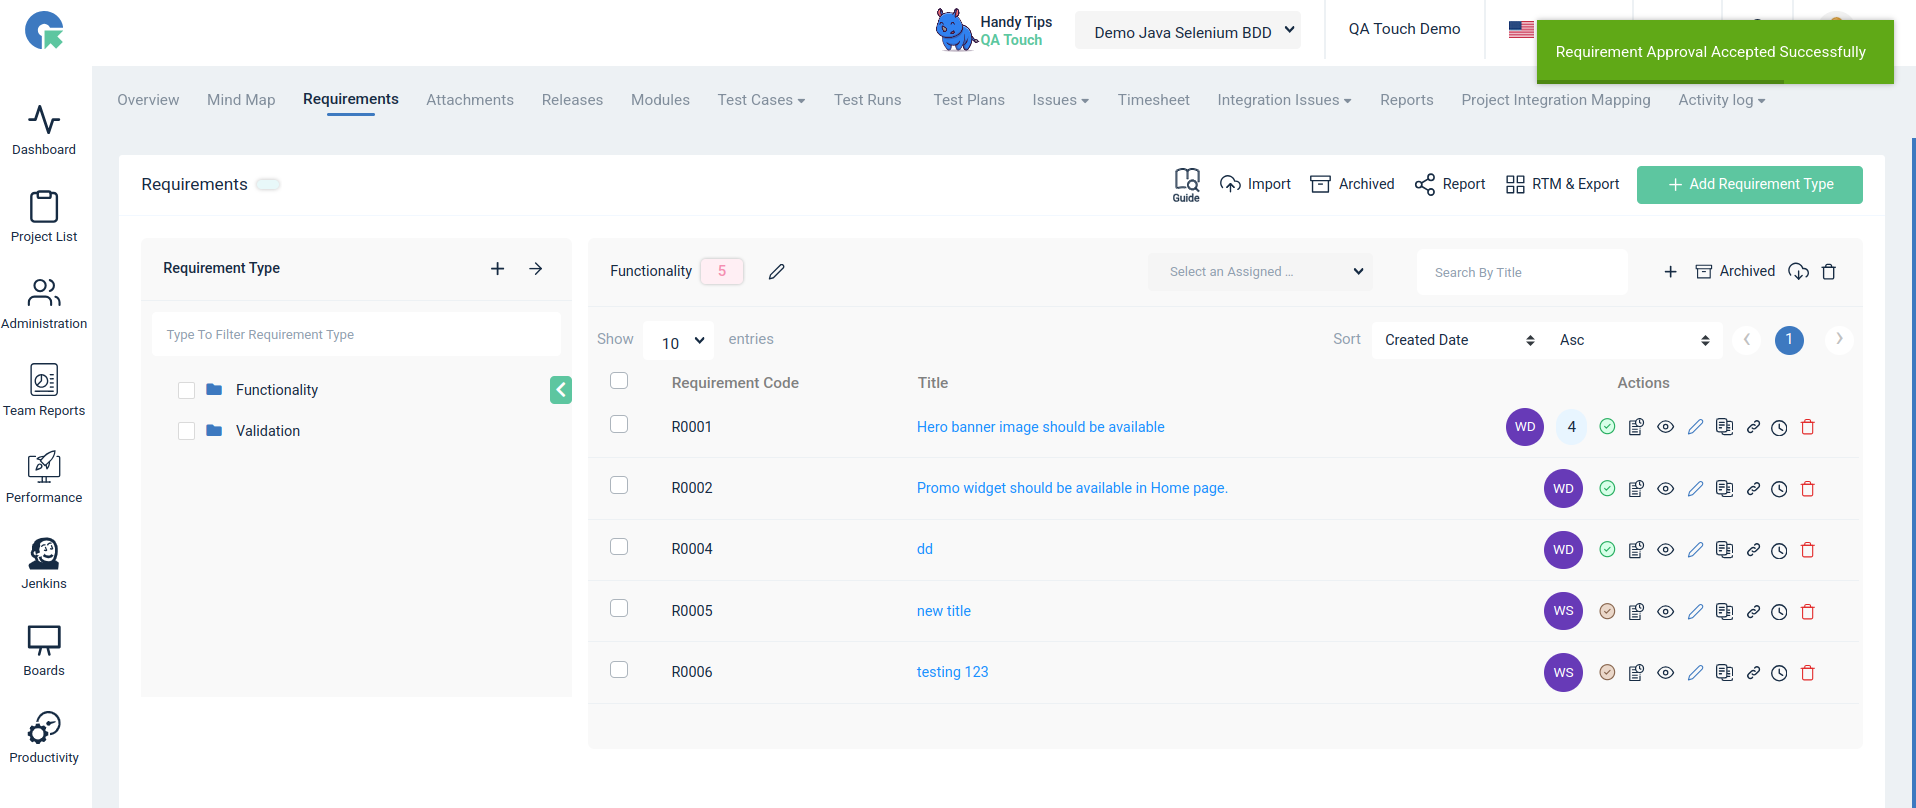
To change a requirement’s approval status, open the approval pending option on the Requirements page, choose the status, tag the assigned user with comments, and click Save.
- Goto Requirement page, click approval pending option
- Approve or reject the requirement by selecting the required option
- To notify the user, tag the assigned user and comments
- Click on save, the status will be updated successfully.
How to View the Status History of Requirement Approval
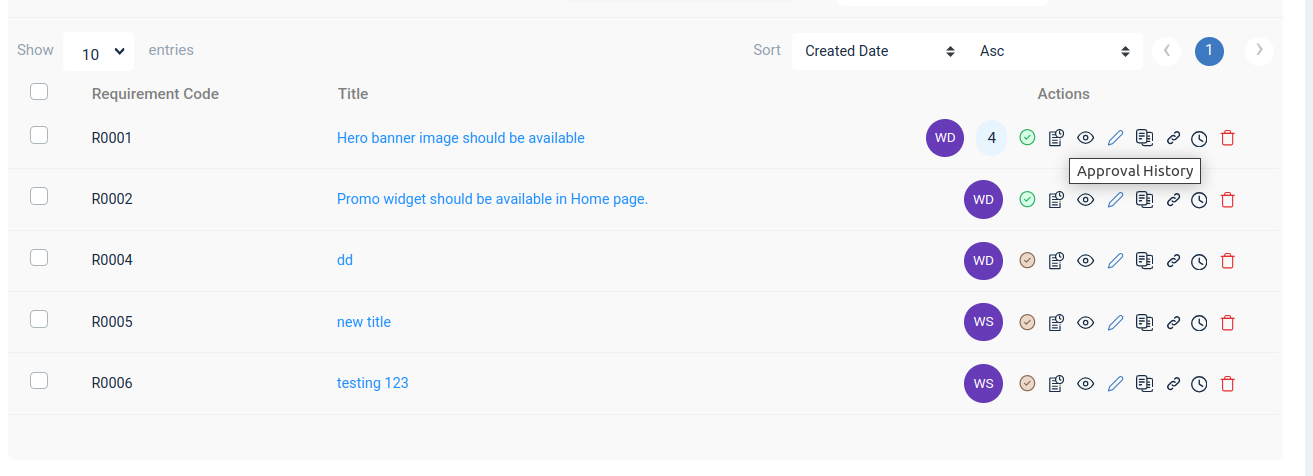
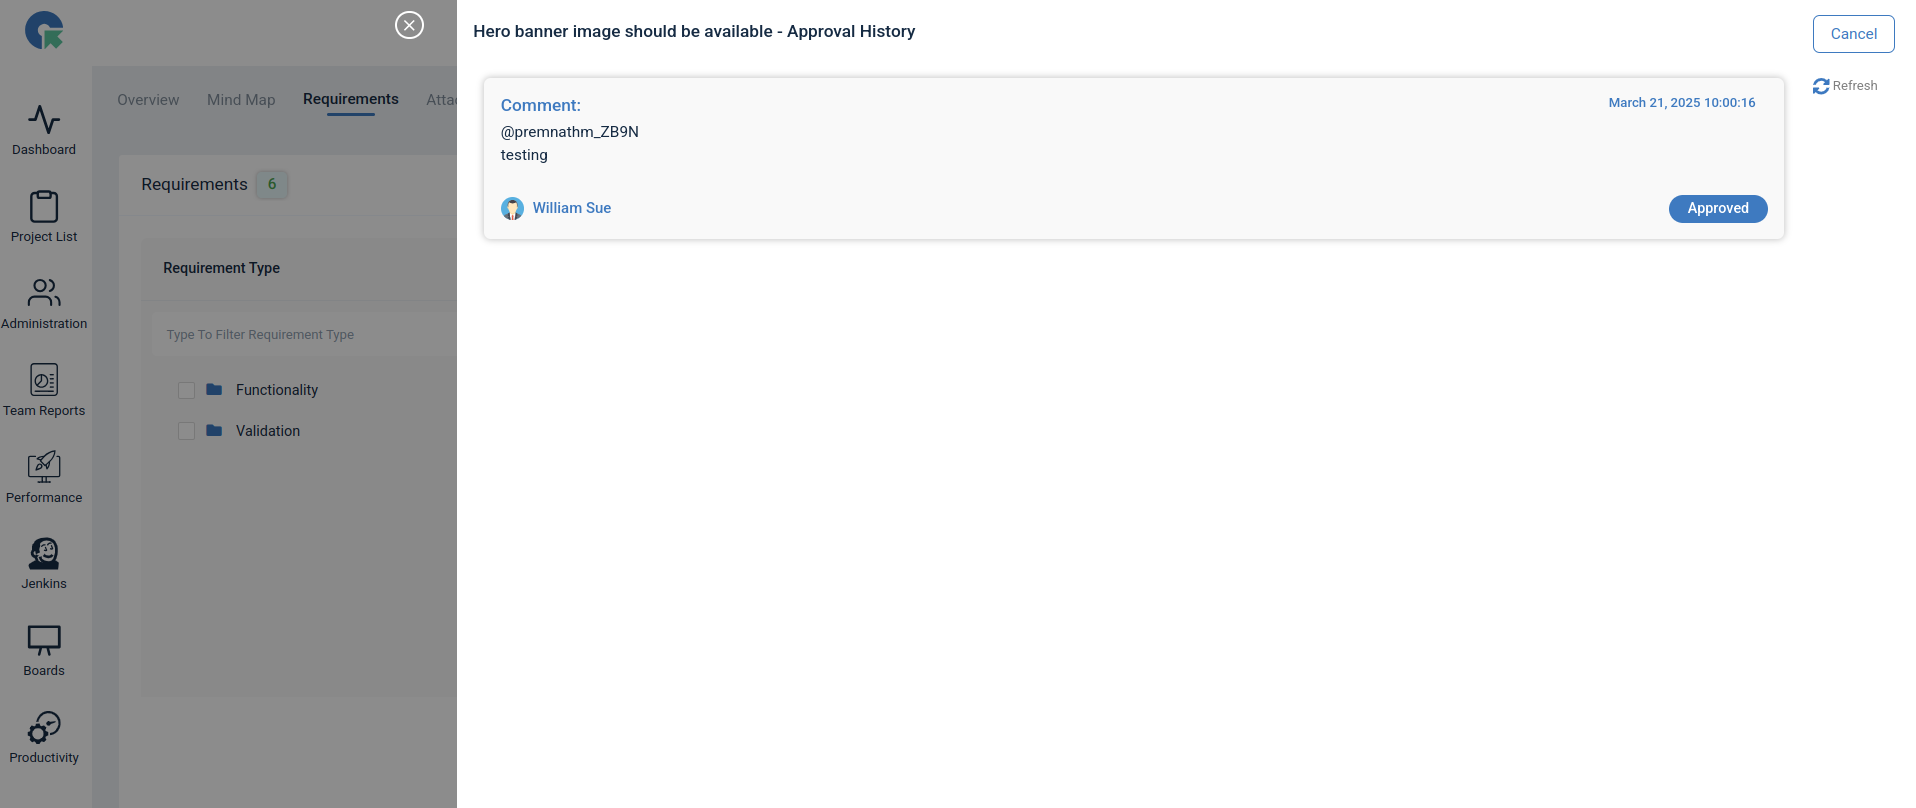
To view the Approved, Rejected, and Re-Verify status of a requirement, click the approval history icon. All the statuses and comments will be displayed.
How to Bulk Update the Requirement Approval Status
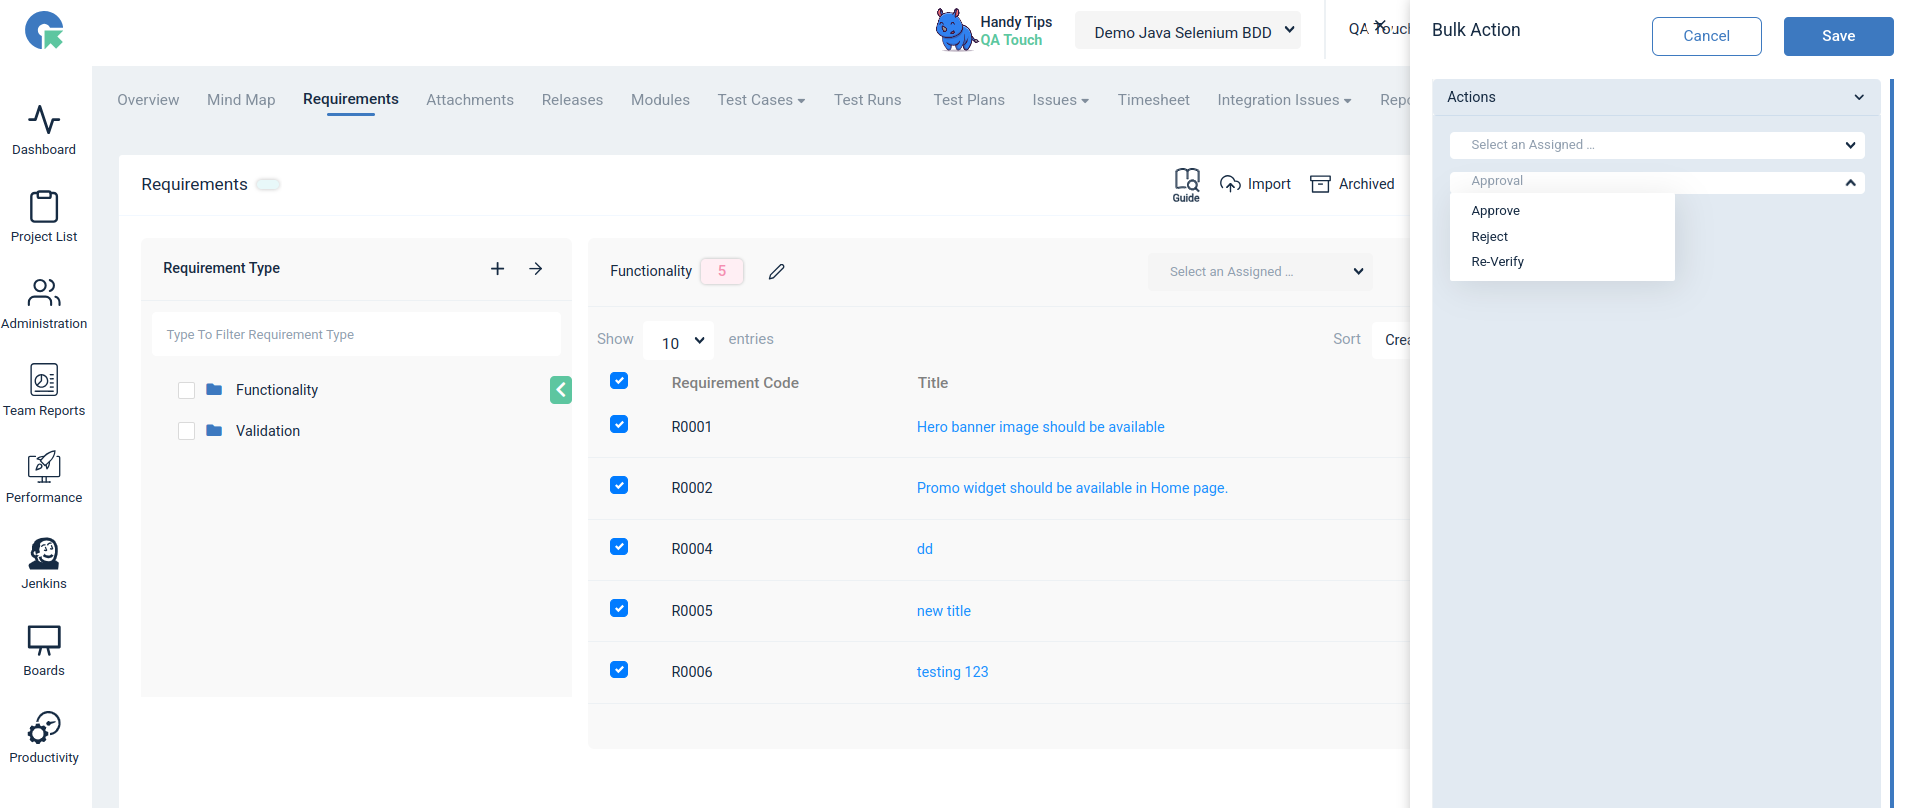
To bulk update the approval status, select the required requirements, select the status (Approved, Rejected, or Re-verify), and click Save. The selected requirements will be updated successfully.
Frequently Asked Questions
How do I add a requirement in QA Touch?
Open your project, go to Requirements, create a Requirement Type, then click Add in the Requirement Type menu, fill in the Title, Description, and Files (if any), and click Save.
Can I import requirements in bulk into QA Touch?
Yes. Click Import on the Requirements page, download the sample .csv file, fill in the Requirement Type, Requirement Title, and Description, and upload the file.
How do I import Requirement Type hierarchies?
Use the greater-than symbol (>) in the first column of the import file as a separator, for example Requirement Type > Sub-Requirement Type 1 > Sub-Requirement Type 2.
Which formats can I export requirements in?
You can export requirements in .xls, .xlsx, or .csv format.
What is the difference between Export and Export All?
Export only exports the selected Requirement Type, while Export All exports all the requirements in the project.
What approval statuses are available for requirements?
Requirements can be Approved, Rejected, or sent for Re-Verify, with comments for tracking and communication.
How do I see the approval history of a requirement?
Click the approval history icon on the requirement to see all statuses and comments.
Can I update the approval status of multiple requirements at once?
Yes. Select the requirements, choose Approved, Rejected, or Re-verify, and click Save to bulk update them.