Sync Selenium Java BDD Automation Test Results with QA Touch
QA Touch API endpoints connect with Selenium Webdriver, which creates robust, browser-based regression automation suites and tests, scales and distributes scripts across many environments, and syncs your automation test results to QA Touch. The steps are below:
Prerequisites:
Selenium and Junit Framework, test automation execution environment. We are going to see how to set up the syncing of test results of the sample automation project, Selenium, Cucumber BDD, and Junit framework to QA Touch. The screenshots and the execution steps mentioned in the article are based on IntelliJ IDE.
- Download the sample project from the Github repository from Selenium Java - BDD - QA Touch Integration Sample and import it into your test automation environment.
- Execute as a Scenario to confirm the test is executed without any errors because of the environment changes.
Sync Test Results from Java Selenium BDD to QA Touch :
Next, we are going to see about setting up the synchronization of the test results process. The steps are below:
-
Login in QA Touch.
-
Click the Project in which you want to sync the test automation results.
-
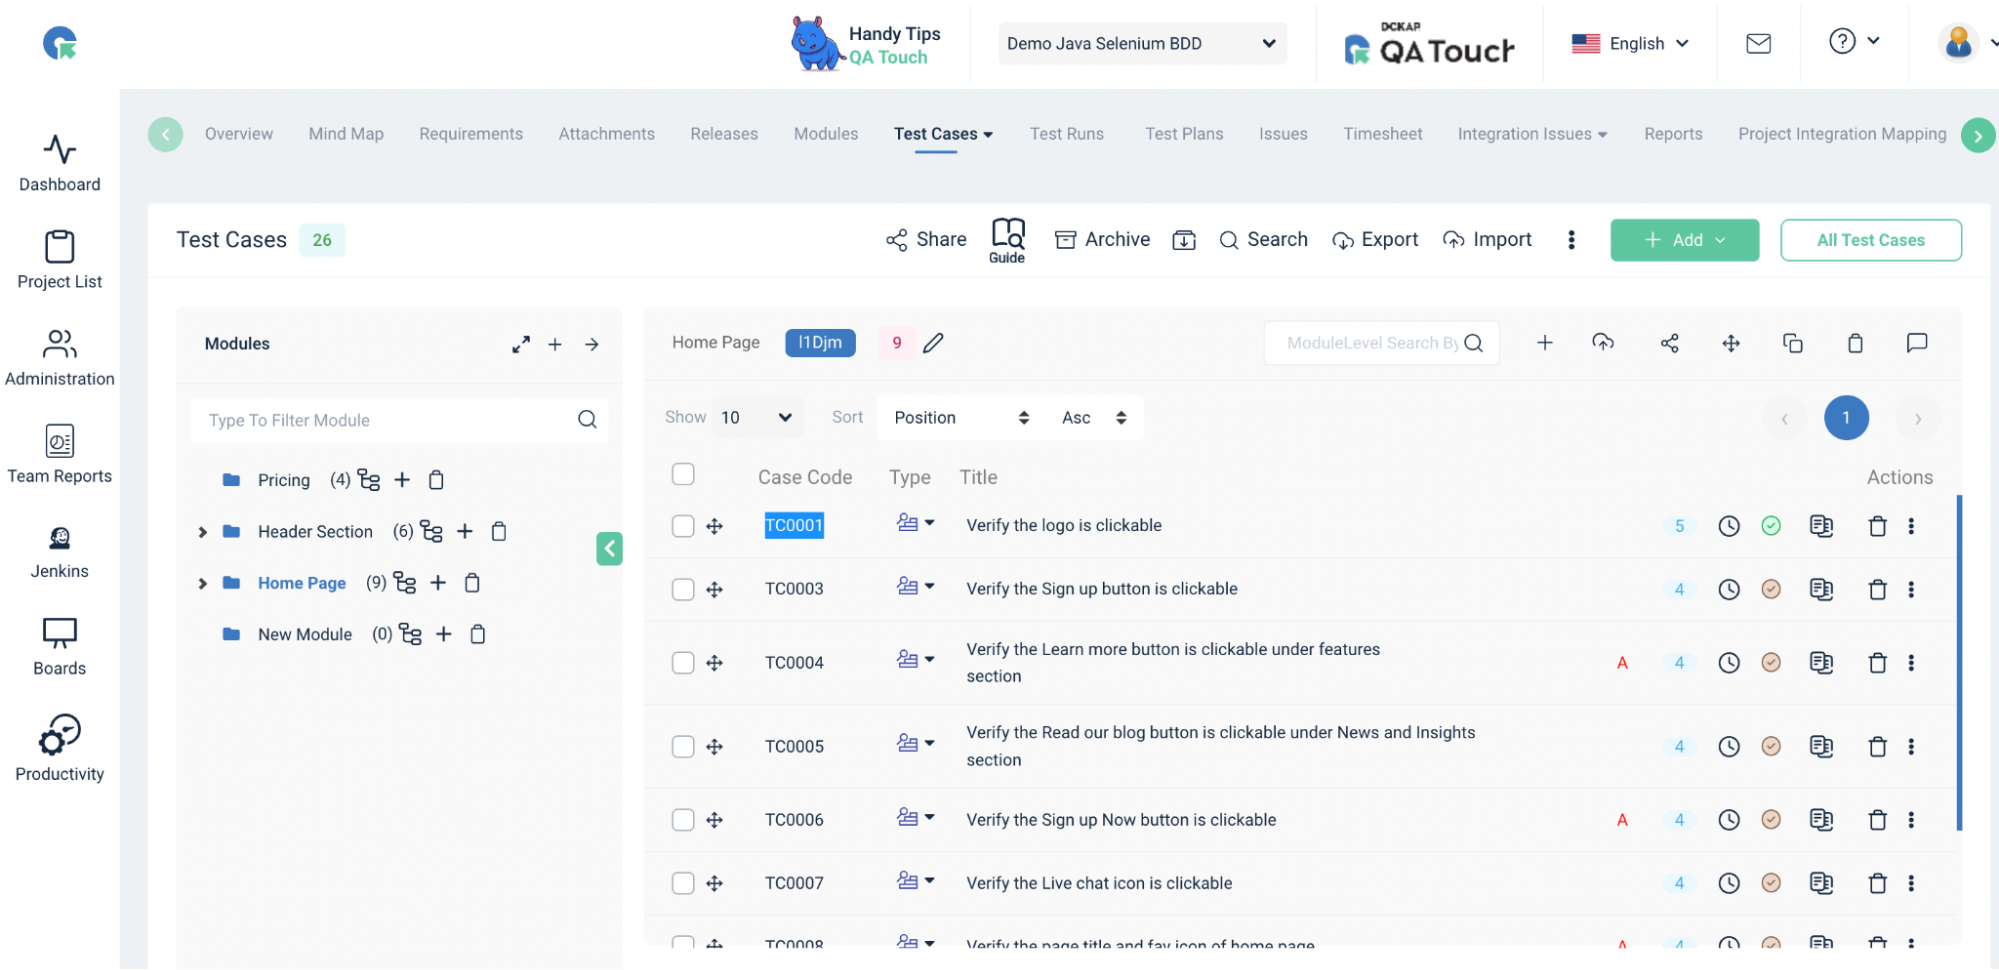
Create a test run for the test automation execution.
-
In this sample project, we have a single test case. Add the test case code from QA Touch. For example, it is TC0001. The below screenshot shows this.
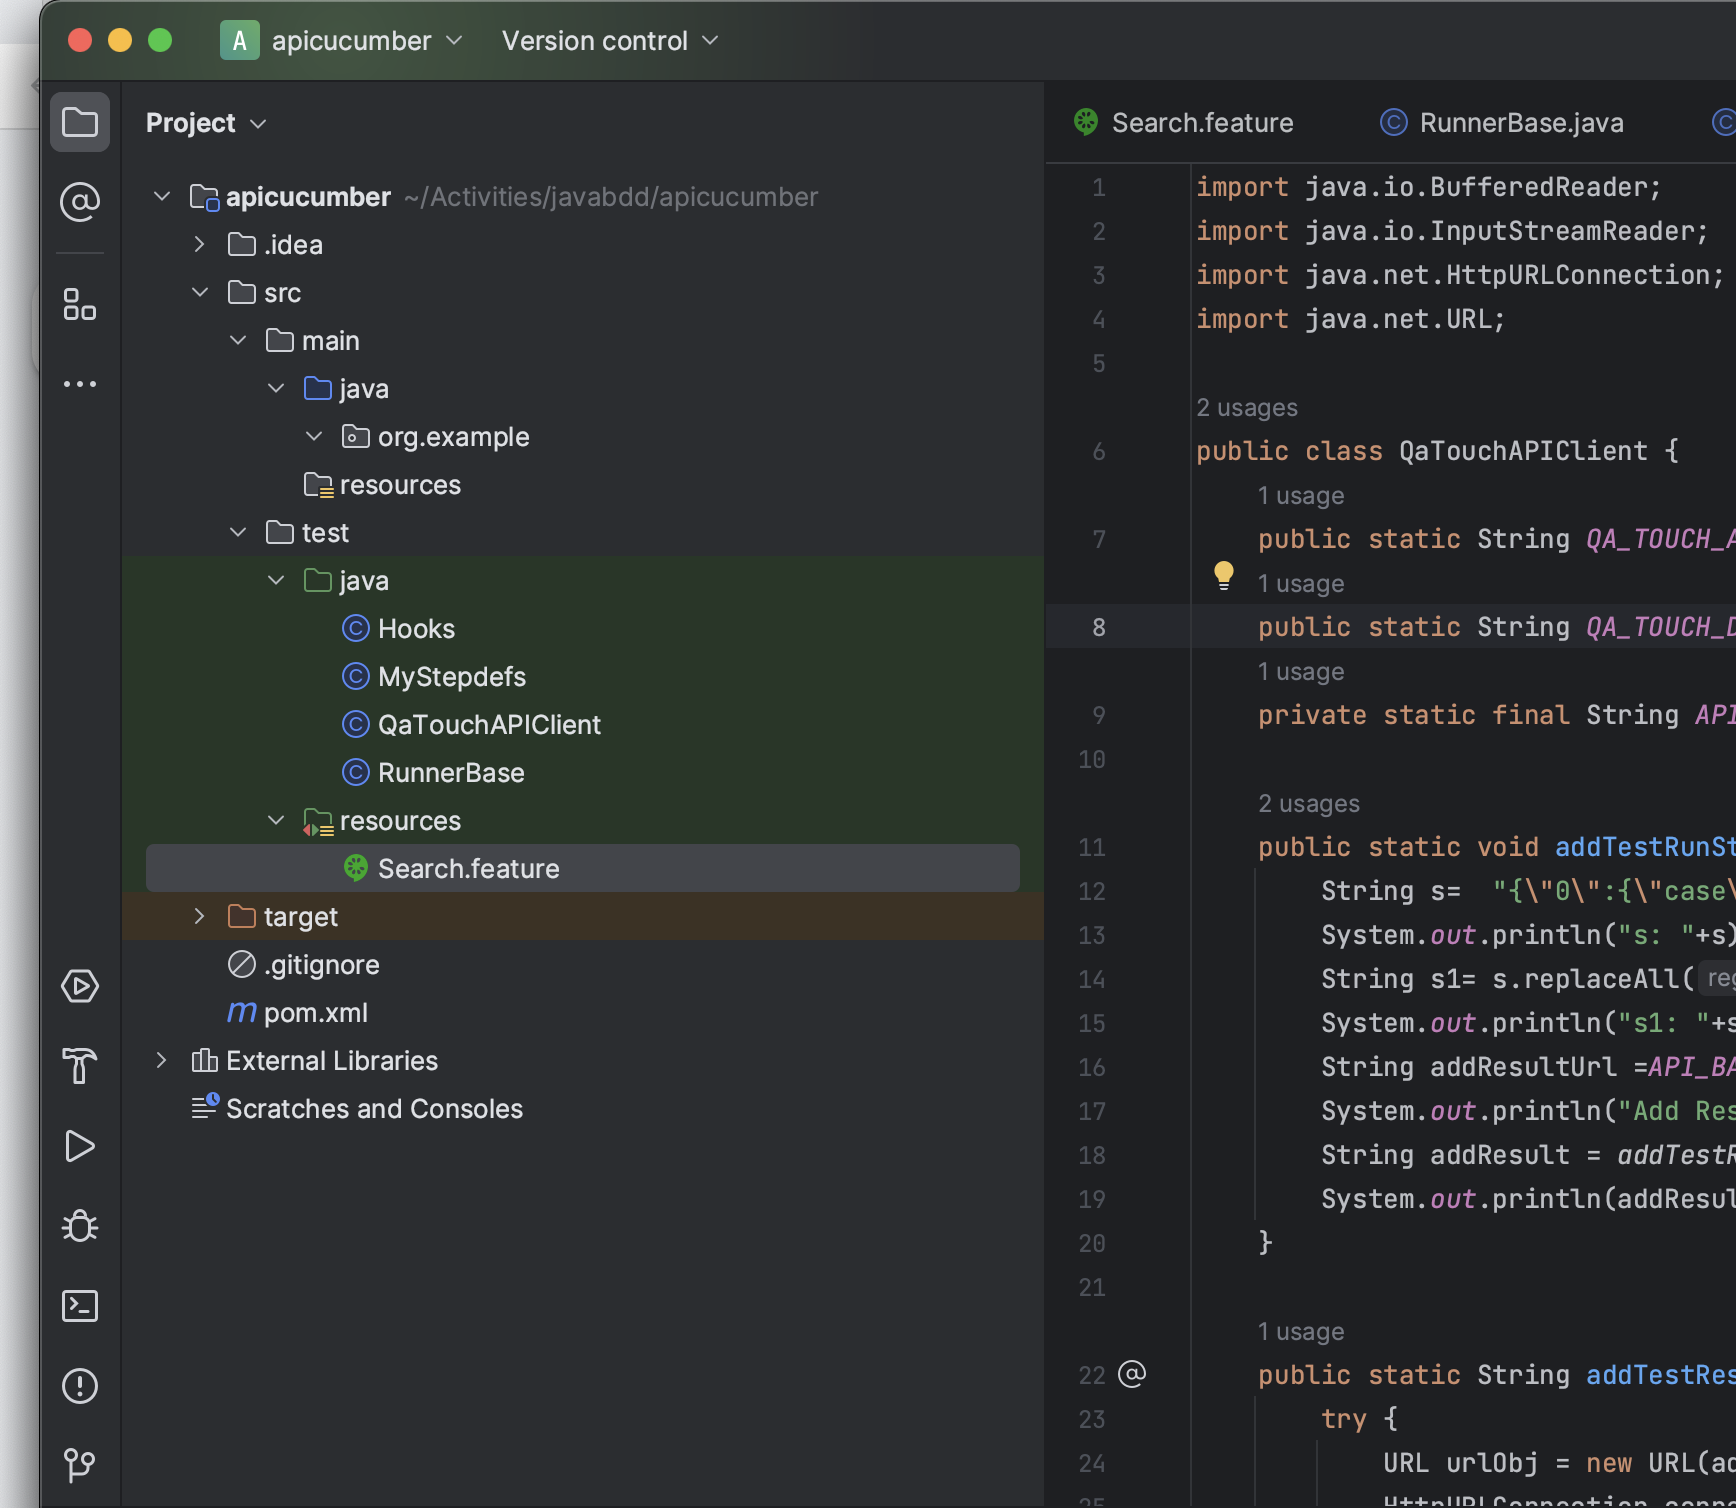
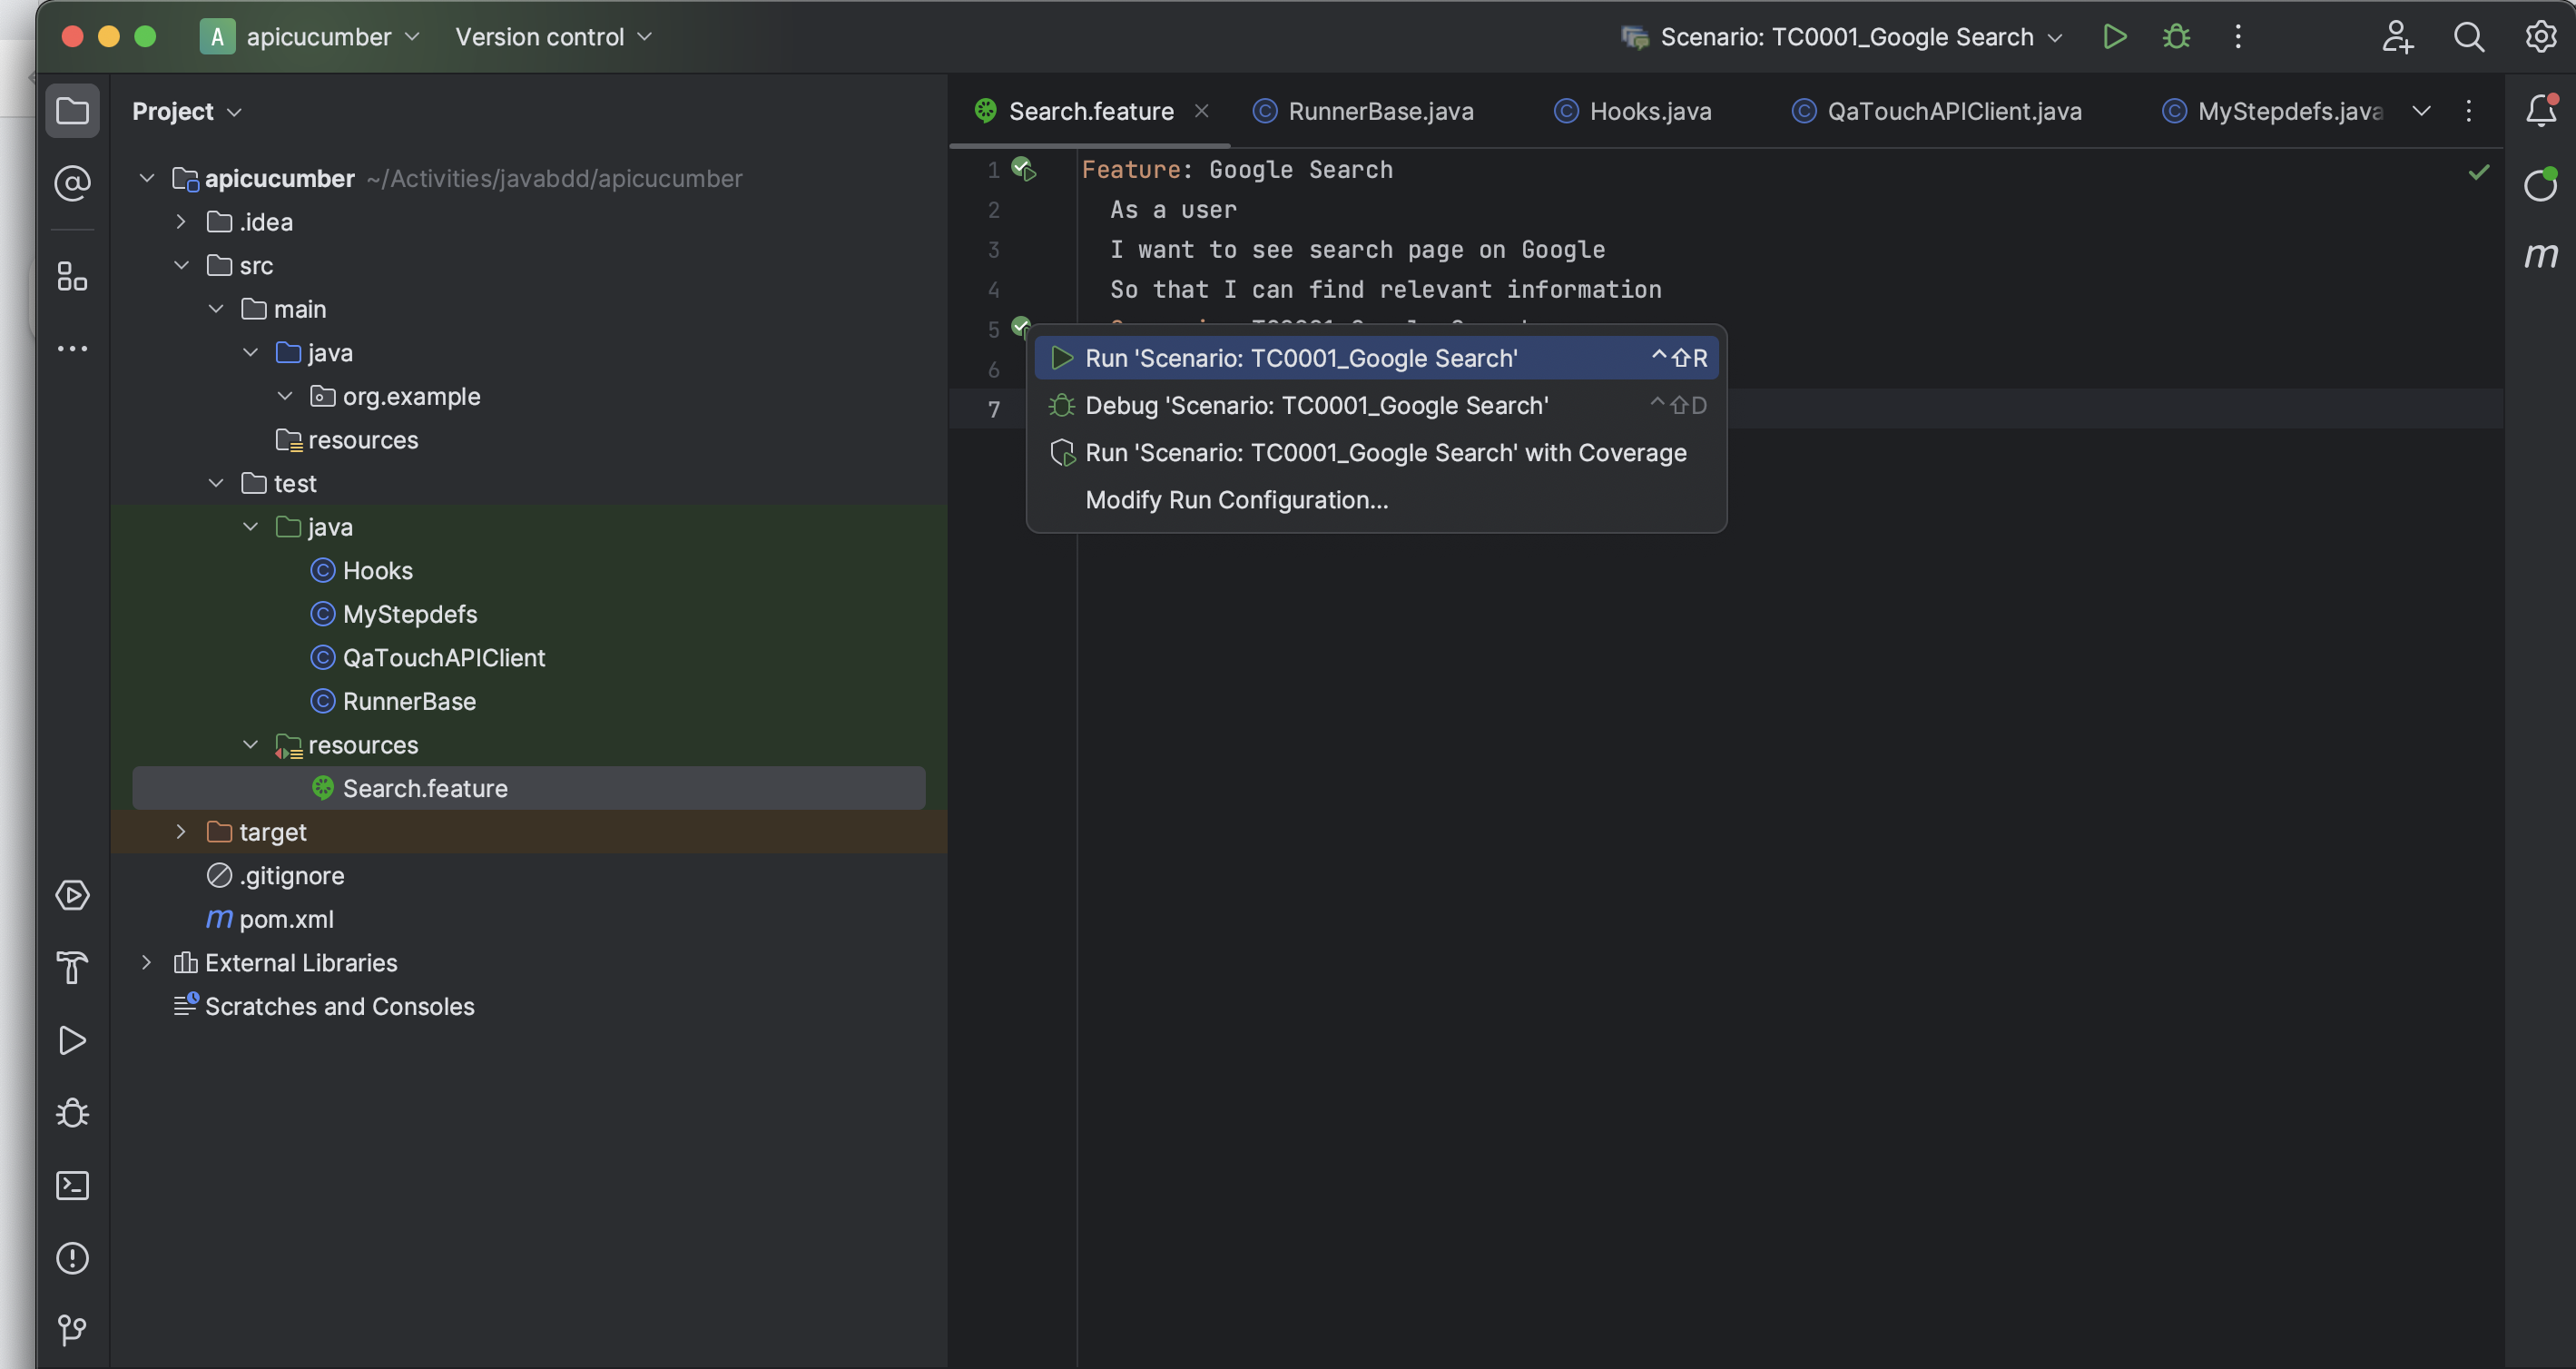
- Go to your sample test automation project, open the feature file, update the method name under Scenario: TC0001_Google Search and Save it. The snippet will look like below:
    Feature: Google Search
    As a user
    I want to see search page on Google
    So that I can find relevant information
    Scenario: TC0001_Google Search
Given I am on the Google search page- Set up the project folder structure like the screenshot below:
-
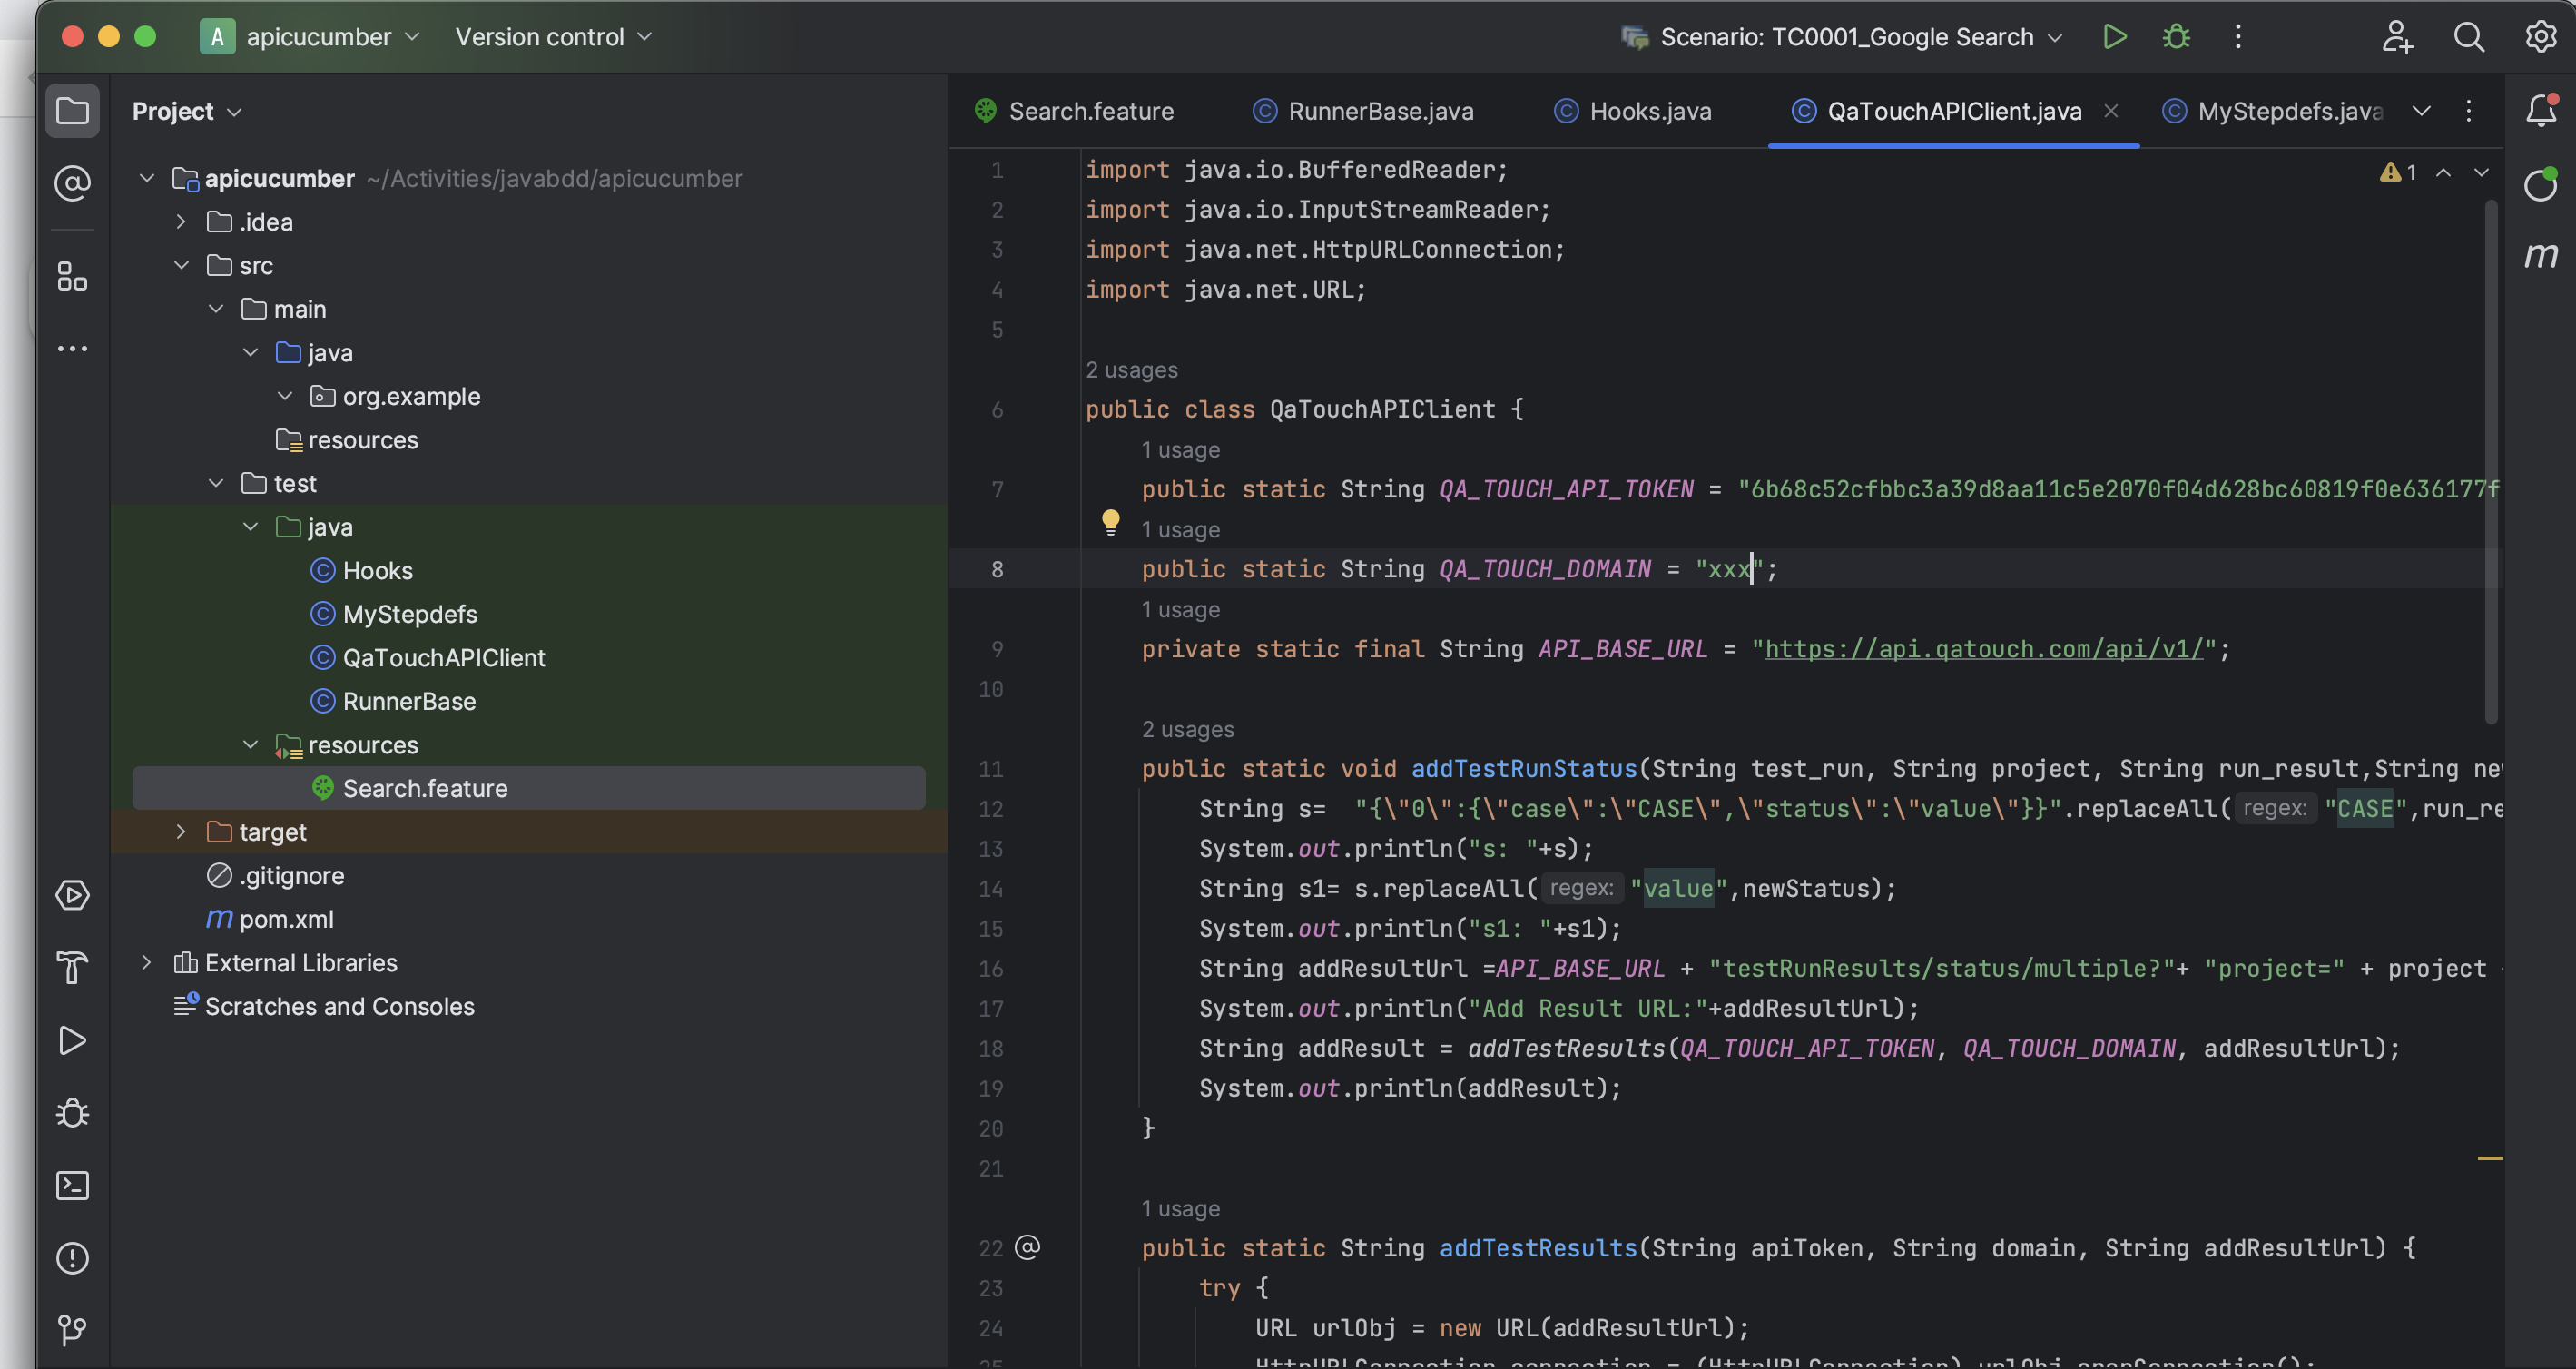
Access the QA Touch application and get the details from the Test run - config popup.
-
Configure the data API token, and domain name in the file from apicucumber/src/test/QAtouchAPIClient.java as shown below:
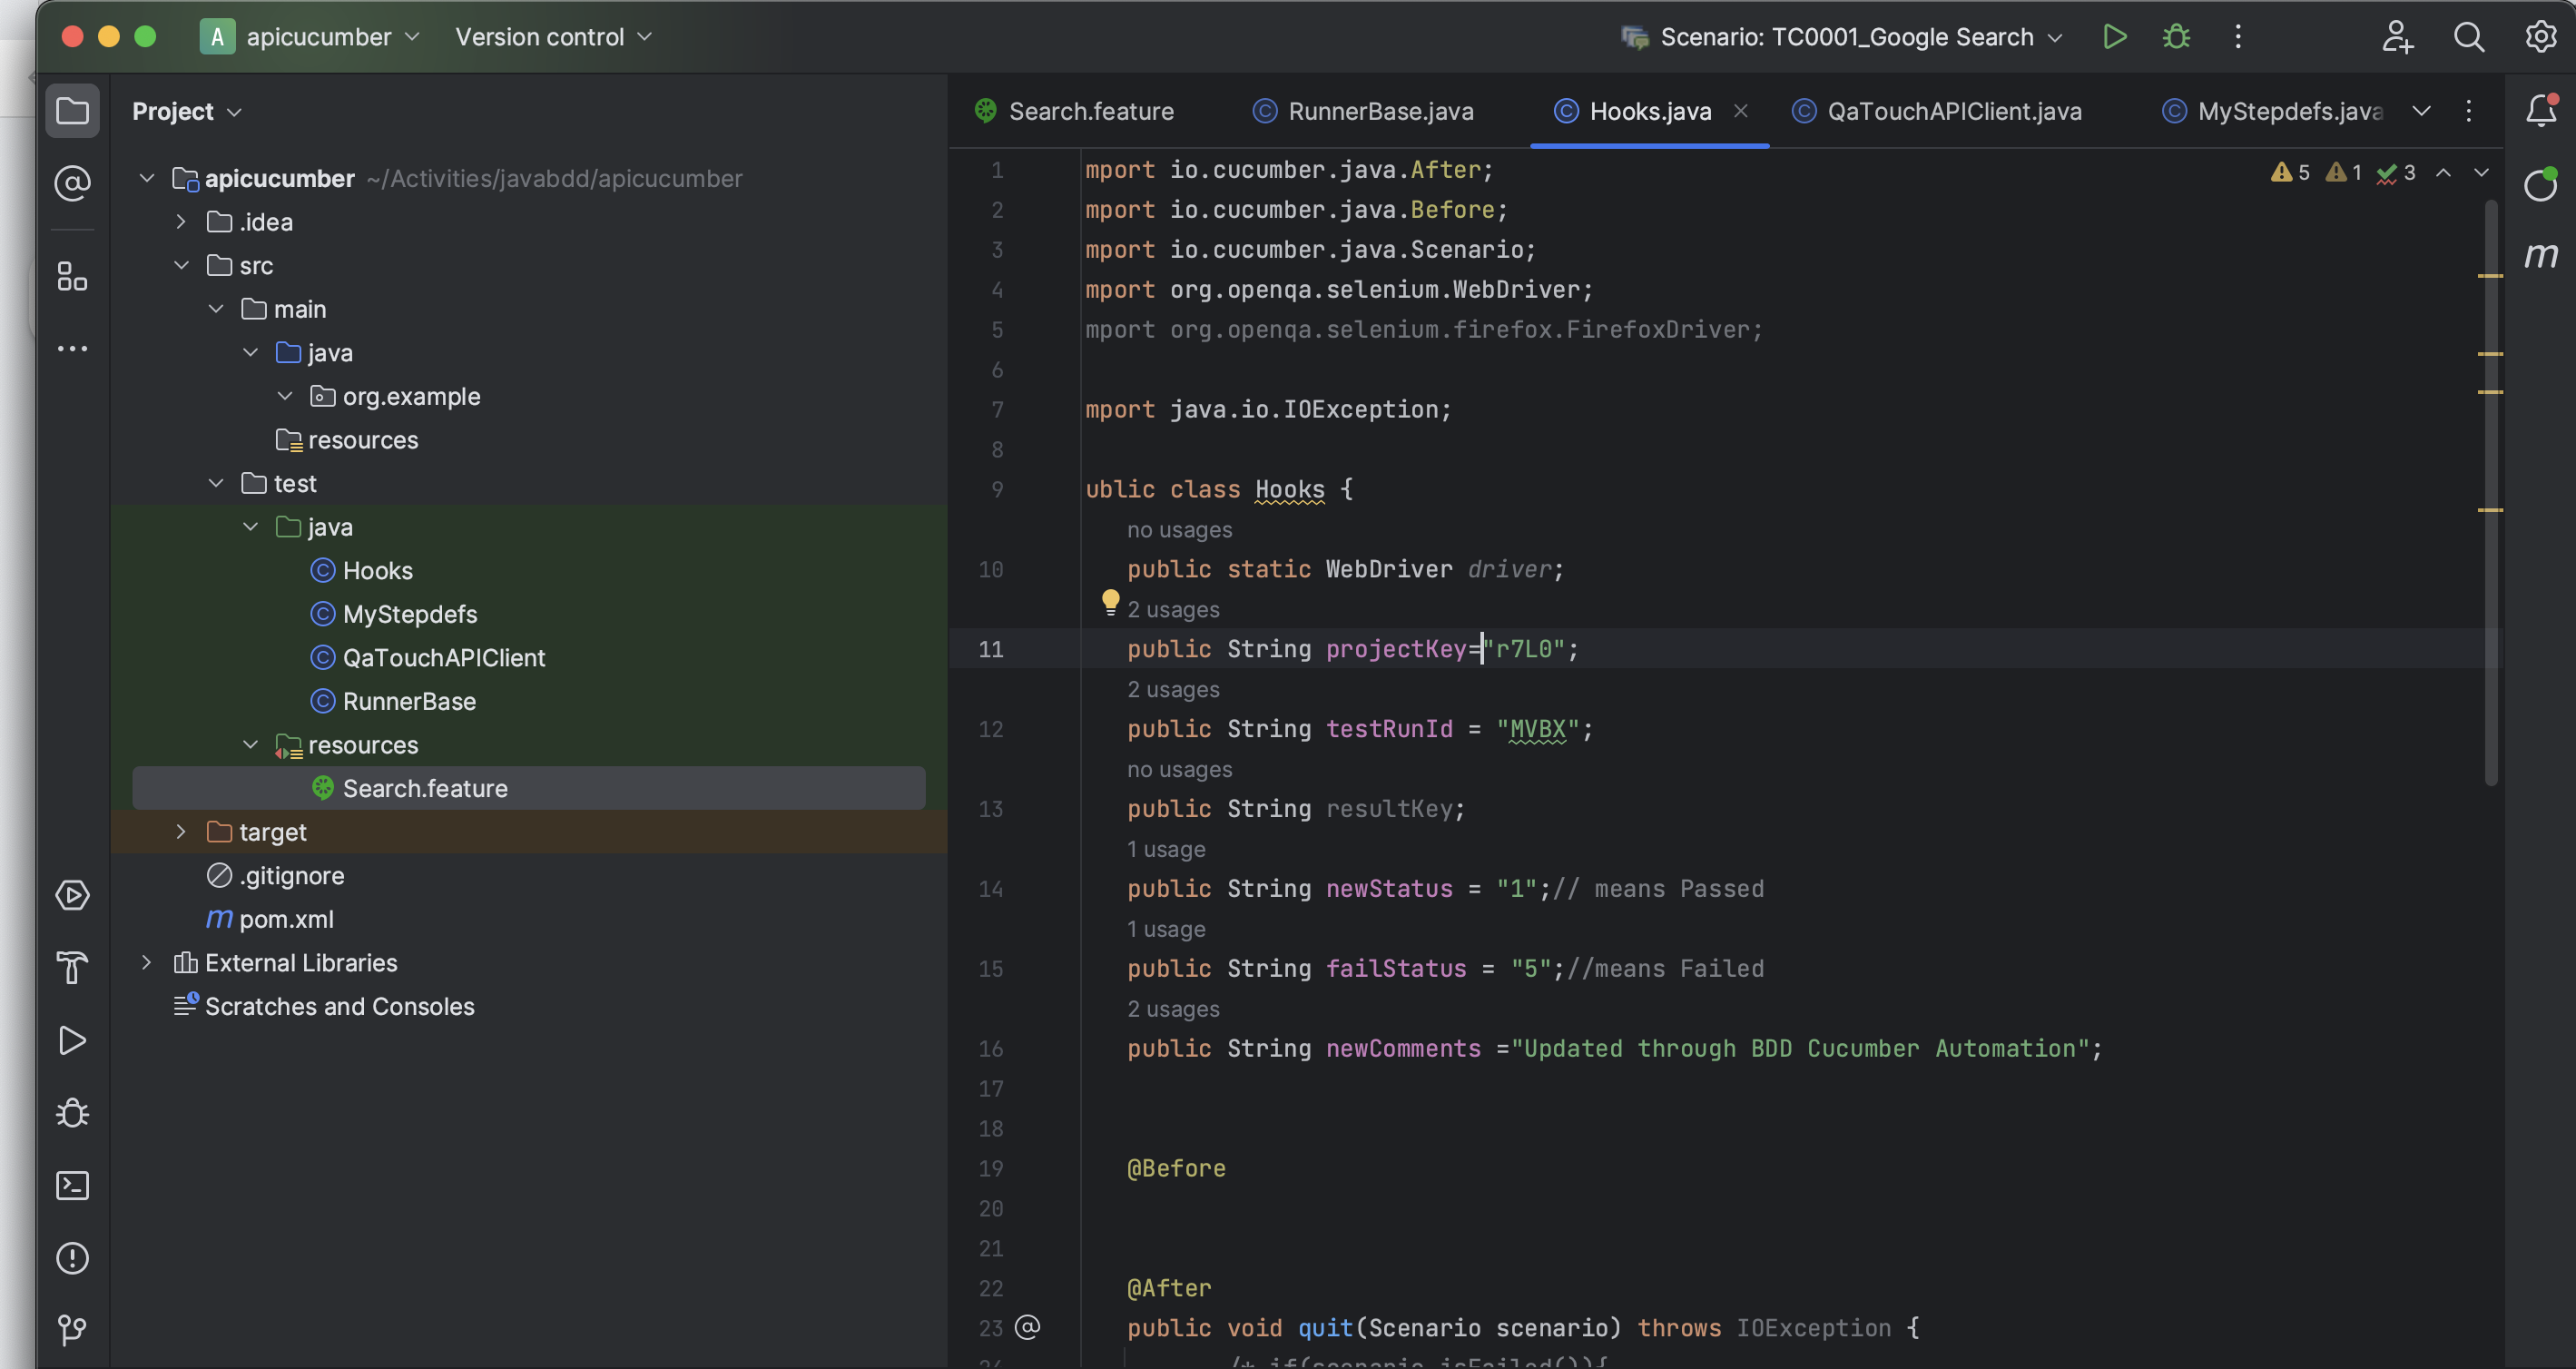
- Update the project key and the test run ID details in the apicucumber/src/test/Hooks.java file.
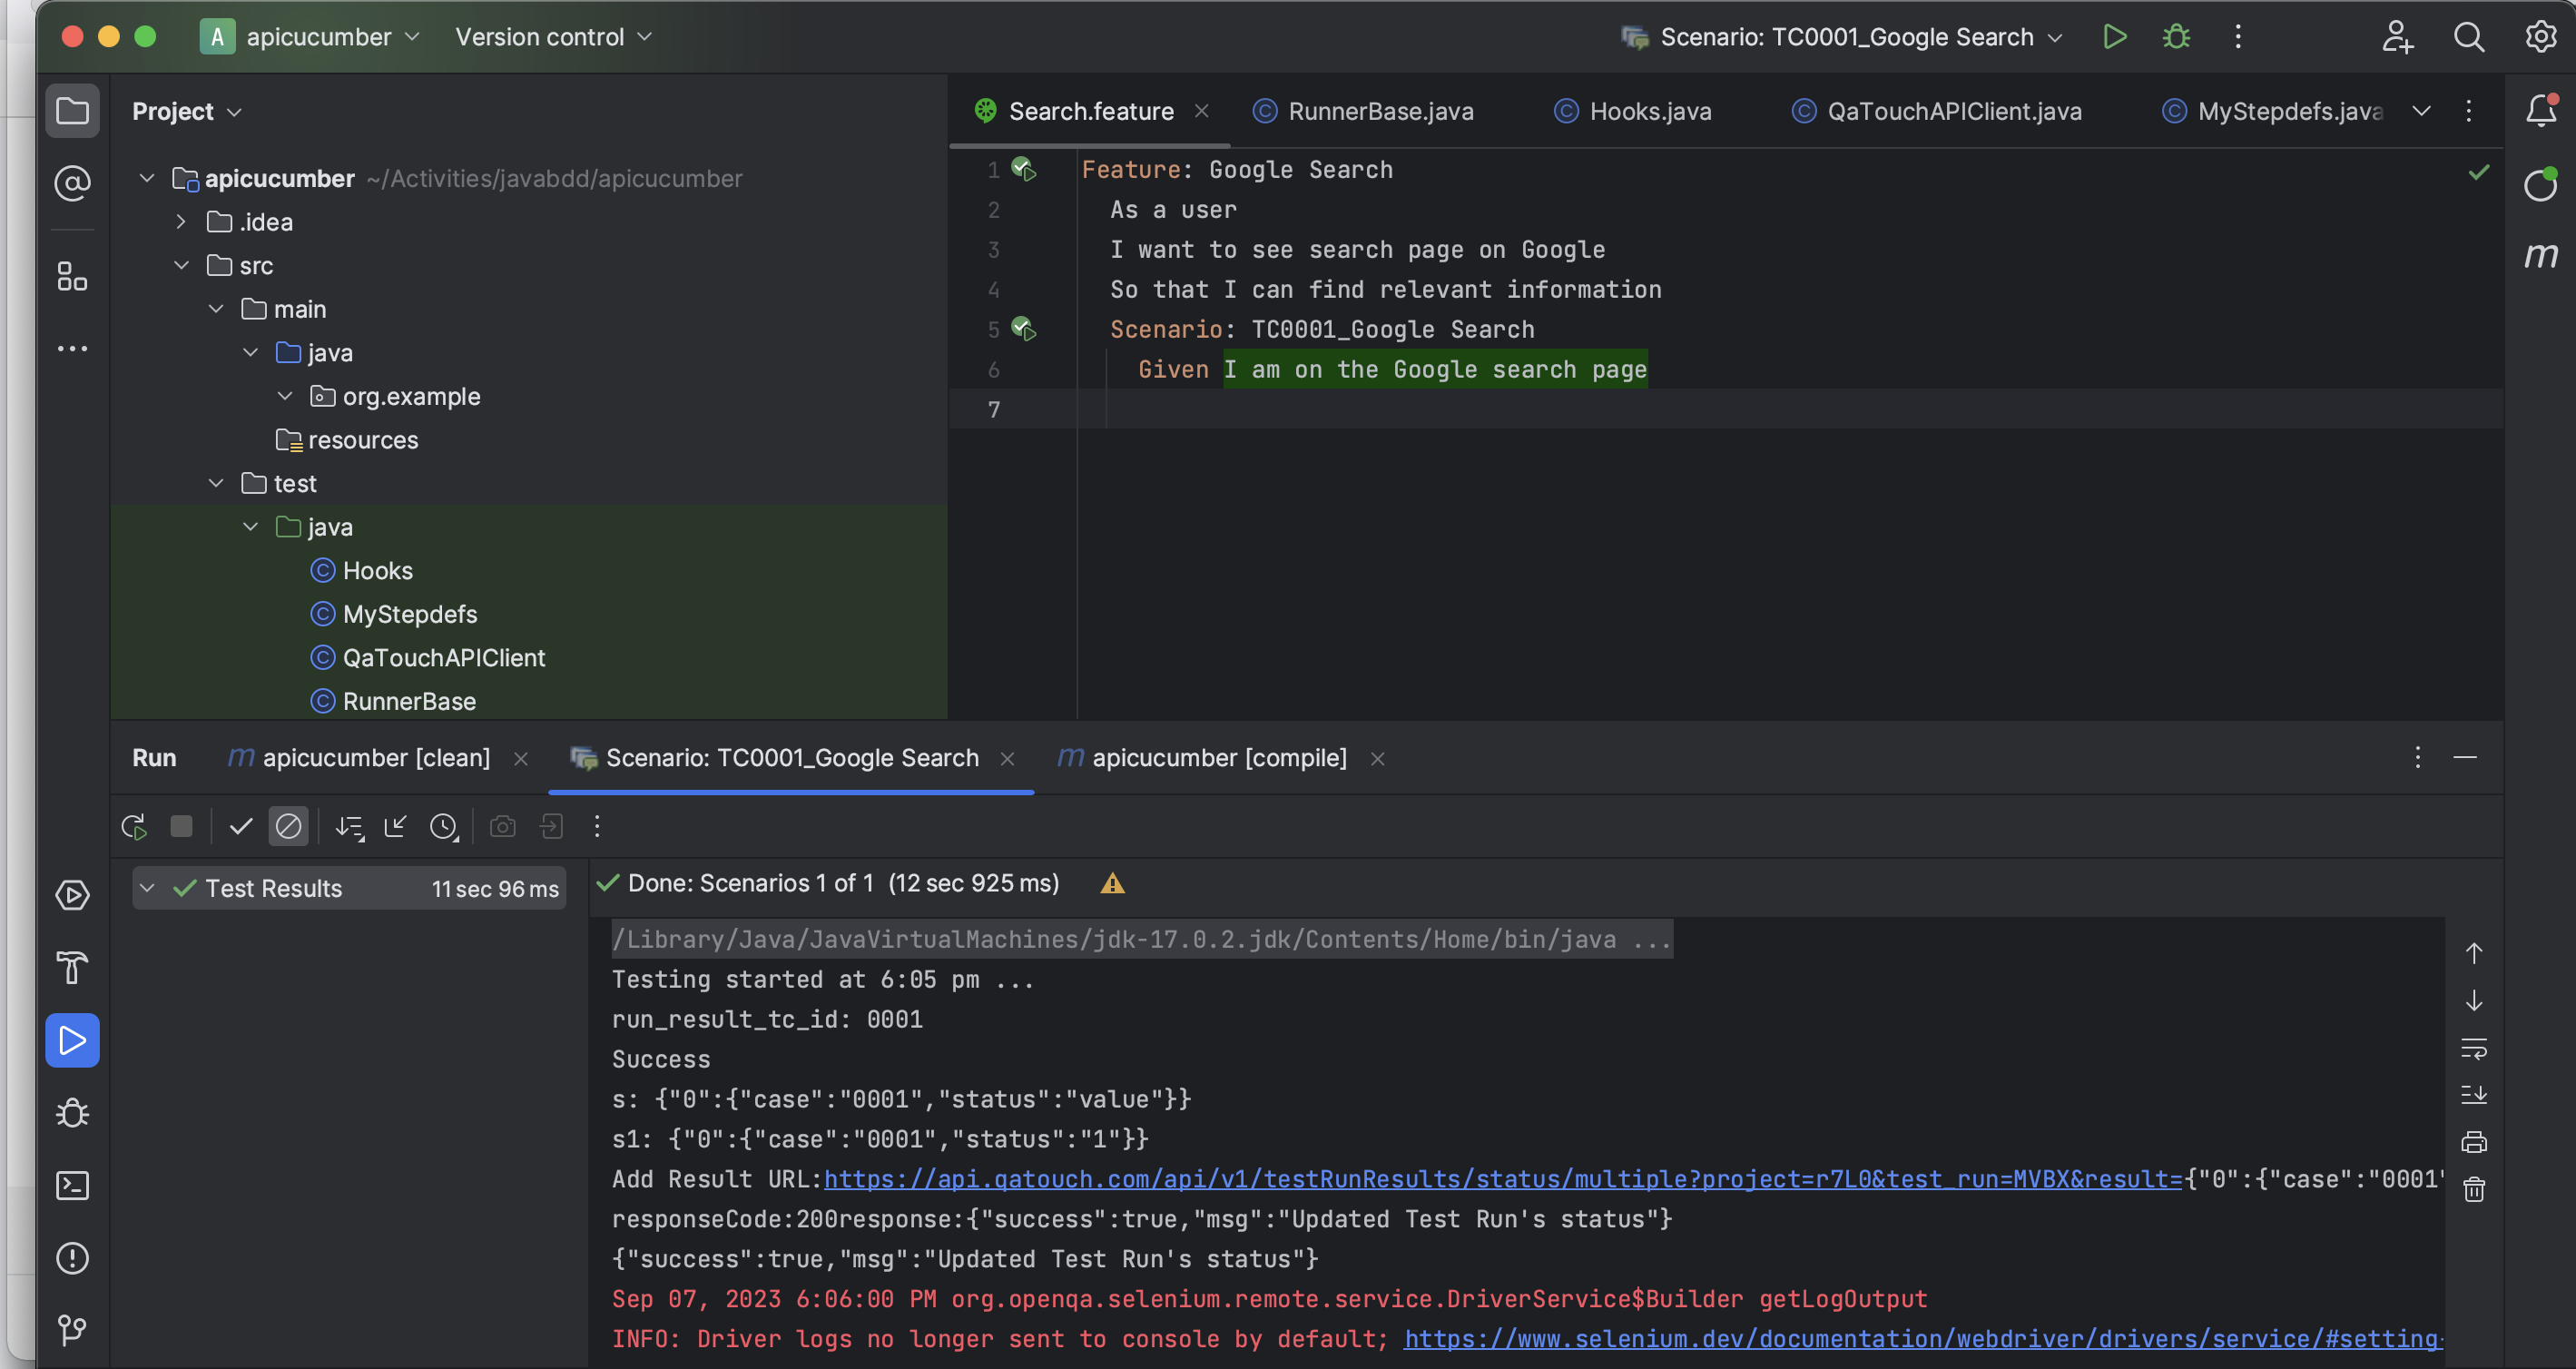
- Run the Test in the Feature file with the Run Scenario option as below screenshot.
- The execution log is below:
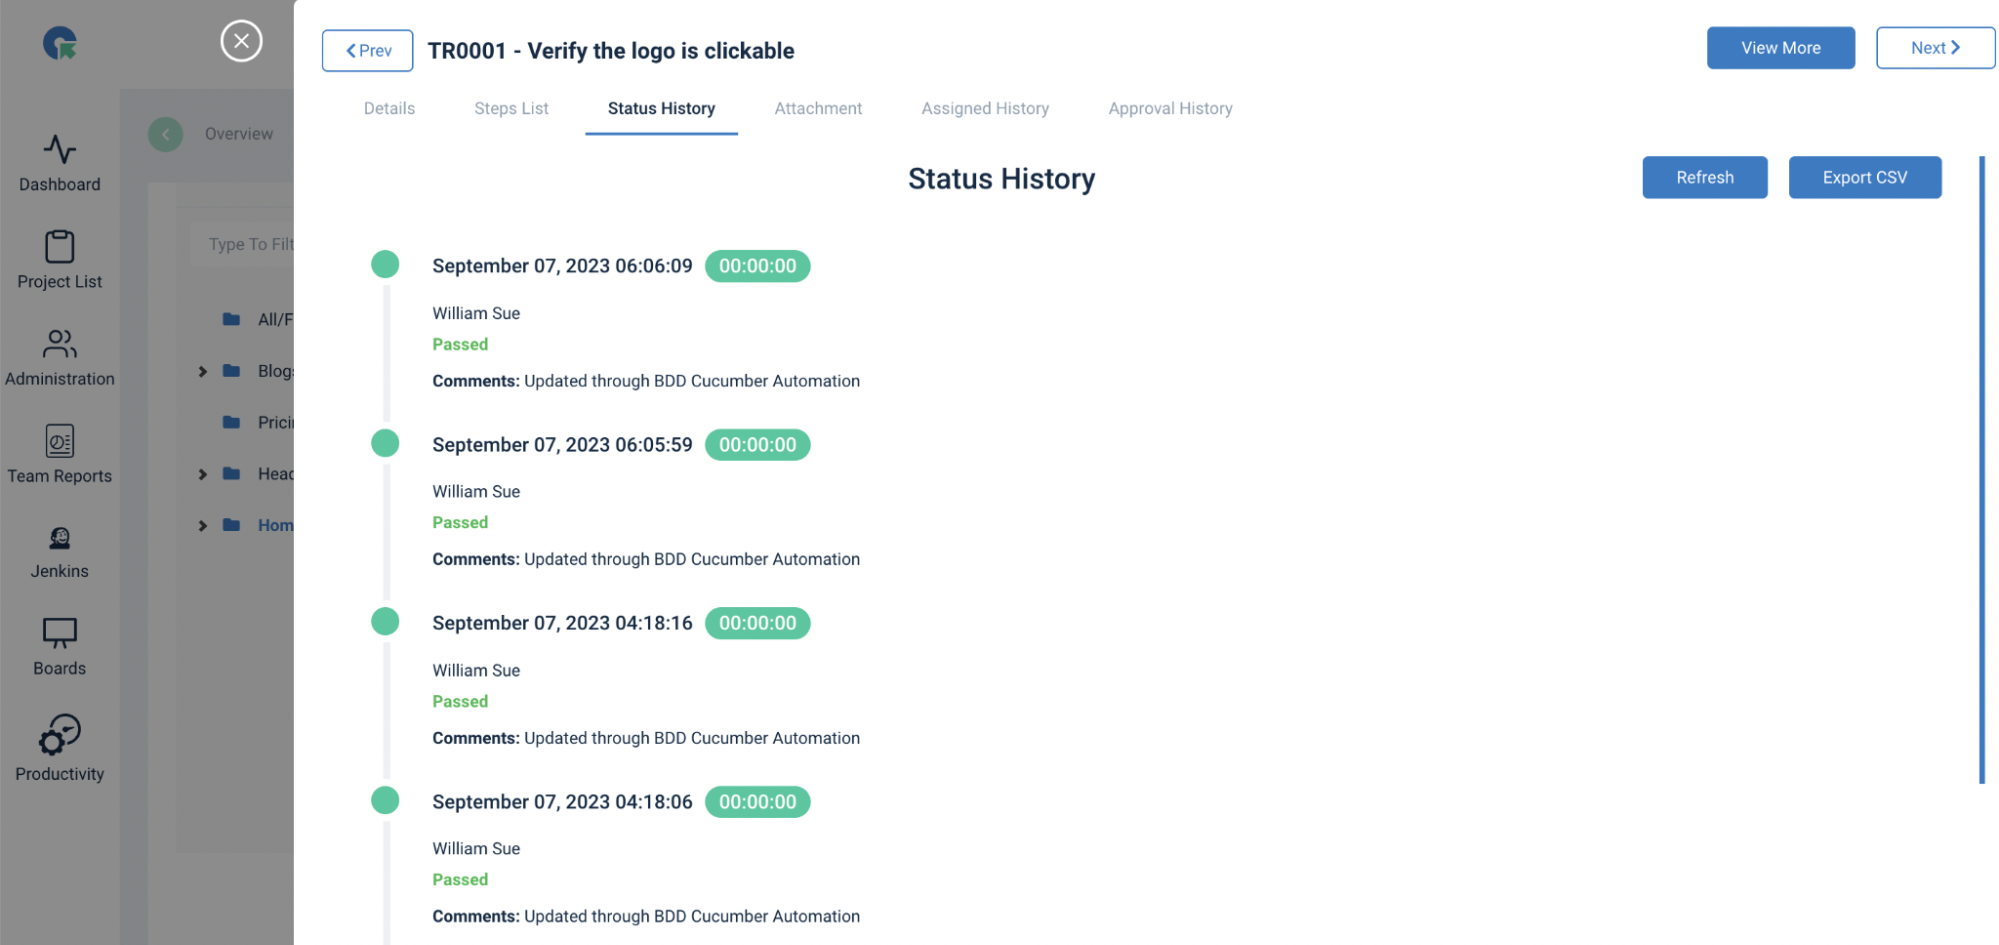
- Go to the test run in QA Touch to see the test results. The test result is updated. The test result snapshot after the update.
What is stopping you?
Get ready and watch the step-by-step tutorial in the below video and start your automation integration.