Role Management && Assign Users to project
Overview
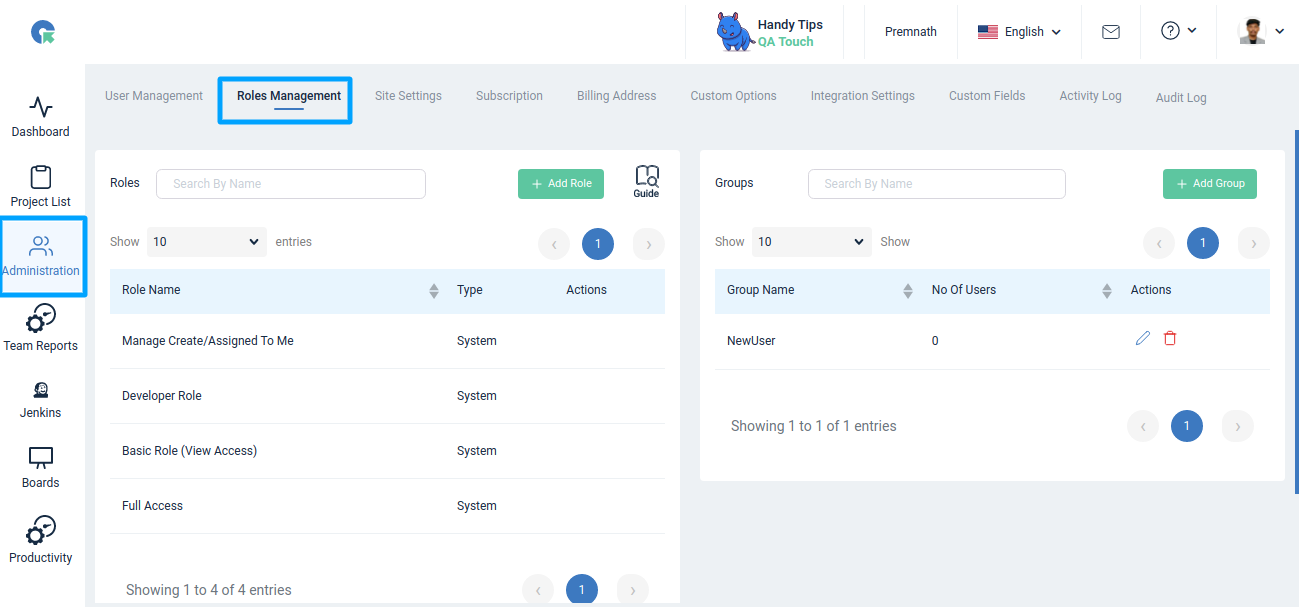
Navigation :
Goto Administration -> Roles Management
Understanding User Roles in Projects
Each user role in QA Touch defines their level of access within a project. Here’s a quick breakdown:
- Admin: Full access across the application.
- Tester: Can create, execute, and manage test cases.
- Developer: Limited access, typically can only view or manage issues. Custom Role: Configured by admins with specific permissions (e.g., view-only, edit-only).
QA Touch Provides option to create/customize roles. Here one can define the Add/Edit, Delete, Import, Export access to a role(which module the role can access) to various modules.
Releases Test Cases Test Case Modules Test Runs Reports Test Results Issues Integrations Requirements
Add Role
- Goto Administration->Roles Management
- Click on Add Role button
- Name the Role and select the access for modules
- Click Save

Roles Management
Role management is the role a user is assigned to within a project. At the project level, Role asserts the level of access the user can have within a project. A user can have all or none or a combination of Add/Edit, Delete, Import, Export access for Releases, Test Cases, Test Case Modules, Test Runs, Test Results, Reports, Issues, Requirements and Integrations. There are two types of roles on the basis of whether they are pre-built or not.
1.System Role 2.Custom Role
System Role
These are the default roles already available for selection within the QA Touch platform.
There are 3 types of system roles.
- Full access
- Basic Role [view access]
- Developer
Full Access
The Full Access role grants complete access of the project to the user who are assigned with the access. The user with full access will be able to view, edit and delete the elements within a project such as test cases, test runs, releases and issues.
Basic Role (view access)
The user with access to Basic Role will have only view access the elements within a project such as test cases, test runs, releases and issues. The user with this role will not be able to edit or delete these elements.
Developer Role
A user assigned Developer Role will only have access to Issues section. They can create and view issues within a project and change the status of issues. They won’t be able to access any other feature in QA Touch.
Custom Role
This is a user defined role. Using this feature, you can assign
- Add/Edit
- Delete
- Import and Export access to individual features like Releases Test Cases, Test Runs, Reports, Test Results, Issues, Integrations and Requirements within a project. The image shows Creating a Custom Role and providing user defined feature level access.
The image shows the custom user defined access the user with the custom role (created in above image) has for each feature within a project.
Manage Created/Assigned to me
Role to restrict users from Viewing / Editing / Deleting the resources(Test Case, Test Run, Issues etc..) not created by or assigned to the user.
The user assigned “Manage Created/Assigned to me” role in a project will have access to the following resources Test Case(s) created by them Test Run Result(s) Created By/Assigned to them Issue(s) Created By/Assigned to them
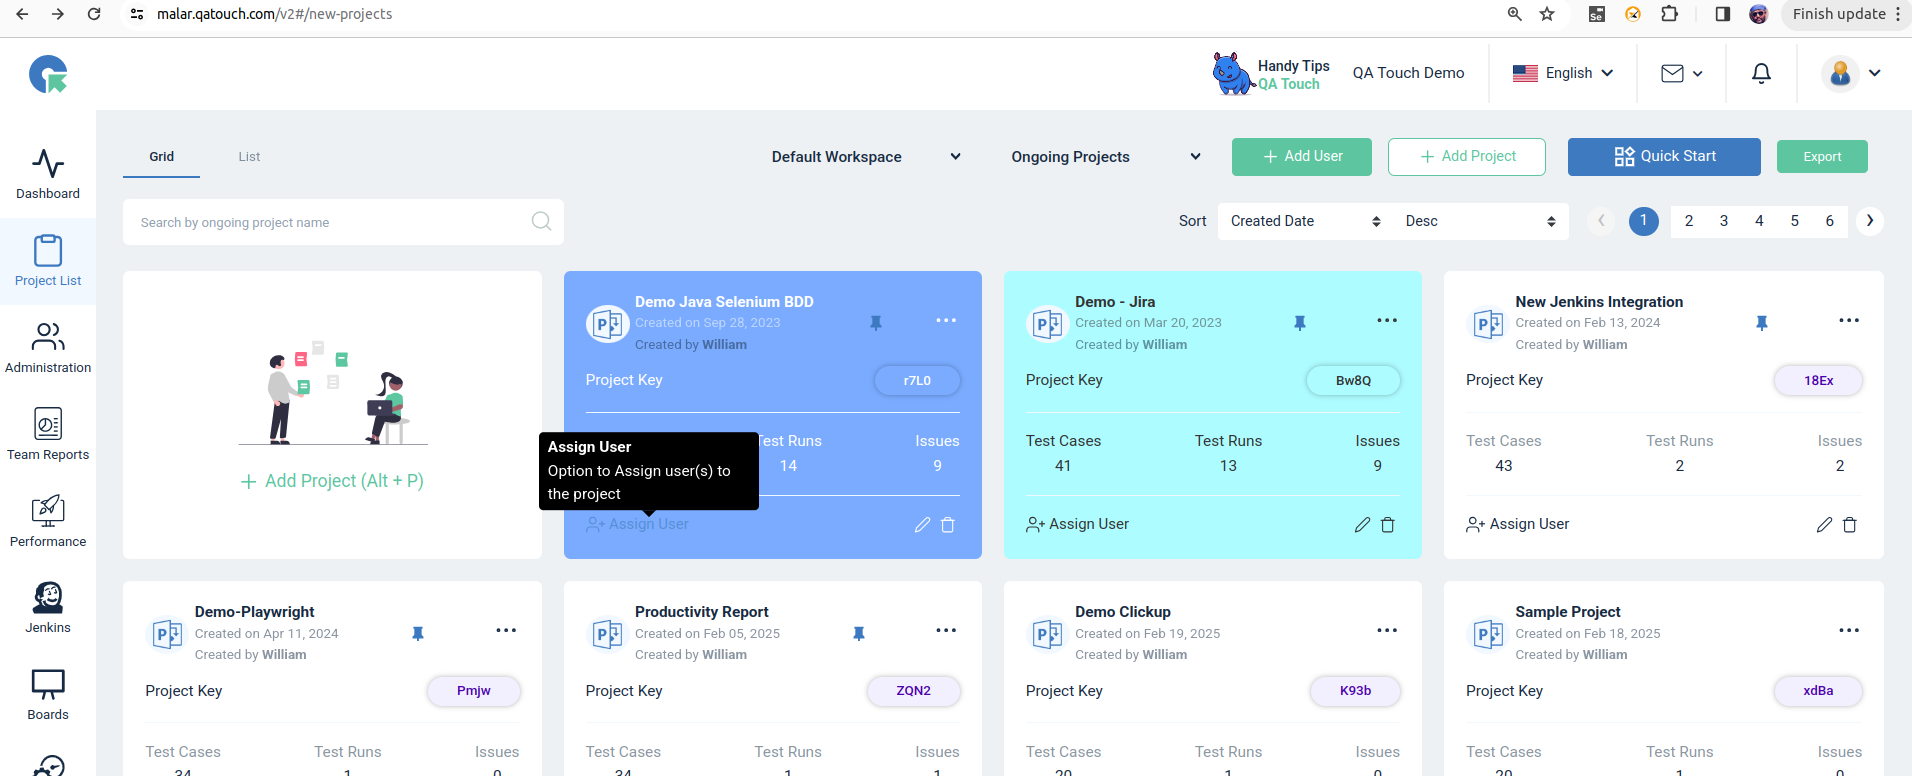
Assign Users to project
Steps to Assign Users to a project:
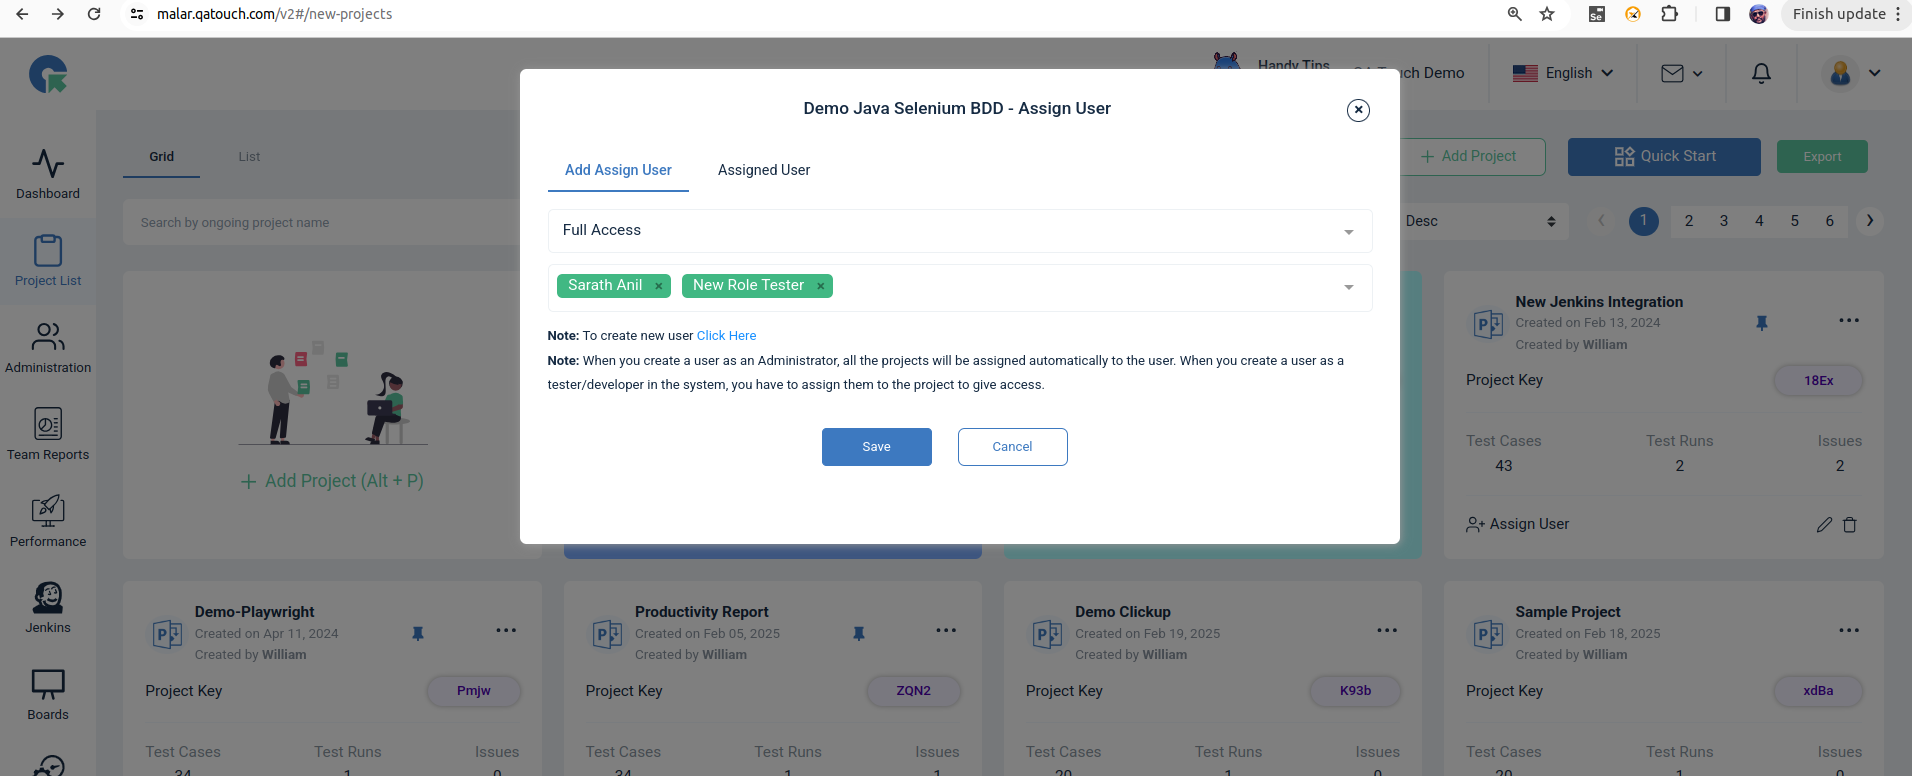
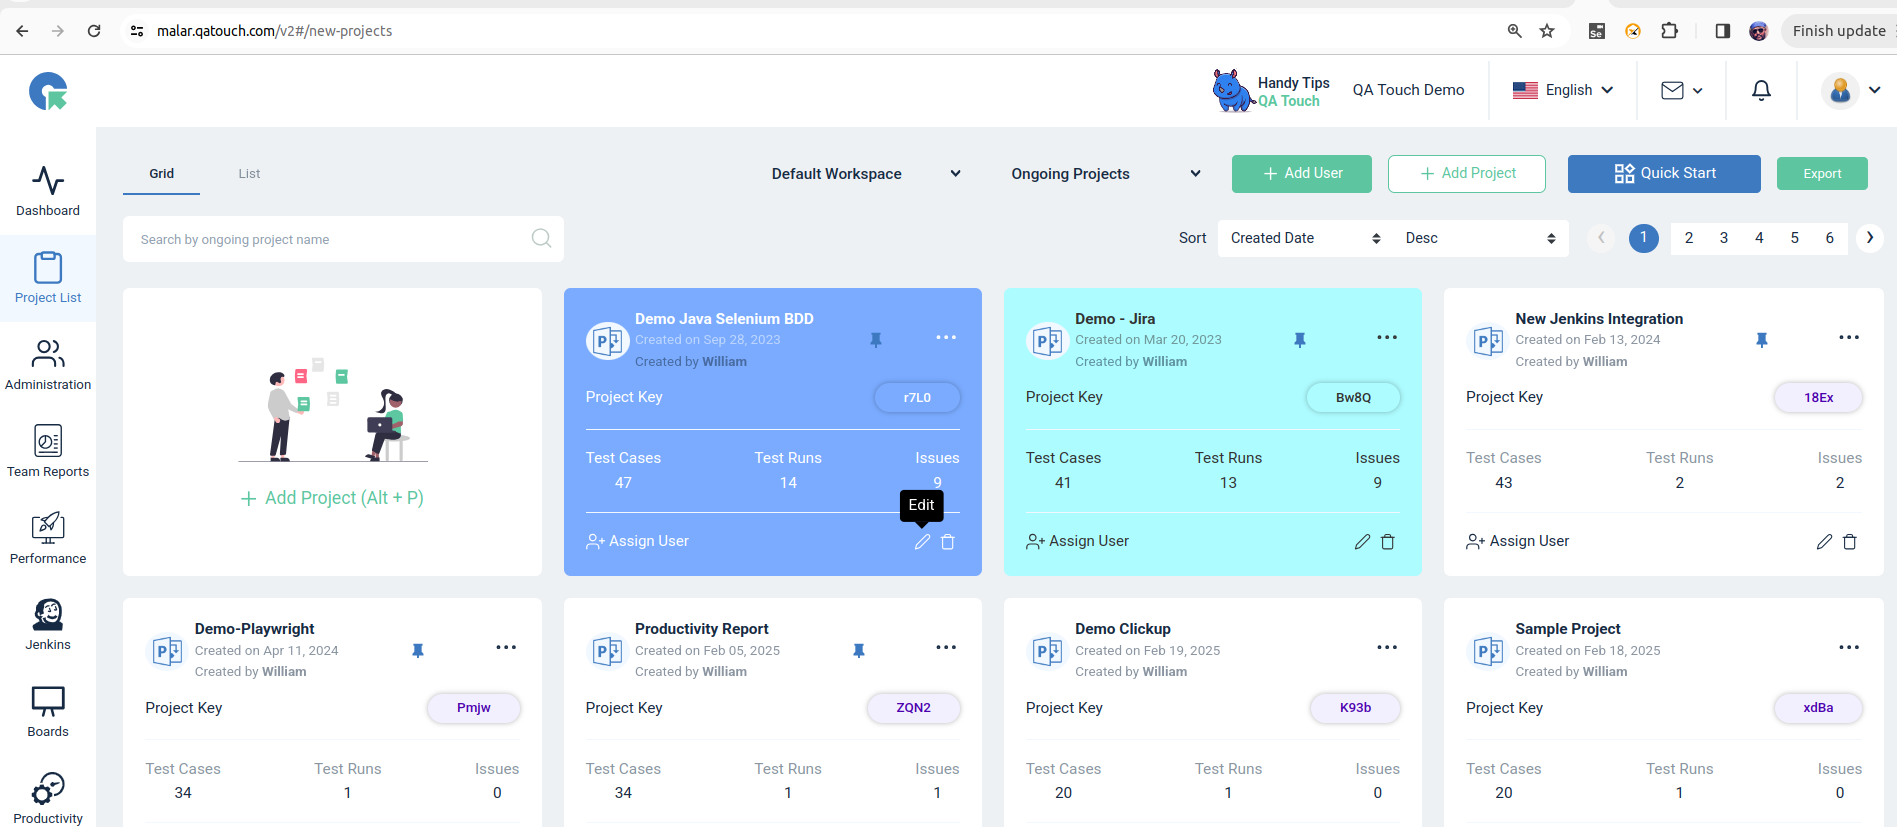
The Assign User functionality streamlines collaboration by allowing you to assign users to specific projects.
- On the project details page, locate and click on the “Assign User” option.
- A popup window will appear with two tabs: “Add Assign User” and “Assigned User.”
- In the “Add Assign User” tab:
- Select the appropriate role for the user from the available options.
- Choose the user you want to assign to the project.
- Click the “Save” button to confirm and save the user assignment.
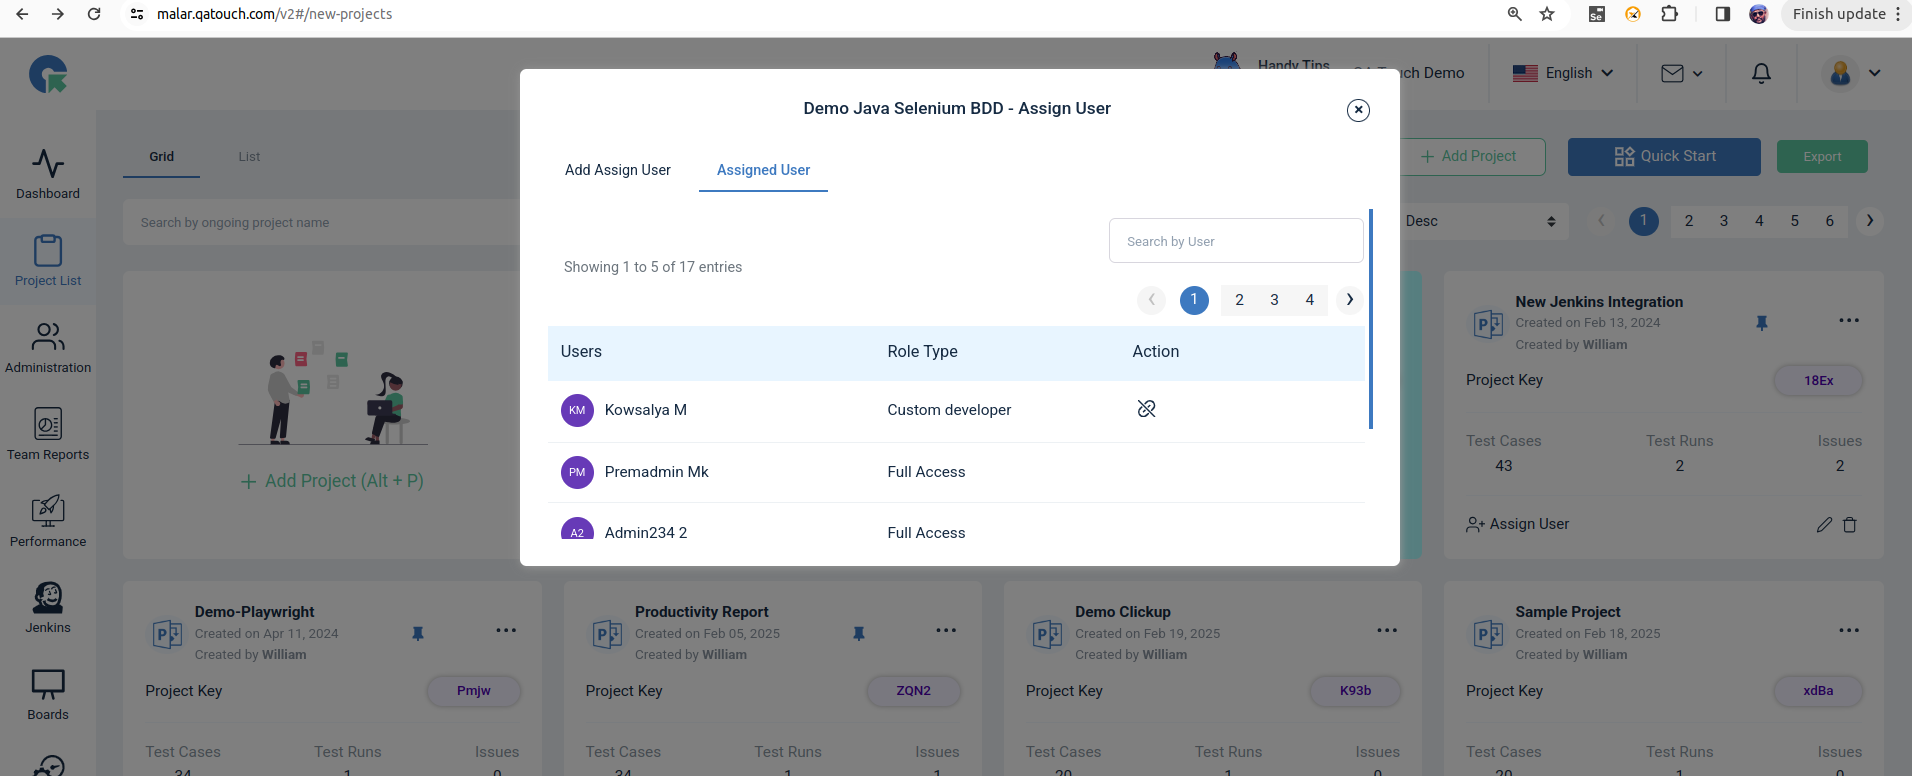
To ensure the user is assigned successfully, navigate to the “Assigned Users” tab.
When you create a user as a tester/developer in the system, you have to assign them to the project to give access.
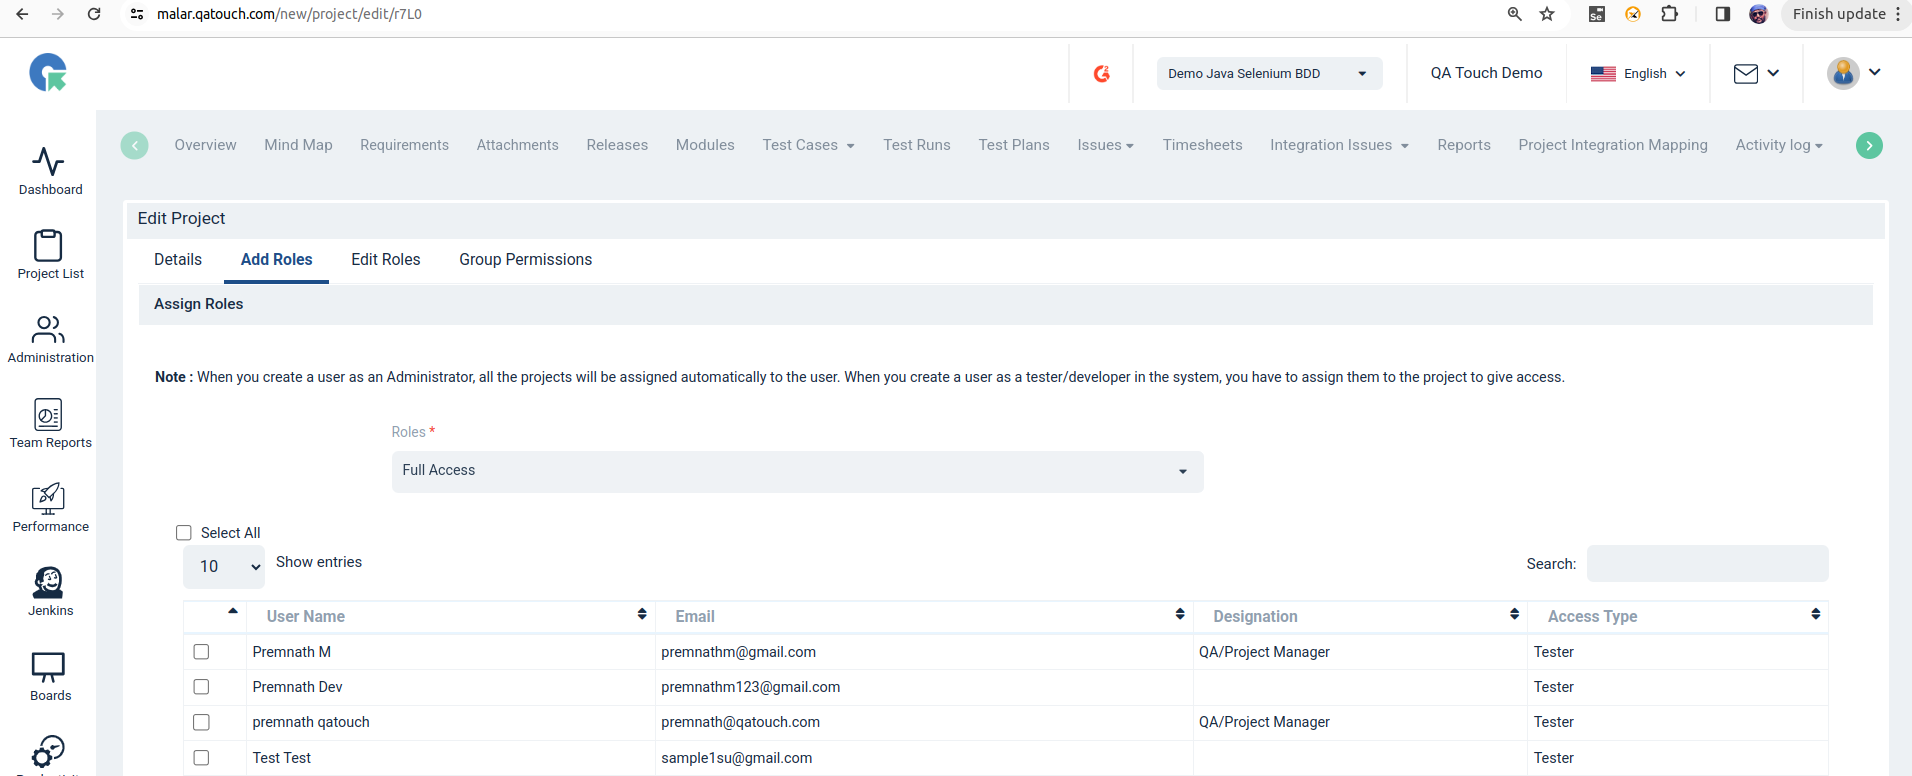
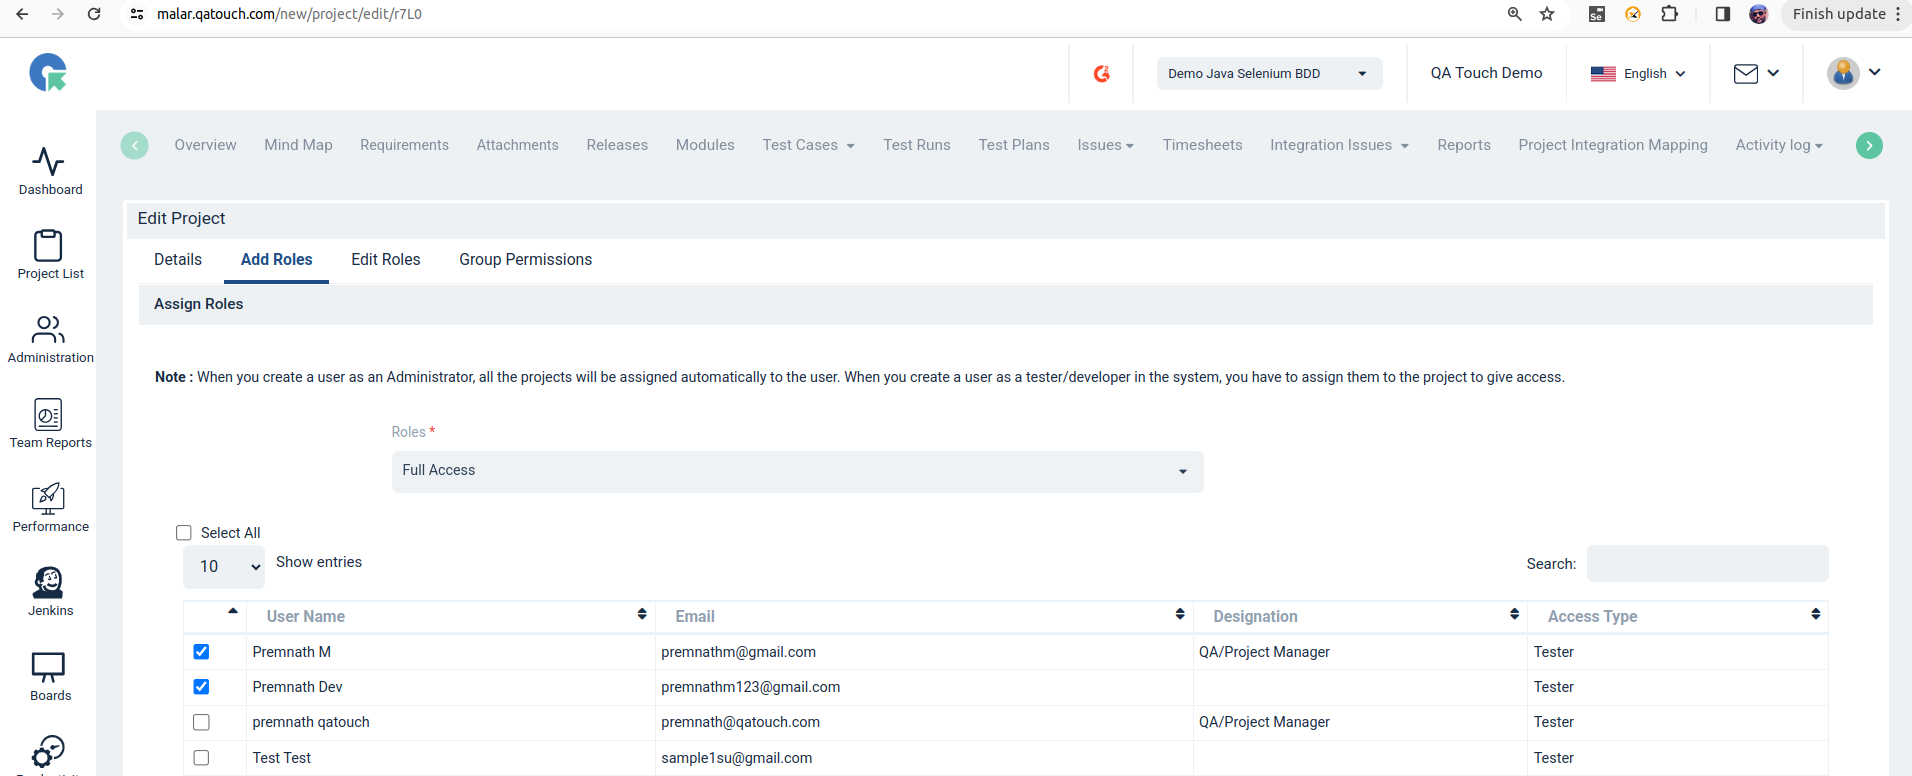
Steps to Assign Users in Bulk to a Project:
- Navigate to the Project Details page and click on the Edit option.
- Go to the Add Role tab and select the desired roles.
- Choose the required users and click Save.
- The selected users will be assigned in bulk to the specified project.
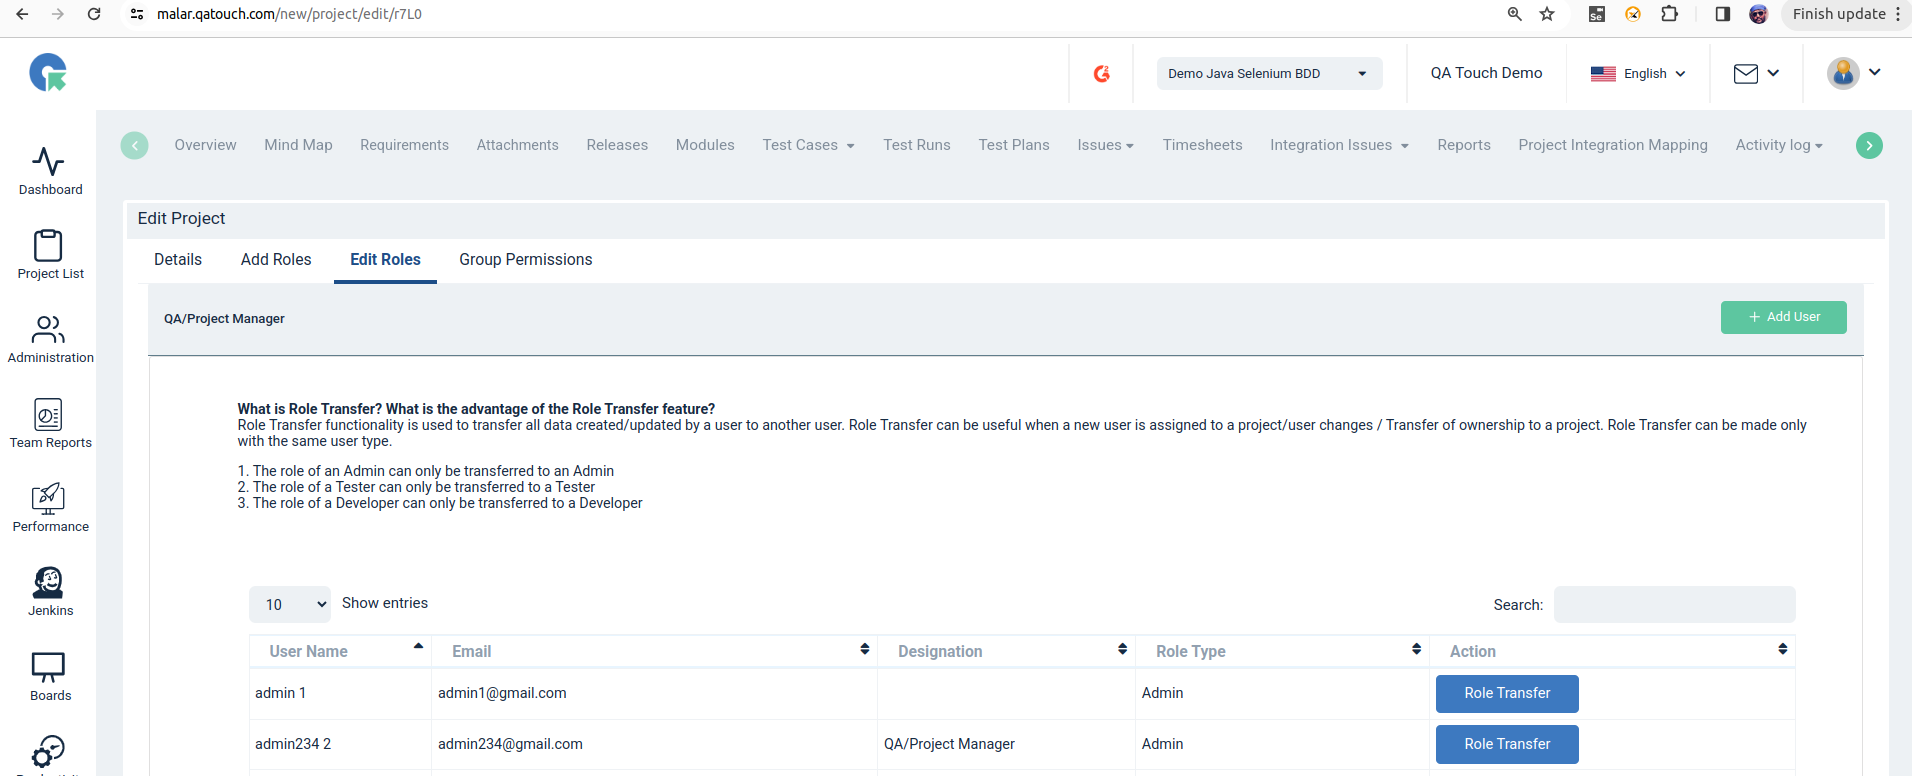
What is Role Transfer? What is the advantage of the Role Transfer feature?
Role Transfer functionality is used to transfer all data created/updated by a user to another user. Role Transfer can be useful when a new user is assigned to a project/user changes / Transfer of ownership to a project. Role Transfer can be made only with the same user type.
- The role of an Admin can only be transferred to an Admin
- The role of a Tester can only be transferred to a Tester
- The role of a Developer can only be transferred to a Developer