Site Settings
Overview
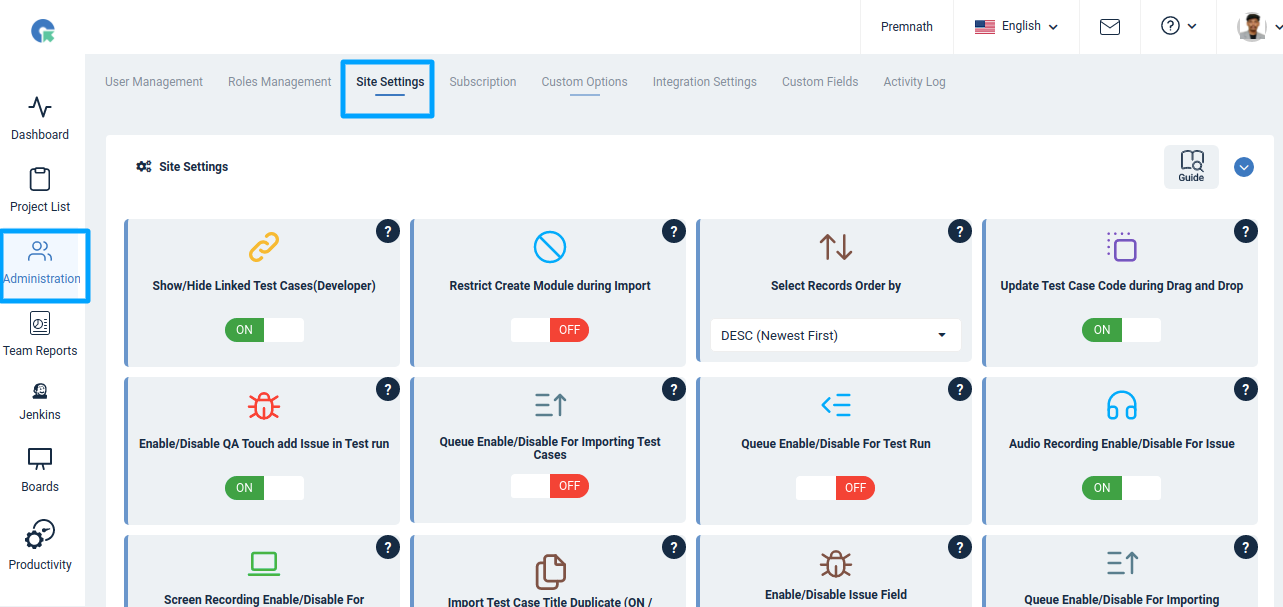
Navigation : Goto Administration -> Site Settings
Pagination Setting
1. Select Records Order by
he “Sort order of records (Asc/Desc)” refers to the direction in which the records will be arranged when displayed or listed.
-
Ascending (ASC): Records are sorted in ascending order, meaning they are arranged from lowest to highest according to the specified criteria. For example, if “ASC” is chosen, the oldest records will appear first.
-
Descending (DESC): Records are sorted in descending order, meaning they are arranged from highest to lowest according to the specified criteria. For example, If “DESC” is selected, the newest records will appear first.
Setting/Restriction
2. Show/Hide Linked Test Cases(Developer)
The option “Show/Hide Linked Test Cases (Developer)” provides developers with the ability to display or conceal linked test cases associated with a particular issue.
-
By choosing to show linked test cases, developers can access to view the linked test case with a particular issue.
-
Conversely, not giving access will hide linked test cases from developers.
3. Enable/Disable QA Touch add Issue in Test run
The “Enable/Disable QA Touch Add Issue in Test Run” feature allows users to control whether the option to add issues directly from QA Touch is available within a test run.
-
When enabled(ON), users can quickly report issues encountered during testing without leaving the test run page. This will help the user to raise the issue instantly.
-
On the other hand, disabling (OFF)this feature removes the option to add issues directly from the test run page. This will restrict access to create issues for specific test runs.
4. Restrict Create Module during Import
The “Restrict Create Module during Import” feature allows users to control whether new modules can be created during the import process.
-
When enabled(ON), users importing data, such as test cases are prevented from creating new modules
-
On the other hand, disabling(OFF) this feature allows users to create new modules during the import process.
5. Update the Test Case Code during Drag and Drop
The “Update Test Case Code during Drag and Drop” feature allows users to automatically update the test case code when moving or dragging and dropping Test cases.
-
When enabled(ON), will change the test case code while rearranging the test case using drag-and-drop
-
When this feature is disabled(OFF), the test case codes remain accurate and consistent, even after they are moved or dragged and dropped. This helps prevent confusion that may arise from incorrect test case codes.
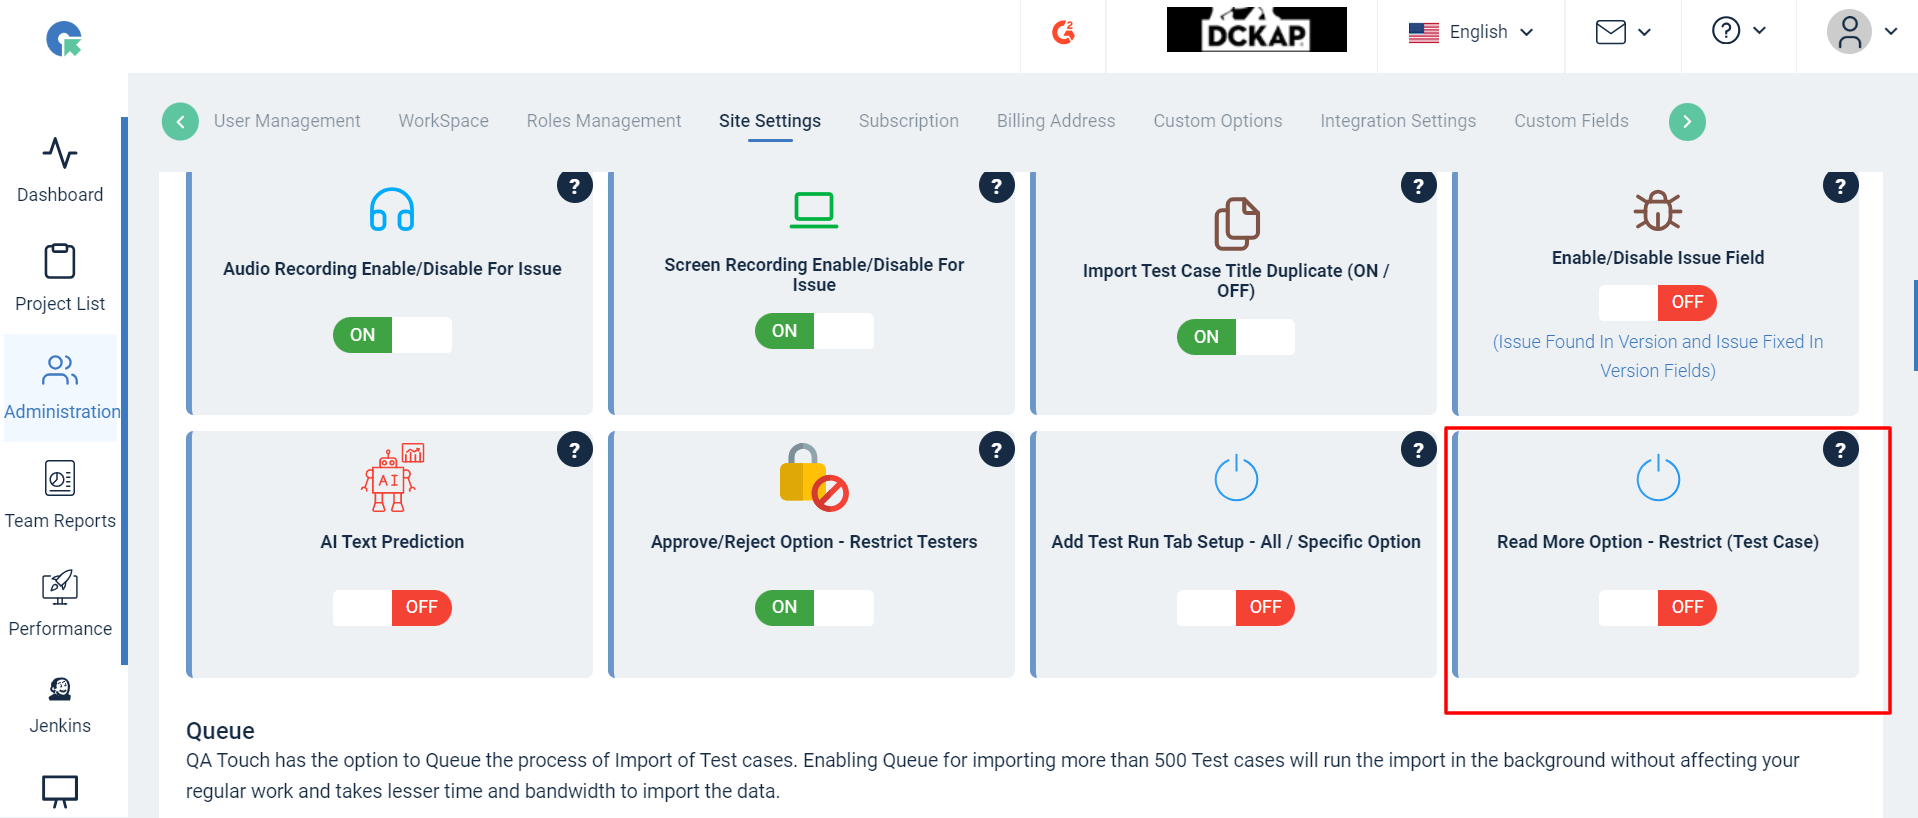
6. Audio Recording Enable/Disable For Issue
The “Audio Recording Enable/Disable for Issue” feature allows users to control the audio recording functionality available when creating or updating issues
-
When this feature is enabled(ON), users have the option to record audio messages while reporting issues. This can be particularly useful in scenarios
-
where users need to provide detailed descriptions or explanations that may be more efficiently conveyed through spoken words rather than written text. when this feature is disabled(OFF), the option to record audio recording won’t be available,
7. Screen Recording Enable/Disable For Issue
The “Screen Recording Enable/Disable for Issue” feature allows users to control whether screen recording functionality is available when creating or updating issues
-
When this feature is enabled(ON), users have the option to record their screen while reporting issues. This can be particularly useful for visually demonstrating bugs or issues and helping developers understand the exact steps to reproduce the problem.
-
On the other hand, when this feature is disabled(OFF), the option to record the screen is not available.
8. Import Test Case Title Duplicate (ON / OFF)
The “Import Test Case Title Duplicate (ON / OFF)” feature allows users to control how duplicate test case titles are handled during the import process
-
When this feature is enabled (ON), duplicate test case titles are allowed during the import process. In such cases, the imported test cases with duplicate titles are added to the project.
-
On the other hand, when this feature is disabled (OFF), it restricts the duplicate test case titles during the import process.
9. Enable/Disable Issue Field
The “Enable/Disable Issue Field” feature allows administrators or users to control the visibility and accessibility of specific fields within an issue.
-
When this feature is enabled (ON), users have access to all fields within the issue form, and they can view, enter, or modify information as needed.
-
Conversely, when this feature is disabled (OFF), certain fields may be hidden.
10. AI Text Prediction
The “AI Text Prediction for Test Cases” feature allows users to enable or disable the use of artificial intelligence-based text prediction when creating or editing test cases
-
When this feature is turned on, the testing tool utilizes AI to suggest text and autofill fields in existing test cases. This can help users save time and improve efficiency by automatically populating commonly used phrases or information.
-
Conversely, when this feature is turned off, the AI text prediction functionality is disabled, and users must manually input all text and information when creating or editing test cases.
11. Approve/Reject Option - Restrict Testers
The “Approve/Reject Option - Restrict Testers” feature allows administrators or users with appropriate permissions to control whether testers can approve or reject test cases.
-
When this feature is enabled(ON), testers can approve or reject test cases
-
Conversely, when this feature is disabled (OFF), testers are restricted from accessing the approve or reject options for test cases. Only users, test managers, or project administrators, are granted access to these options.
12. Add Test Run Tab Setup - All / Specific Option
The “Add Test Run Tab Setup - All / Specific Option” feature allows tab displaying behavior.
- Add Test Run Tab Setup - All / Specific Option
- On: All test cases tab will be active - Default Option
- Off: Specific test cases tab will be active.
13. Read more Option -Restrict Test case
When creating a test case for a “Read More” feature that expands content when clicked. On the Test case page for steps you can Turn ON/OFF the read more option in the site setting.
Enabled (ON): Access to the “Read more” option, limiting users’ ability to view detailed information about test case steps.
Disabled (OFF): The “Read more” option is restricted to users and users can view detailed information about test cases.
14. Enable/Restrict updating Test Case code during drag and drop
Option to configure either freeze/change Test case code while reordering Test cases using drag and drop.
-
On - Will change Test case code while rearranging the test cases using drag and drop.
-
Off - Will not change Test case code while rearranging the test cases using drag and drop.

15. Import Test Cases - Queue
QA Touch has the option to Queue the process of Import of Test cases. Enabling Queue for importing more than 300 Test cases will run the import in the background without affecting your regular work and takes lesser time and bandwidth to import the data.
Follow the steps to Enable Queue for import
-
Go to Administration->Site Settings
-
Enable the option “Enable/Disable Queue for Importing Test Cases”
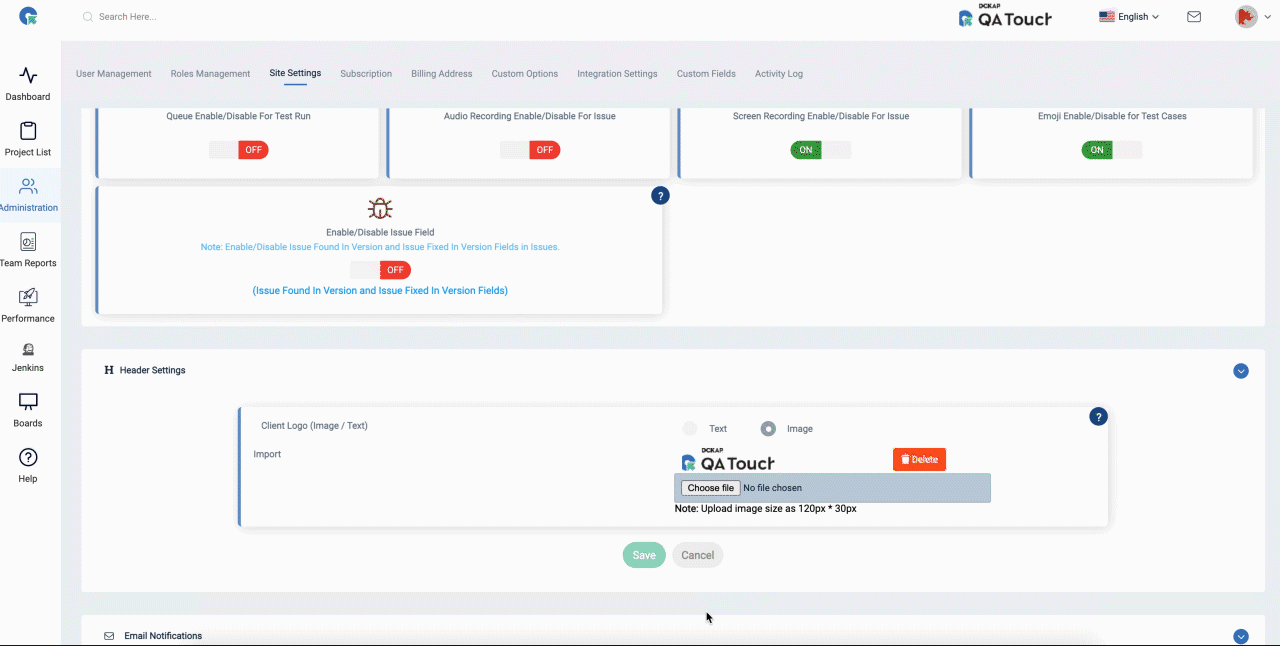
Header Settings
This setting allows the user to choose whether they want to see a text or image for the client logo in the header section.
Email Notification Settings
The setting enables users to select for what activity a user would like to receive notifications in email. You can either enable or disable email notification as a whole or for each activity
- Test Run assigned to a user/assigned by a user
- Issues
- Issue Comments
- Reports You can also edit email sender name and email address.
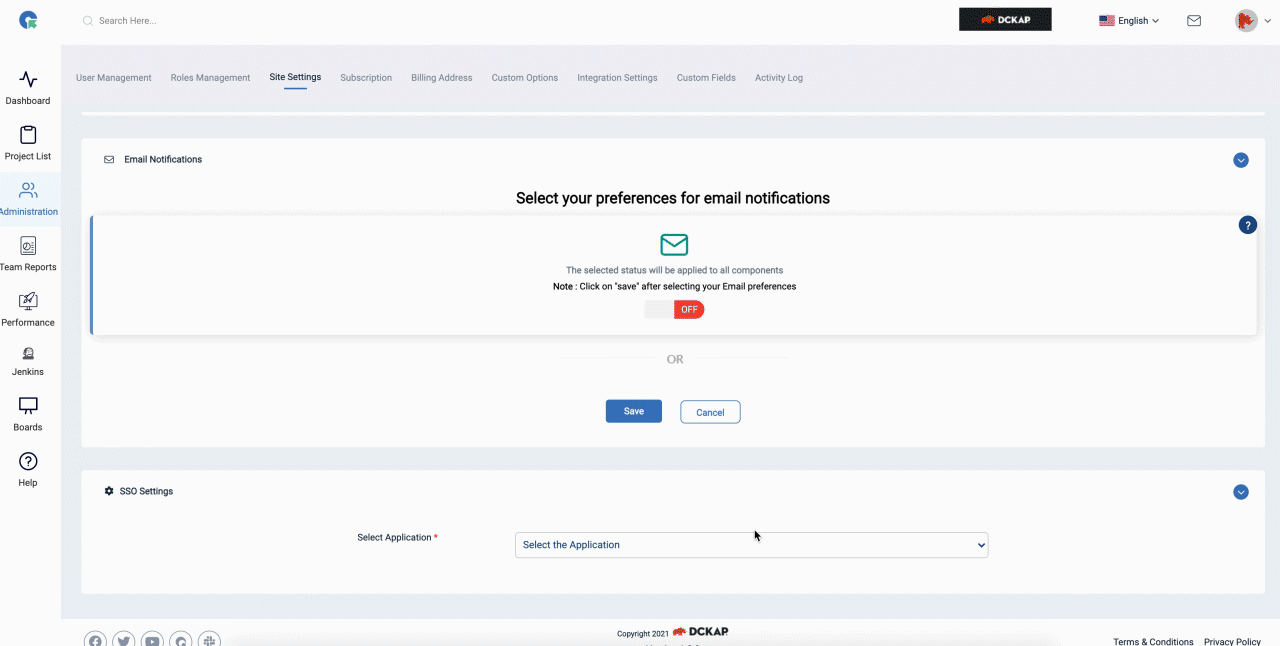
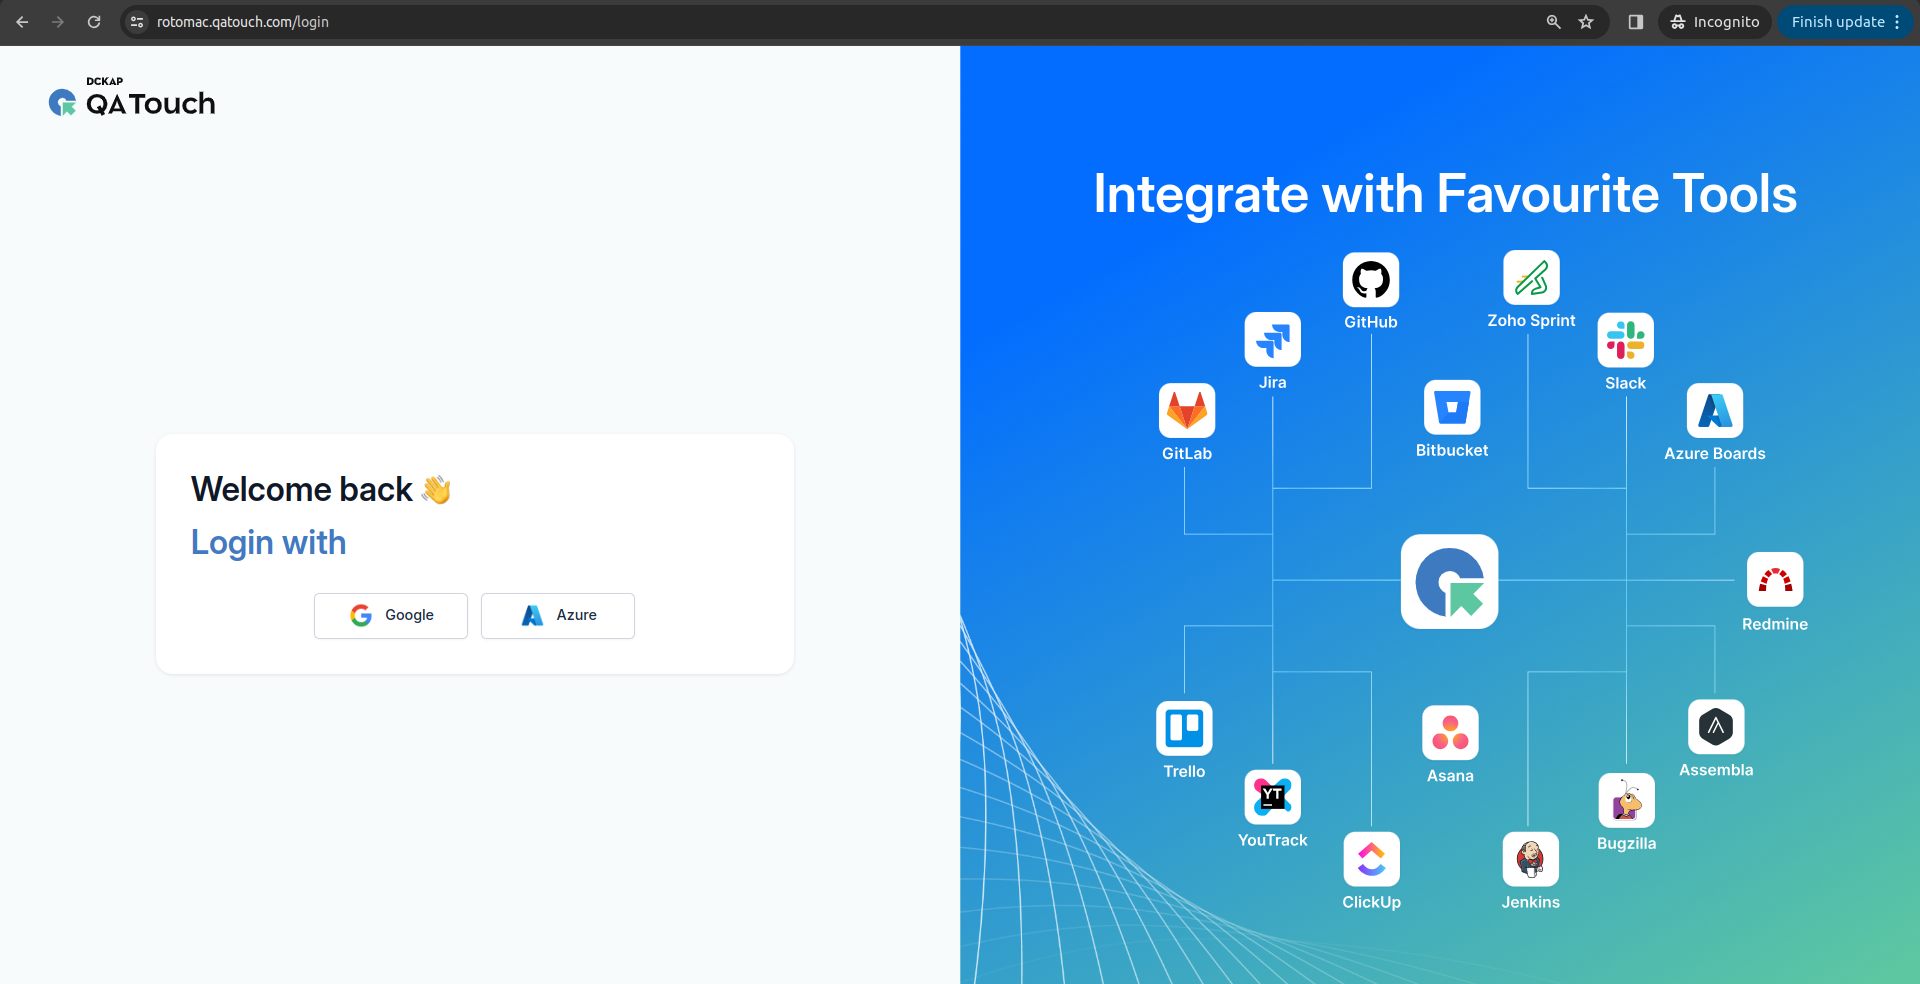
SSO Settings
QA Touch allows administrators to integrate QA Touch with their preferred SSO providers. At Present, QA Touch supports Single Sign-On with Google and OKTA
- To configure SSO for your domain 2 Goto SSO Settings, Click on Administration->SSO Setting
- Select the Application you need to configure
- Enter the Required details(Client ID, Client Secret Key, Redirect Url)
- Click on Save
SSO - Restrict QA Touch login form (Enable / Disable)
The “Enable/Disable SSO - Restrict QA Touch Login Form” feature allows users to control login access via Single Sign-On (SSO) while disabling the standard Username & Password login option. When Enabled (ON):Users can only log in through SSO (e.g., OKTA), ensuring secure and centralized authentication. The standard login form will be restricted, enhancing security and preventing unauthorized access.
When Disabled (OFF):Both SSO and Username & Password login options will be available. This allows flexibility for users to log in either through SSO or with their credentials.

OKTA SSO
We need to create an Okta developer account to create an application setup specific to your QA Touch domain. After activating the developer account, login in the newly created developer account and create APPlication in the below URL: https://developer.okta.com/.
The steps to integrate with SSO are as follows:
- How to Create an OKTA SSO Client Credentials.
- Mapping the Credential detail to QA Touch
Google SSO
- Sign in to your Google Admin console. …
- From the Admin console Home page, go to Security.
- Click Set up single sign-on (SSO) with a third party IdP.
Microsoft Azure Active Directory SSO.
The steps to integrate with SSO are as follows:
How to Create Microsoft Azure SSO API Client Credentials. Mapping the Credential detail to QA Touch
How To Create Microsoft Azure SSO Client Credentials The steps to create an application are mentioned below
Please login to the Microsoft Azure portal Login to your Microsoft Azure account and click on Microsoft Entra ID.