Test cases
Overview
A test case is a specification of the inputs,
execution conditions, testing procedure,
and expected results that define a single test
to be executed to achieve a particular
software testing objective
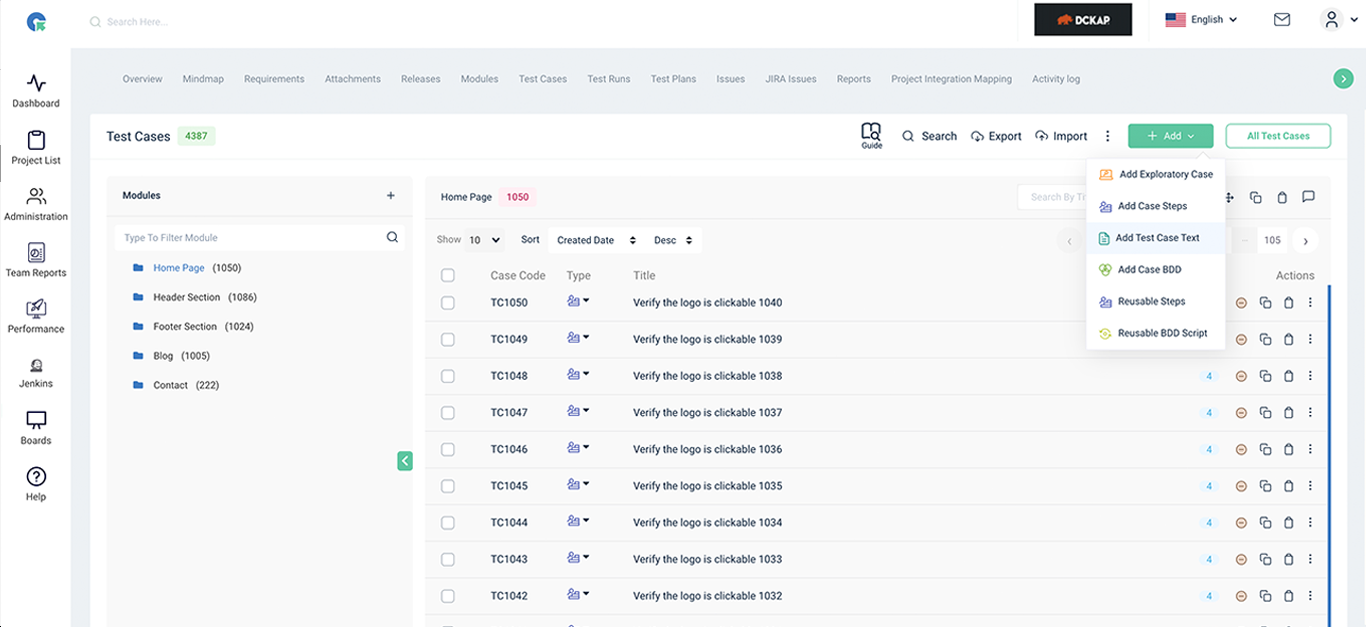
What are all the test case templates available in QA Touch?
There are 4 types of test case templates
available in QA Touch.
- Exploratory Test Case
- Test Case(Text)
- Test Case(Step)
- BDD Test Case
Add Module
- To goto Test Case page, Click on Project->Test Cases Menu
- Click on Add->Module
- Enter Module Name
- Click save
Edit Module
- In Testcase page itself- we can also edit a module name if required
- Click on the edit icon near the module name in the testcase section and save after editing
Add Sub Module
- In the module section we can add submodule if needed by clicking the + icon near the module name.
Case Actions
- Click on action button
- It will show the actions list dropdown
- Here will show the following actions
Sorting the cases By
- Click on Sort dropdown
- Here will show the sorting options.
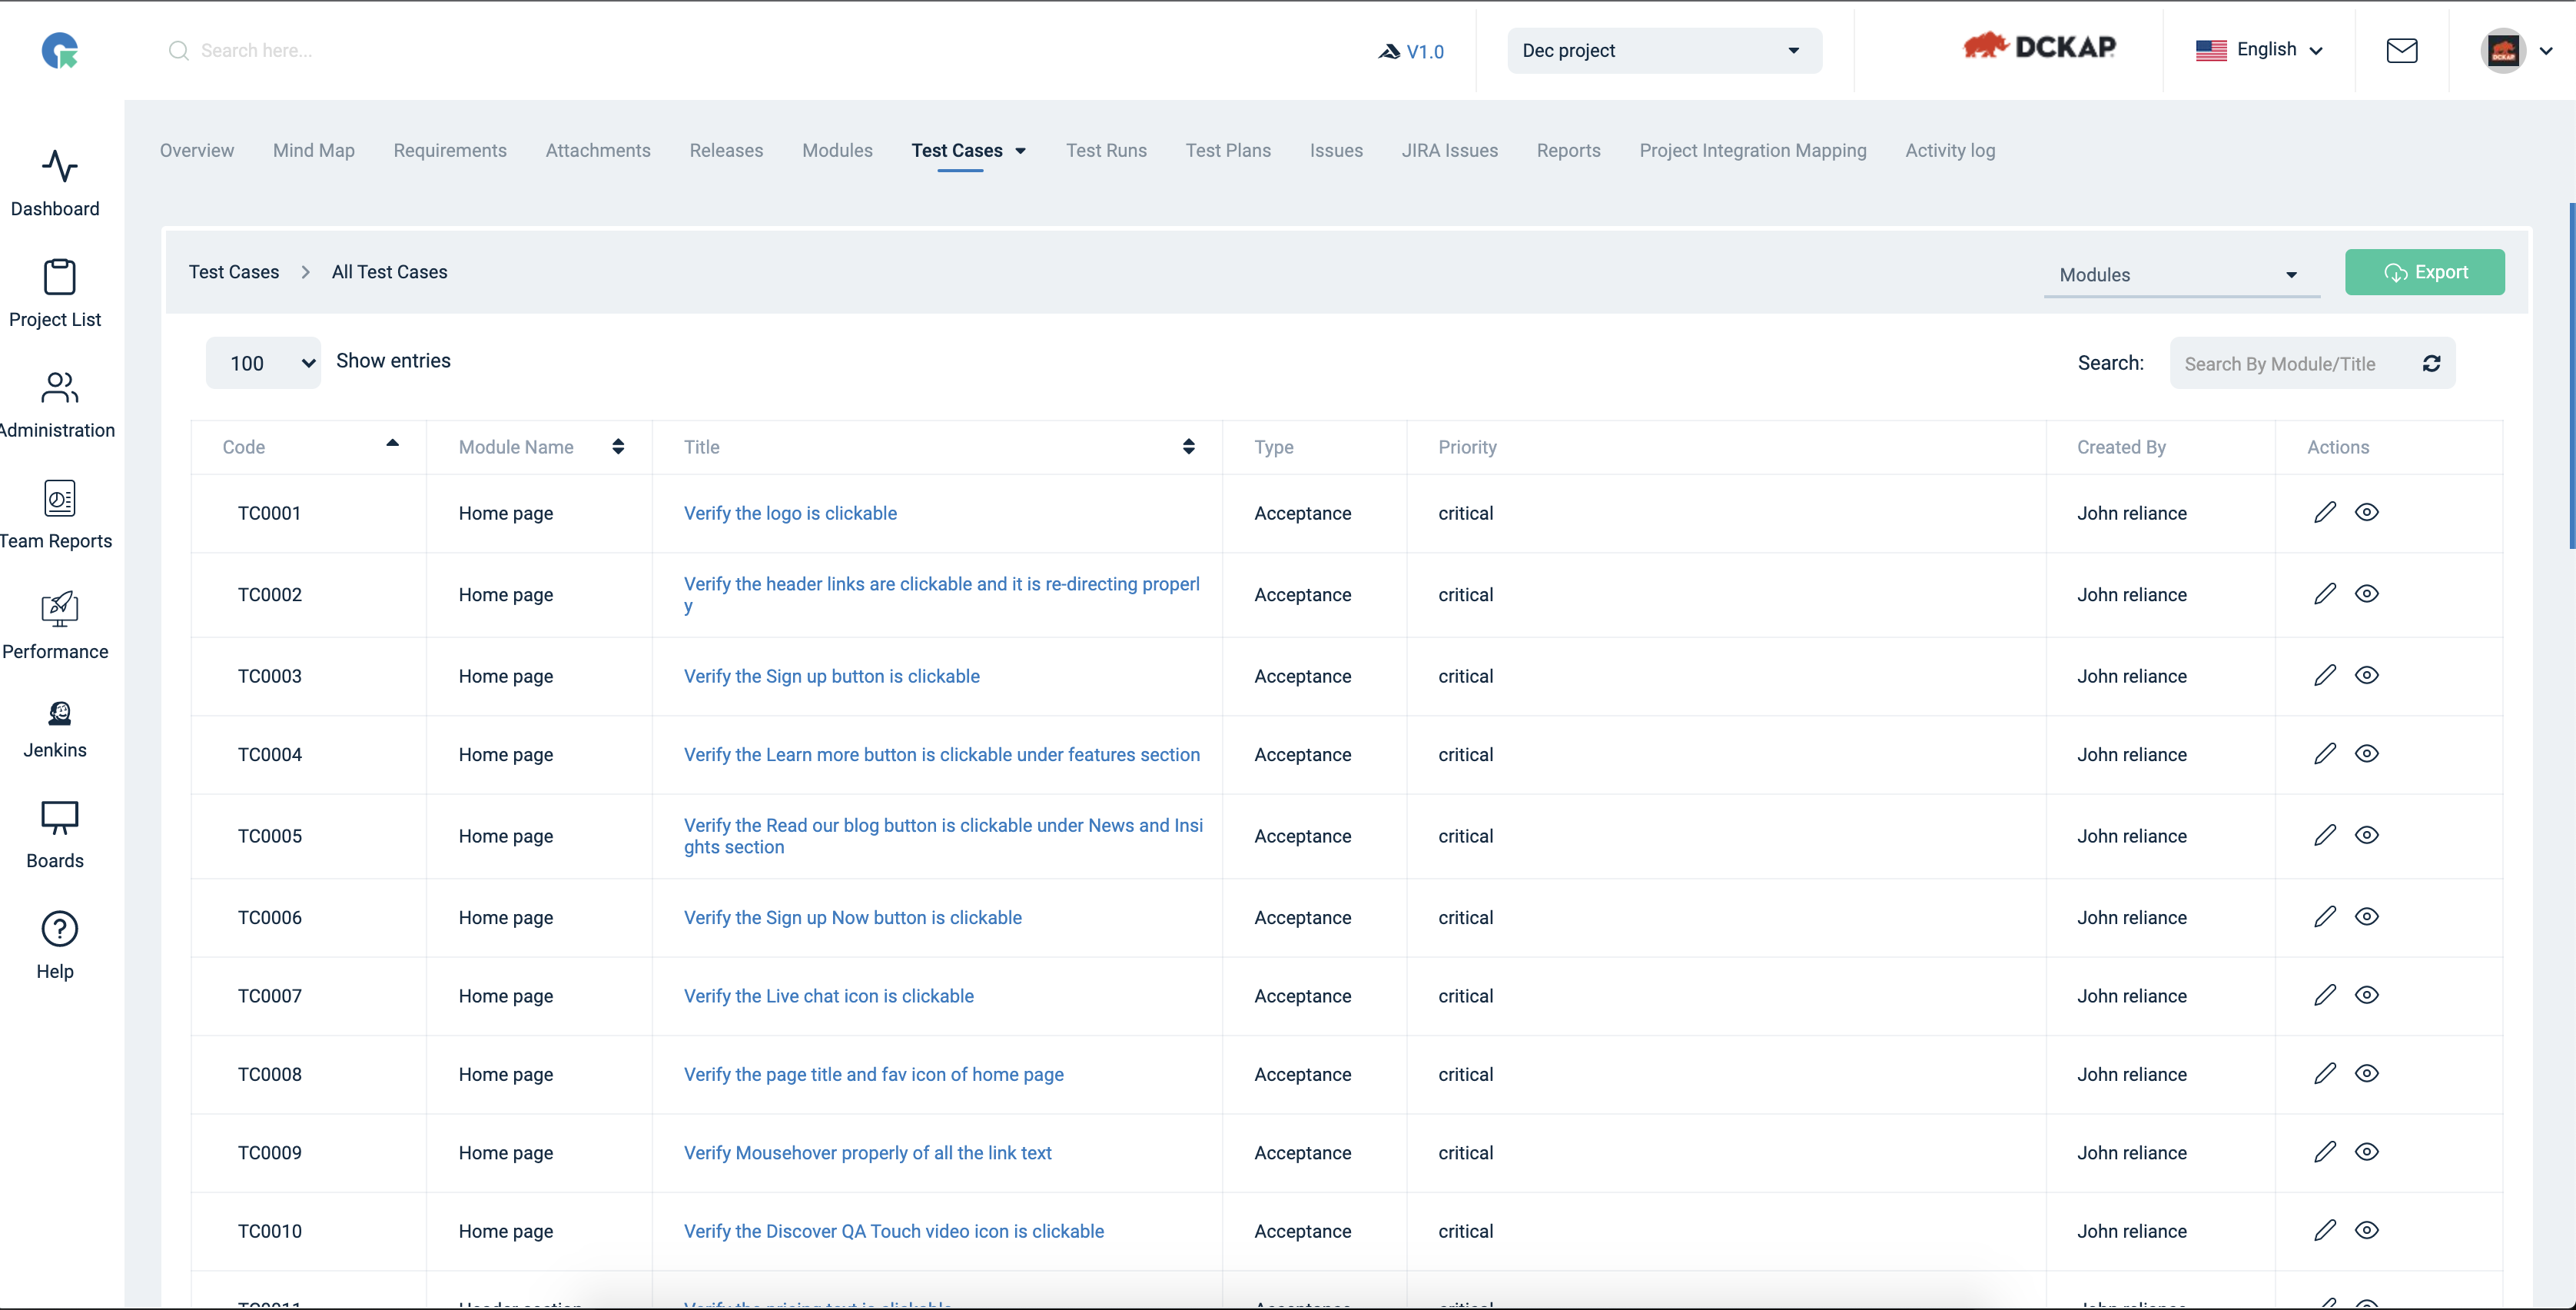
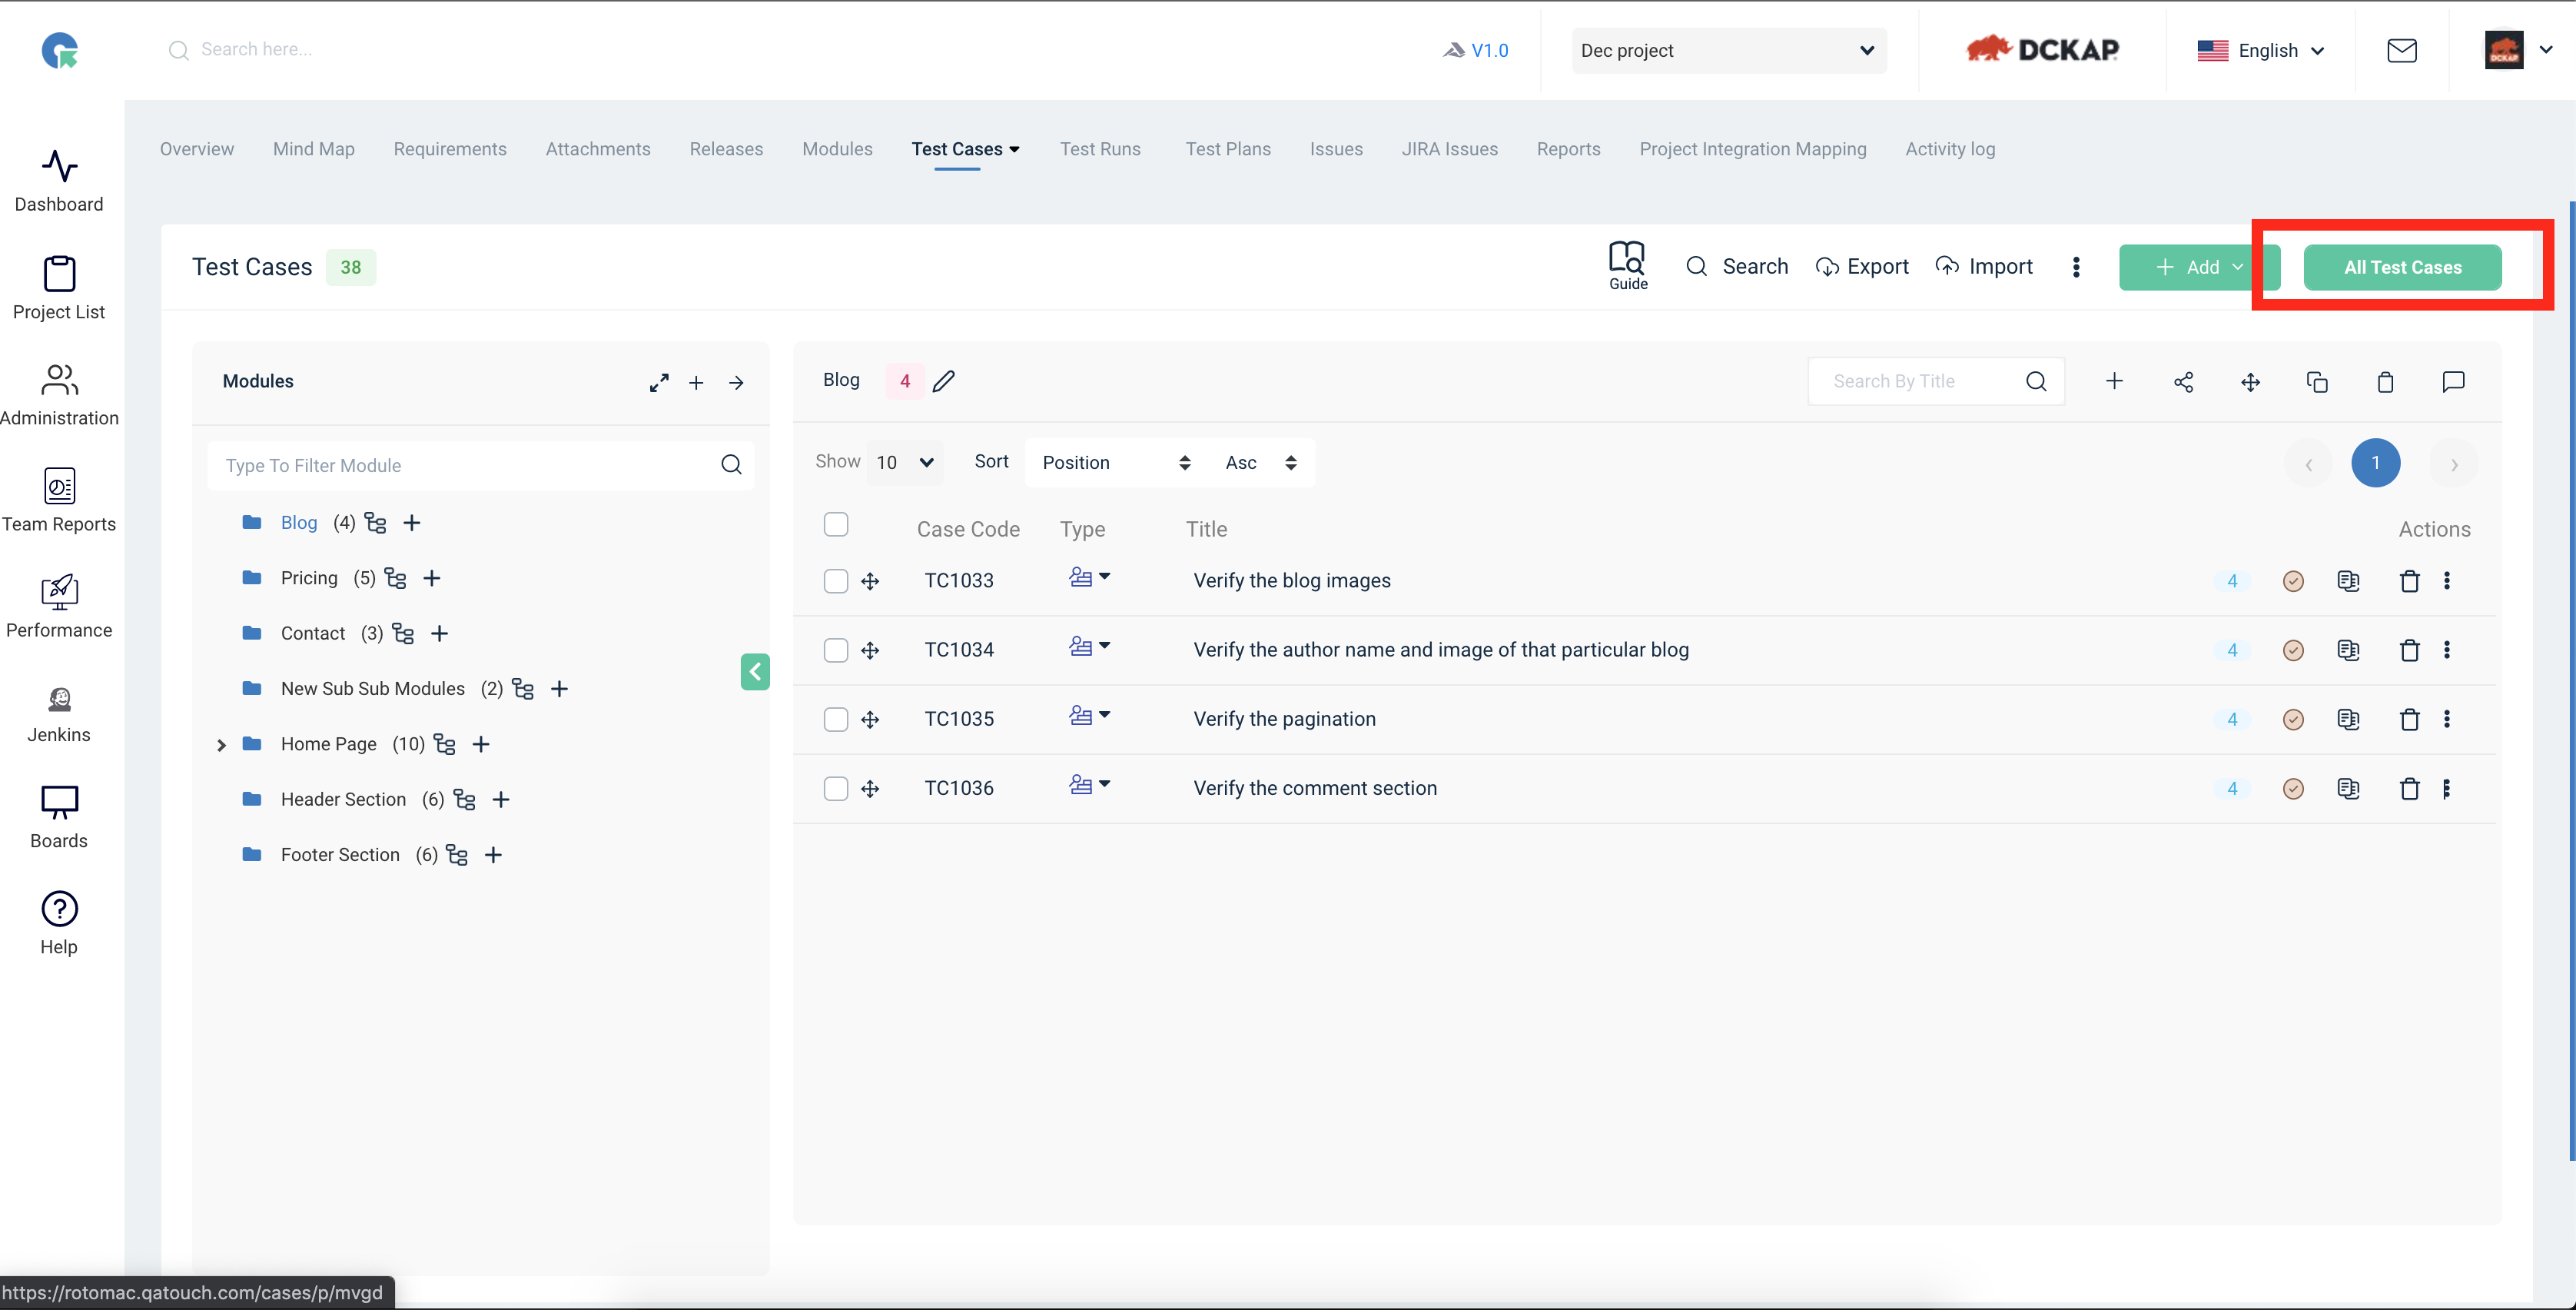
All Testcases
- Click on All testcase button
- It will redirect to All Testcase page
- Here will see the all Testcases
Add Test Case
- To goto Test Case page, Click on Project->Test Cases Menu
- In Case panel, Click on Add and select the template
- Enter Test Case details
- Click save
Add Module from Add case Overlay
- To goto Test Case page, Click on Project->Test Cases Menu
- In Case panel, Click on Add and select the template
- We can also create module by clicking “click here” link in the add test case form itself
Add steps and Add Reusable steps from Add case Overlay
- To goto Test Case page, Click on Project->Test Cases Menu
- In Case panel, Click on Add and select the template
- We can also create module by clicking “click here” link in the add test case form itself
- In Add or Edit test case - under steps tab - we can add Reusable step or new step and click on save
Edit Test Case
- To goto Test Case page, Click on Project->Test Cases Menu
- In Case list, Click on case title
- Click edit button on overlay
- Enter Test Case details
- Click save
View linked issues in Test Case
- The issues linked with a particular test case can be viewed easily in the testcase view page itself under the Linked issues tab.
Archive a Test Case
- To Archive a Test case, Click on delete icon near test case.
- Confirm archive by clicking on “Archive” button in popup.
- The Test case will be archived.
Bulk Archive Test cases
- Check the Test cases which needs to be archived.
- In Bulk action overlay, Click on Delete all.
- Click Archive button in popup.
- All the selected Test cases will be archived.
Revert back archived Test case
- In Test case list page, Click on Archive icon.
- Check the Test cases which needs to be reverted back.
- Click on Revert back button and confirm.
Add BDD Test Case
- To goto Test Case page, Click on Project->Test Cases Menu
- In the Test Cases page, Click on Add->Add Case BDD
- Select the Module
- Enter Test Case details
- Add BDD Script
- And, Click save
Clone Test Case
- Click on "Clone" icon in Test case List
- Update the Test case title
- Click Save
Approve/Reject Test Cases
- Click on the Approve icon in the test case list
- Enter the comment(optional)
- Click on Approve/Reject
Approve/Reject Test Cases History
- Click on the dots (Actions) near the test case.
- Click on Approval History.
- You can view the history of approvals for that particular test case.
To Copy a Module of Test Cases
- In Module pane, Click on "Copy" Button
- Select whether to copy Within this project (or) To other project
- Select the destination module (or) Enter a new module
- Choose whether to Copy Entire Module (or) Copy Specific TestCases
- To Copy Specific Test Cases select the Test cases and
- Click on Copy
To Copy All the Test cases in a project
- Click on Actions->Copy
- Select the Destination Project
- Choose the option Copy all Modules with Test Cases (or) Copy based on Module (or)
- Copy based on Test Cases
- To Copy based on Test Cases select the Test cases and
- Click on Copy
Export Test Cases
1. Goto Test case list page by Clicking on Quick-> Test Case Count in Project card
2. Click the Export text button.
3. Click on any format in the Export dropdown.
Module export
1. Goto Test case list page by Clicking on Quick-> Test Case Count in Project card
2. Click the Share icon.
3.Click on Export option in dropdown.
Module expand
1. Goto Test case list page by Clicking on Quick-> Test Case Count in Project card
2. Click the Expand icon in the Module section.
3. Modules with their respective sub modules will be shown.
Module Drag and Drop
1. Goto Test case list page by Clicking on Quick-> Test Case Count in Project card
2. Click and hold the Module name in the module card.
3. Now you can drag the module and drop it anywhere in the module box.
Import Test Cases
1. Goto Test case List page and navigate to import page by clicking on Import
2. Choose the Test case Template ( Test Case (Text) / Test Case (Steps) / Test Case (Custom field))
3. Upload the file(CSV, XLS, XLSX) to import
4. Map the fields in your file with QA Touch Test case fields. Module name and Test case title are mandatory.
5. Click on Import button
Import Test Cases - Queue
QA Touch has the option to Queue the process of Import of Test cases. Enabling Queue for importing more than 300 Test cases will run the import in the background without affecting your regular work and takes lesser time and bandwidth to import the data.
Follow the steps to Enable Queue for import
1. Go to Administration->Site Settings
2. Enable the option "Enable/Disable Queue for Importing Test Cases"
Link Test Cases
QA Touch provides the option to Link a Test Case with its Related Test case.
A Test case can be linked with another
while Adding the test case or can be linked by editing it.
1. Goto Test Case Add/Edit
2. In Link Cases tab, Select the module
3. Choose the related Test cases
4. Click on Save
Test Case - Step Overlay
To ease the access of steps in a test case - we implemented an overlay design by which you can easily check the steps for the test cases.
Click on the button near a test case for which you want to see its steps
Step overlay will be displayed
You can also add new steps with that overlay itself
To Move a Module of Test Cases
- In Module pane, Click on "Move" Button
- Select whether to move Within this project (or) To other projects
- Select the destination module (or) Enter a new module
- Choose whether to Move Entire Module (or) Move Specific TestCases
- To Move Specific Test Cases select the Test cases and
- Click on Move
To Move All the Test cases in a project
- Click on Actions->Move
- Select the Destination Project
- Choose between the options All Test Cases (or) Specific Test Cases
- To Move Specific Test Cases, select the Test cases and
- Click on Move
Bulk Update Testcase
- Select the Test cases you need to update.
- Now appear the Bulk Action panel,
- In Actions panel, select the value for the field to bulk update
- (Note: The fields including(Type, Mode, Priority, Approval Status,
Test Suite, Tags, and all Custom Fields) can be updated)
Share Testcase
QA Touch provides a suite of options to share test cases
- Export Test Cases(CSV, XLS,XLSX, PDF)
- Share by Email(Module-wise)
- Copy Link(Module-wise)
Data Summary Report
Summary of Number of data logged into QA Touch in a given time span (Number of Test Cases, Test runs, Requirements and Issues)
Export Testcase
In the Test Case page, Click on Export Button
Select the format(CSV, XLS,XLSX, PDF) to download
Share by Email
In Module pane, Click on Share
Choose the Mail option
Enter the Email id(For multiple email ids Enter ids separated by comma)
Click on Share
Share by Link
In Module pane, Click on Share
Choose Link option
The link will be copied to your clipboard automatically
Share the copied Link
Stepwise Execution
Stepwise execution is the sequential execution of the steps of the test cases.
This feature is available only to the test cases which are created with the Test case(Steps) template.
- Login in the product.
- Access Test cases.
- Create test cases with the Test Case(Steps) template.
Or
- Import the test cases with the Test Case(Steps) template.
- Create Test Run(Give help link of Create Test Run).
- Click the newly created test run.
- You will be able to update result to test cases each step.
- When you update all the test case steps passed, the test case status
will become passed automatically.
- When you update any of the test case step failed, the test case status
will become failed automatically.
Search Test Cases
Navigate to the Test Cases Search to Filter Test cases based on the various Test Case fields
- Click on the Search icon in the Test case list page.
- Here Test cases can be filtered based on case Id, case Title, Tag, Type, Priority, Module, Steps,
Description, Created User, Test suite, Mode, Status and Custom Fields.
Filter Test Cases and Export
When the test cases are filtered with required fields. Those test cases can be exported.
Click on the Export button and choose the format to export filtered cases.
QA Touch allows exporting test cases by 4 formats(XLS, XLSX, CSV, PDF)
Filter Test Cases & Bulk Update
Fields including Type, Priority, Test Suite and Custom Fields can be updated in bulk
for the selected Search Results.
- Filter Test Cases by entering the value in the required field.
- Select the Test cases those need to be updated in search results.
- Now select the value of the field
- The value will be updated for all the selected Test cases.
Filter Test Cases & Create Test Run
To create a Test run with filtered cases
- Filter Test Cases by entering the value in the required fields
- Check the Test cases those need to be added to Test Run
- Click on the Create Test Run button
- Enter Test Run title
- Choose Release Name and Select a User in Assigned To
- Click on Save
Filter Test Cases & Delete
- Filter Test Cases by entering the value in the required field.
- Select the Test cases those need to be deleted
- Click on the Delete button
Link Requirements with Test Case
- Go to the Test case list page
- Click on Actions⋮-> Edit
- In the Link Requirements tab, Choose the requirements
- Click on Save
Unlink Requirements
- Go to the Test case list page
- Click on Actions⋮-> Edit
- In the Edit Test case overlay, Choose the Linked Requirements tab
- If we need unselect all - Click the requirement list header checkbox.
- If we unselect the specific requirements - click the requirement checkbox.
Link Jira Requirements with Test Case
- Go to the Test case list page
- Click on Actions⋮-> Link Jira Requirements
- In the Link Jira Requirements Overlay, Choose the requirements
- Click on Link
Link Gitlab Requirements with Test Case
- Go to the Test case list page
- Click on Actions⋮-> Link Gitlab Requirements
- In the Link Gitlab Requirements Overlay, Choose the requirements
- Click on Link
Share Test case - Copy Link
To share a individual test case
- Go to Test case list, Click on Actions icon near Test case title
- Click Copy Link option
- Now the shareable link for selected Test case will be copied
(Note: The link works only for authenticated user after login)
Test case Outline
Outline is a statistical view of Test Cases with filter by options(Created By, Test Suite, Module and Time Span)