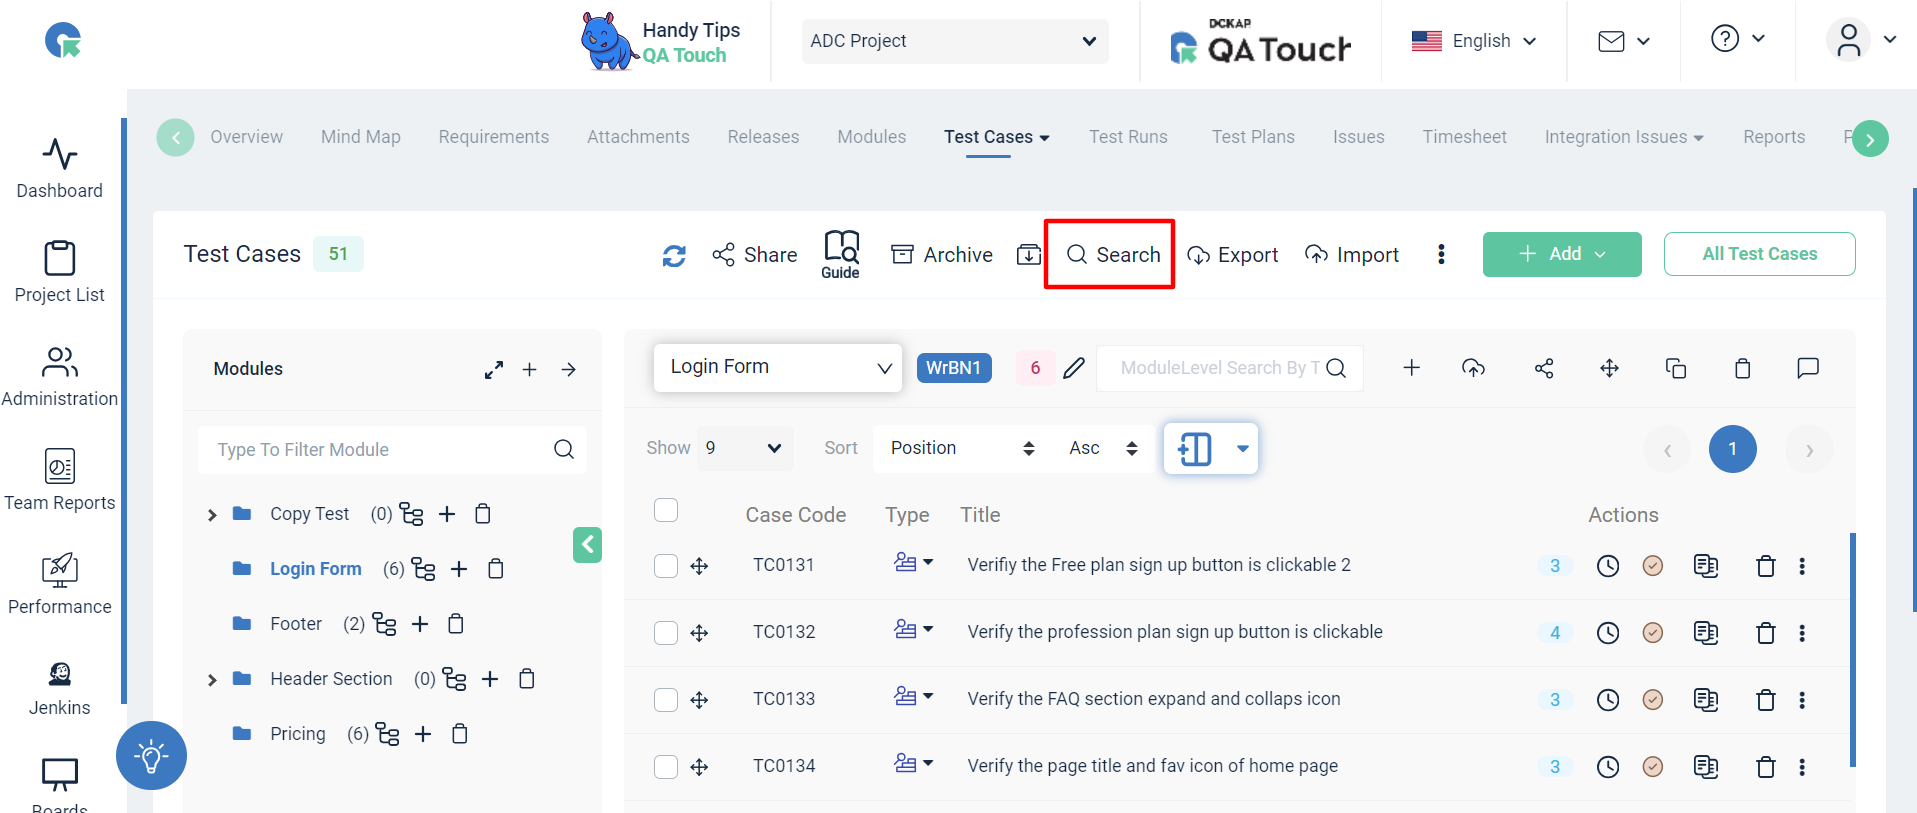
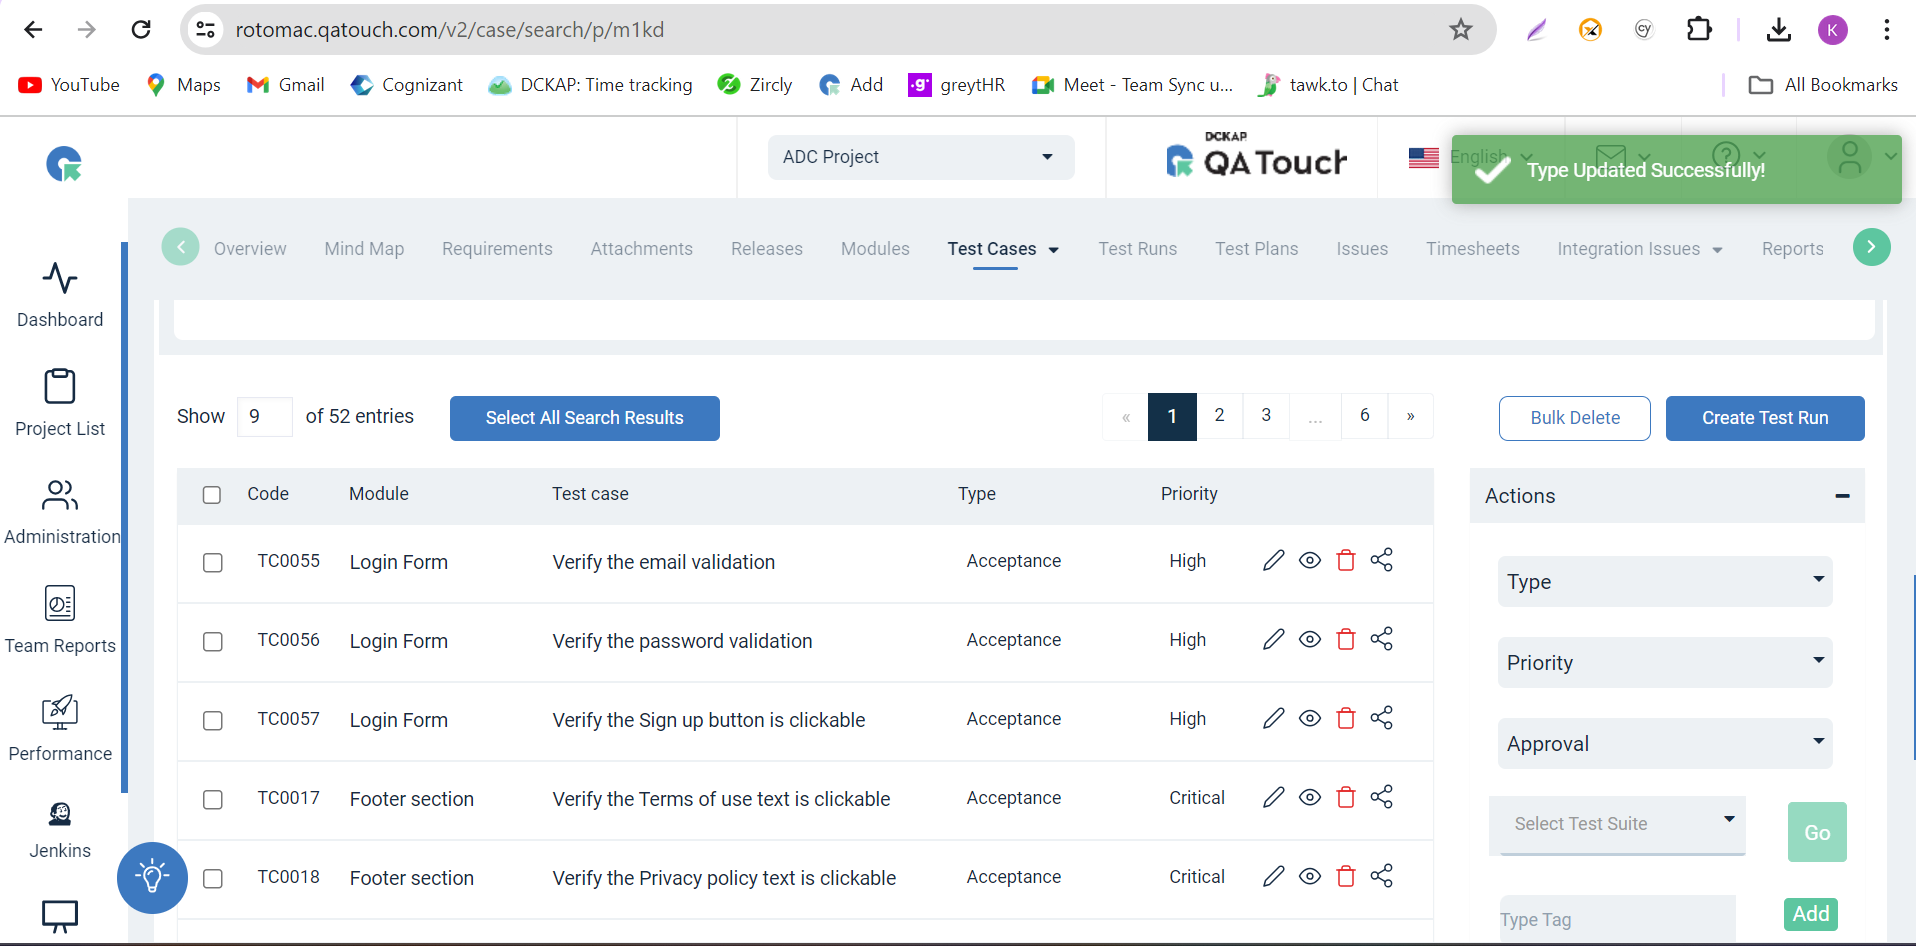
Search
- Test Cases
- Overview
- How to Filter a Test Case ?
- How to Apply Filters ?
- How to Reset Filter ?
- How to Save Filter ?
- How to Export Filter Results ?
- How to Bulk Update Testcase Search ?
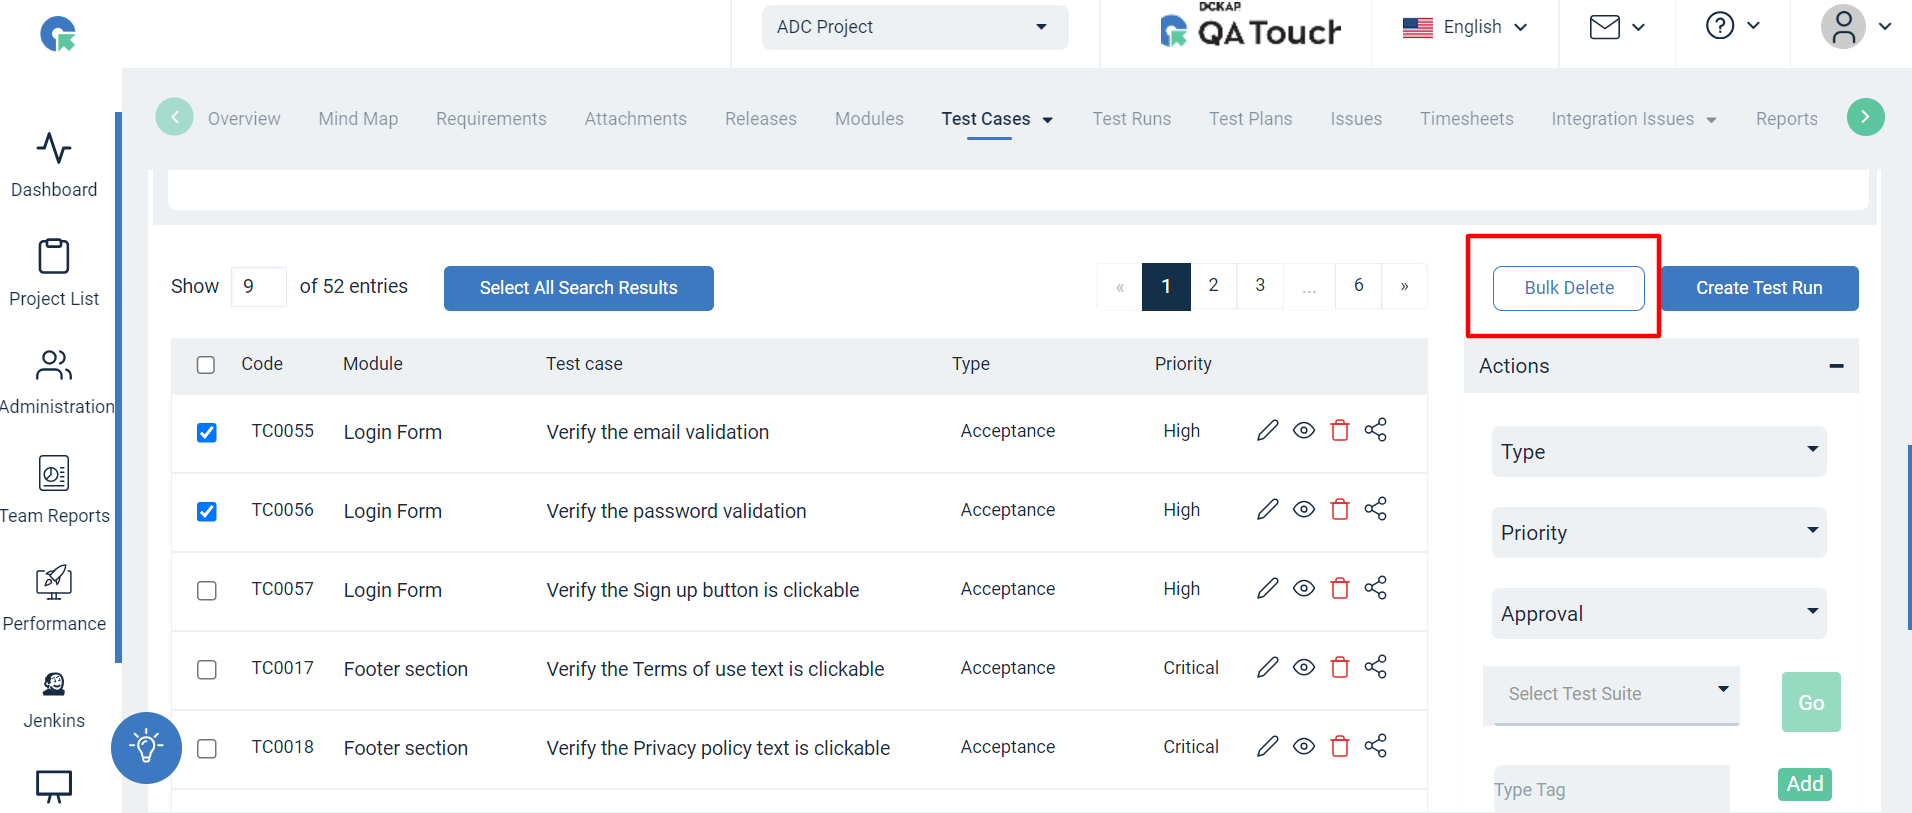
- How to Bulk Delete Testcase Search ?
- How to create a Test run from the test case search page ?
Overview
Users could quickly locate specific test cases by entering keywords or phrases from the test case titles into a search bar. This functionality would be particularly useful in scenarios where a large number of test cases exist, allowing users to find and access relevant tests with ease. Additionally, enabling users to search test cases based on specific criteria such as
Tags, Type, Priority, Template Type, Created By, Test Suite, Mode, and Status.
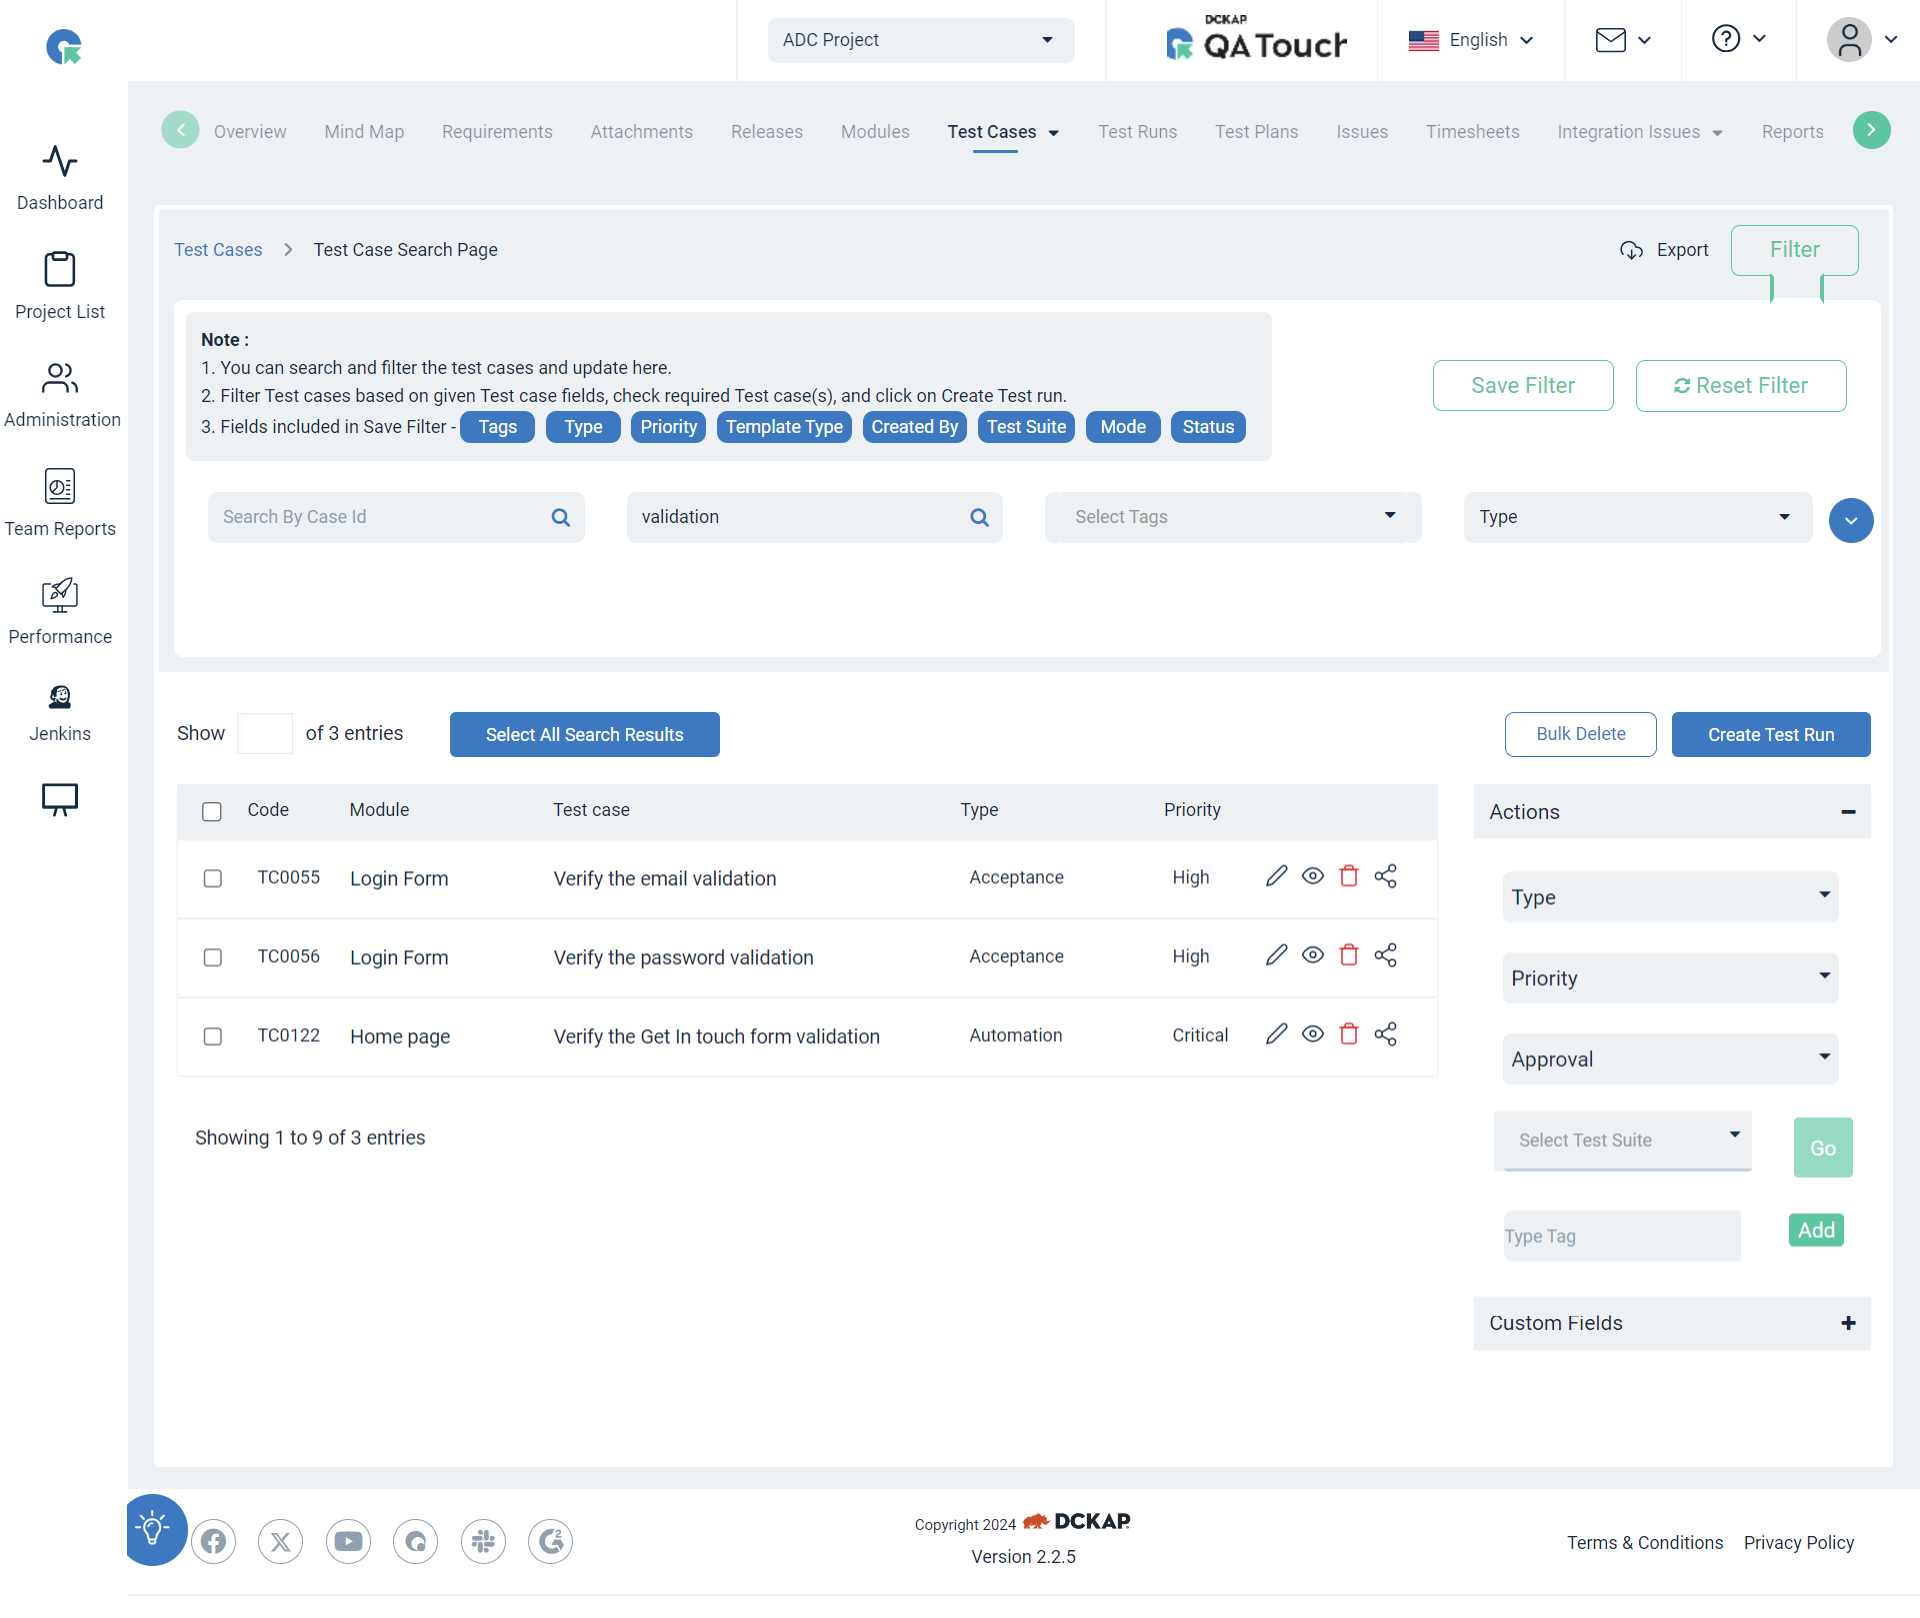
How to Filter a Test Case ?
- Go to the Test case page, and select the search option.
- Select Filter Criteria: Choose the criteria you want to filter by.
Common filter criteria include:
- Status:Filter test cases by their current status (e.g., "Approved," "Rejected," "Re-verify").
- Type: Filter test cases based on their selected Type (e.g., "User Acceptance," "Automation," "system under test").
- Test suite: Filter test cases based on their Test suite(e.g., "smoke suite," "regression suite," "sanity suite").
- Priority: Filter test cases based on their priority level (e.g., "High," "Medium," "Low").
- Tags: Filter test cases that are tagged with specific keywords or labels.
- Creation By: Filter test cases based on who created the test case.
- Custom Fields: Filter test cases based on custom fields you've defined, such as "Component," "Module," or "Release Version."
How to Apply Filters ?
Once you've defined your filter criteria, apply the filters to see the updated list of test cases that meet the specified conditions. By following these steps, you can effectively filter test cases
How to Reset Filter ?
The "reset filter" option would allow users to quickly revert to the default state or clear any applied filters, making it easier to manage and navigate through large sets of data or content. It enhances user experience by providing a straightforward way to reset the view without having to manually deselect individual filters.
How to Save Filter ?
With this option, users can save their frequently used or complex filter configurations for future use. It simplifies the process of reapplying specific filters, especially for tasks that require the same filtering criteria repeatedly. Users can manage multiple saved filters, offering flexibility and customization to suit their workflow preferences.
Note:Fields included in Save Filter - Tags, Type, Priority, Template Type, Created By, Test Suite, Mode, and Status.

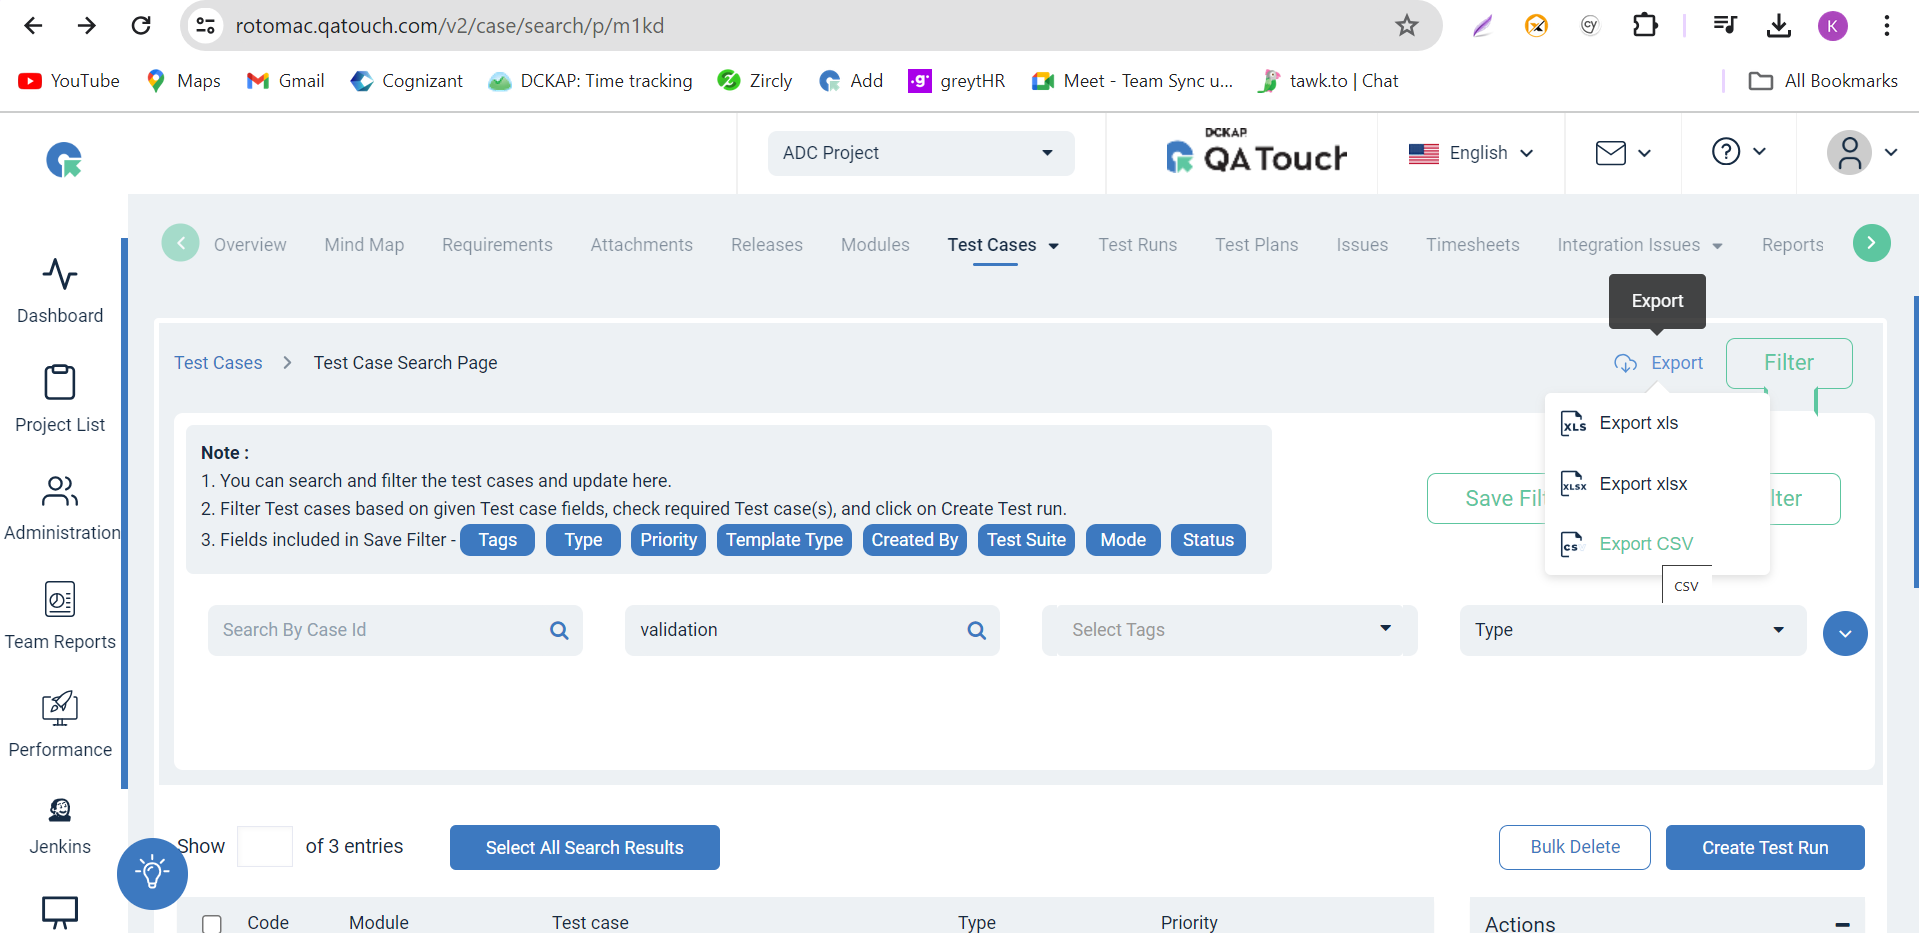
How to Export Filter Results ?
- Apply Filters: First, apply the desired filters to narrow down the test cases based on your criteria.
- Access Export Option: Once the filters are applied and the desired test cases are displayed, locate the "Export" option.
- Select Export Format: Choose the desired export format from the available options. Common export formats include CSV (Comma-Separated Values), XLS, XLSX
Note:
- Ensure that the filtered results are accurately displayed before initiating the export process.
- Depending on the size of the filtered results and the selected export format, the export process may take some time to complete.
How to Bulk Update Testcase Search ?
Performing bulk updates of test cases is a handy feature, especially when you need to make similar changes to multiple test cases at once. Follow the below steps on how to execute bulk updates:
- Select Test Cases: Identify the test cases you want to update.
- Specify Update Fields: Once you've accessed the bulk update feature, you'll typically see fields or options to specify the updates you want to make.
- Execute Bulk Update: Once you're satisfied with the updates, proceed to execute the bulk update. This action will apply the specified changes to all selected test cases simultaneously.
- Confirmation: After the bulk update is complete, you may receive a confirmation message indicating the number of test cases that were successfully updated.
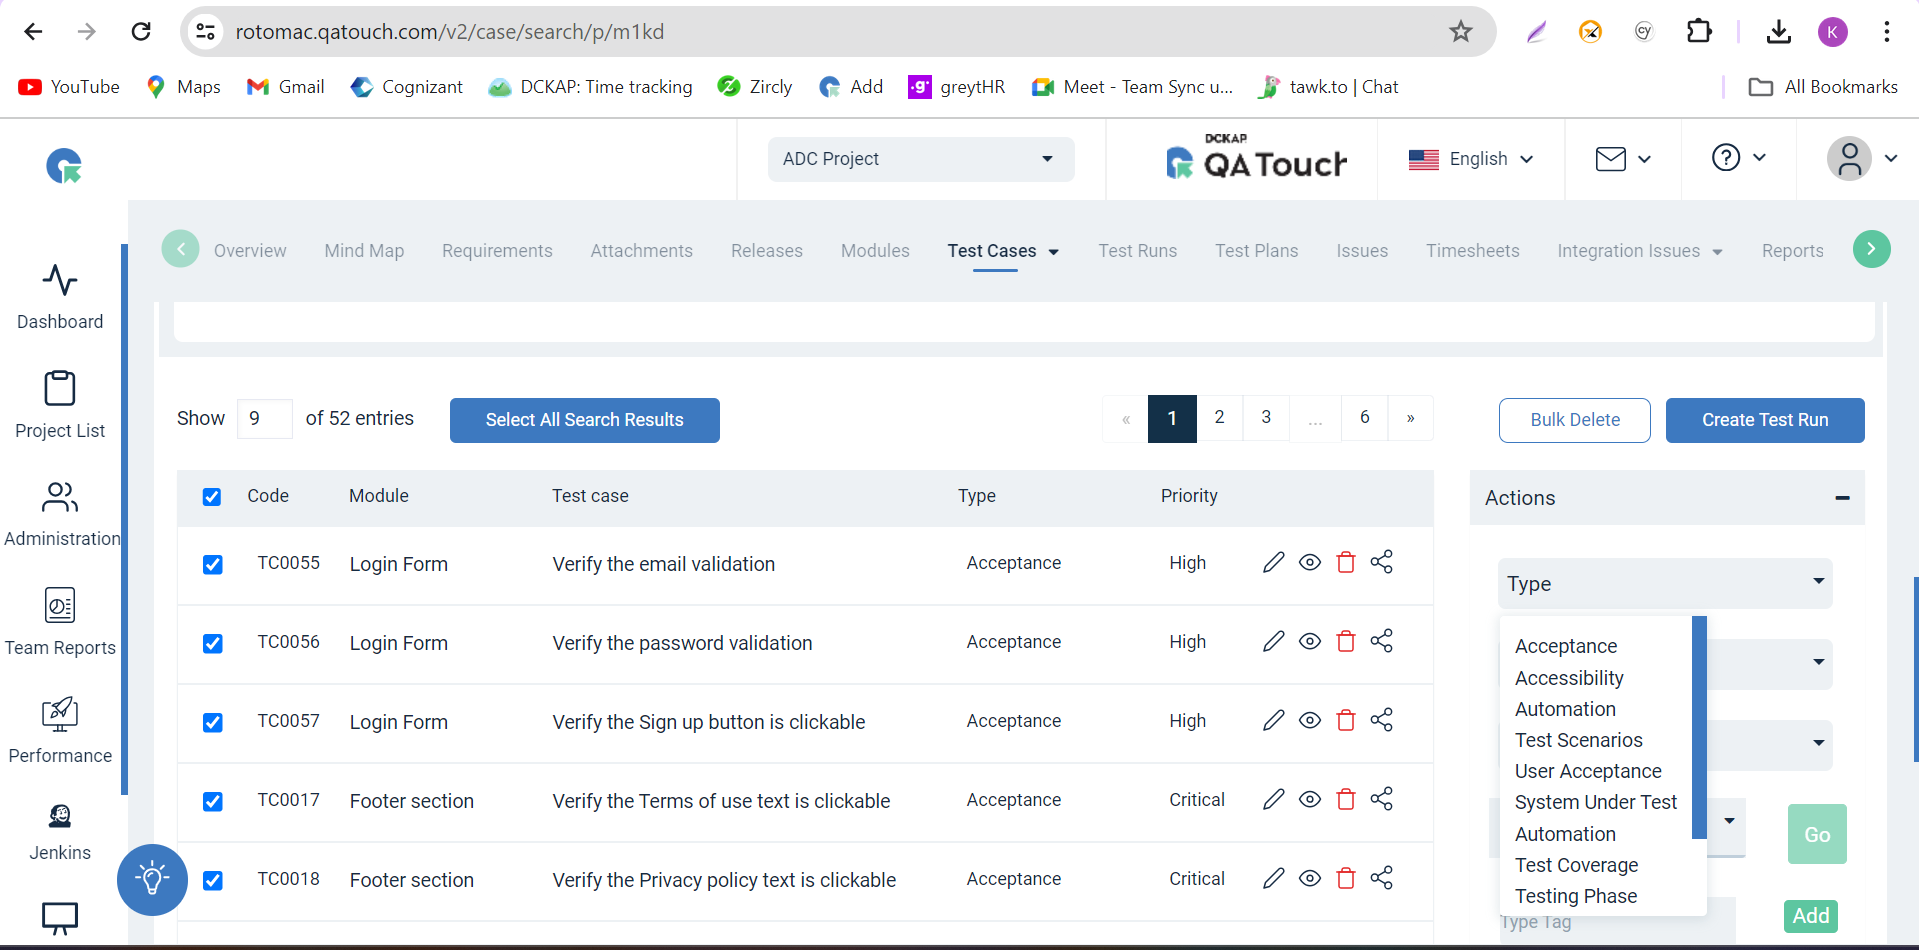
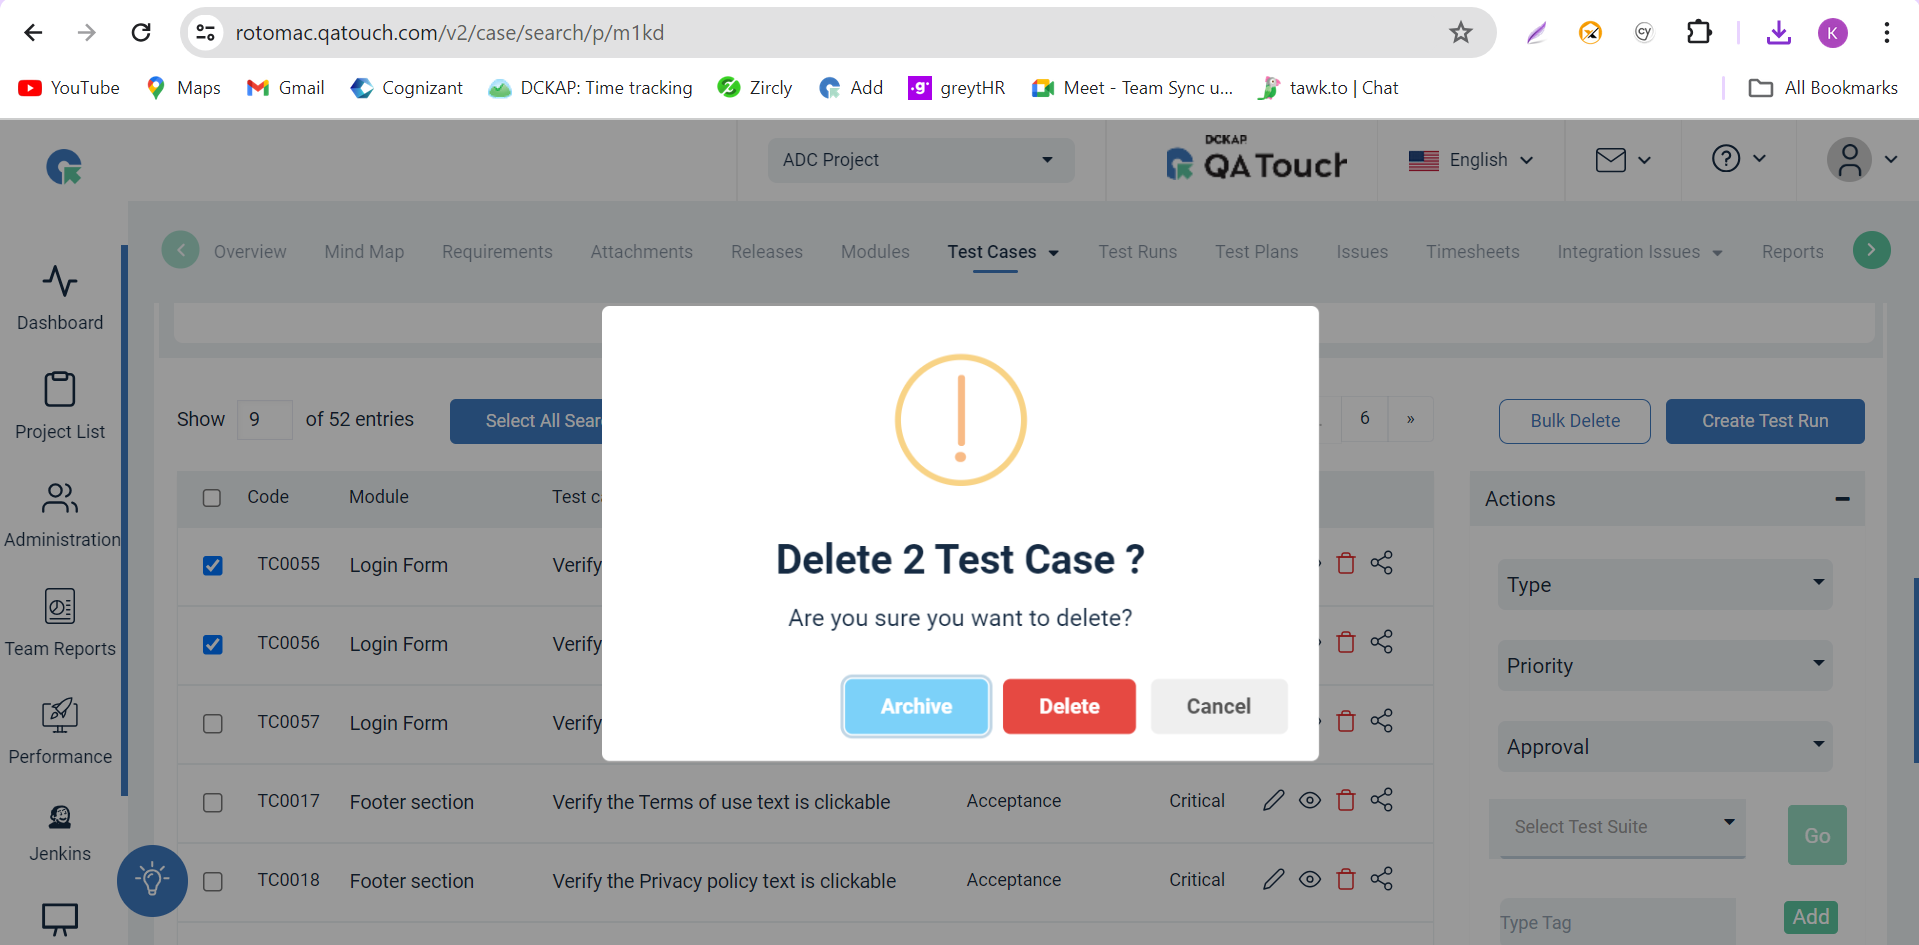
How to Bulk Delete Testcase Search ?
- Select Test Cases: Identify the test cases you want to delete. You can select multiple test cases by ticking the checkboxes next to their names.
- Choose Bulk Delete Option: Look for a "Bulk Delete," option and click.
- Confirmation: Before proceeding with the deletion, may prompt you to confirm your action. This is to prevent accidental deletions, especially when dealing with multiple test cases. confirm that you want to delete the selected test cases. This action is irreversible, so ensure that you've selected the correct test cases for deletion.
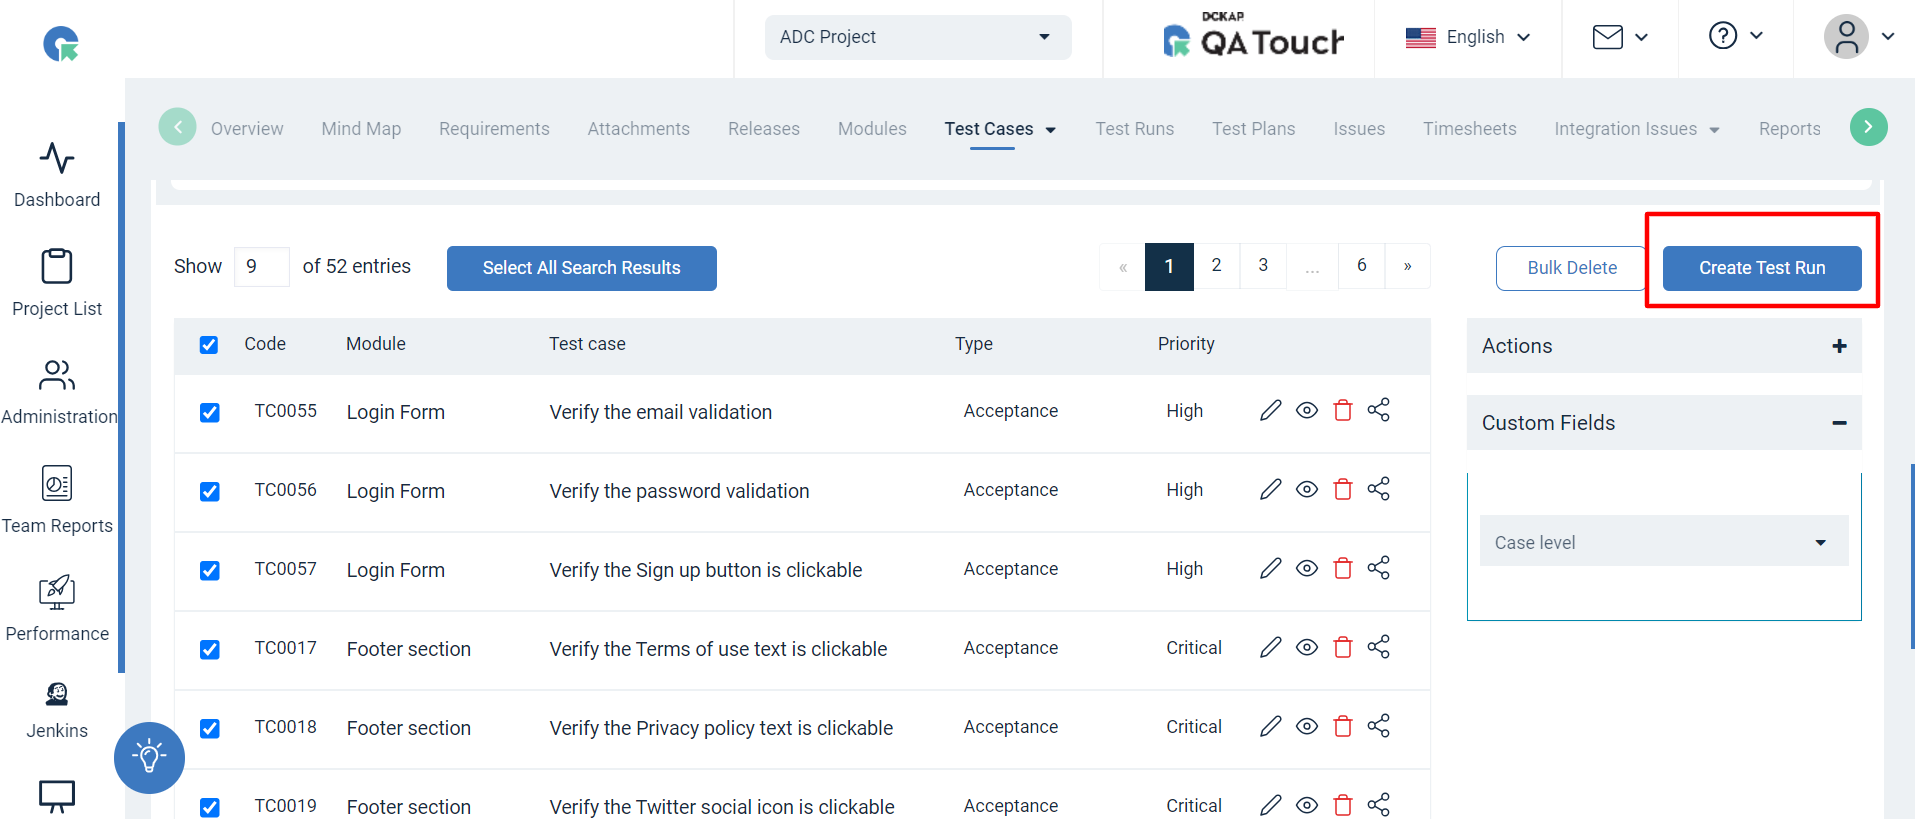
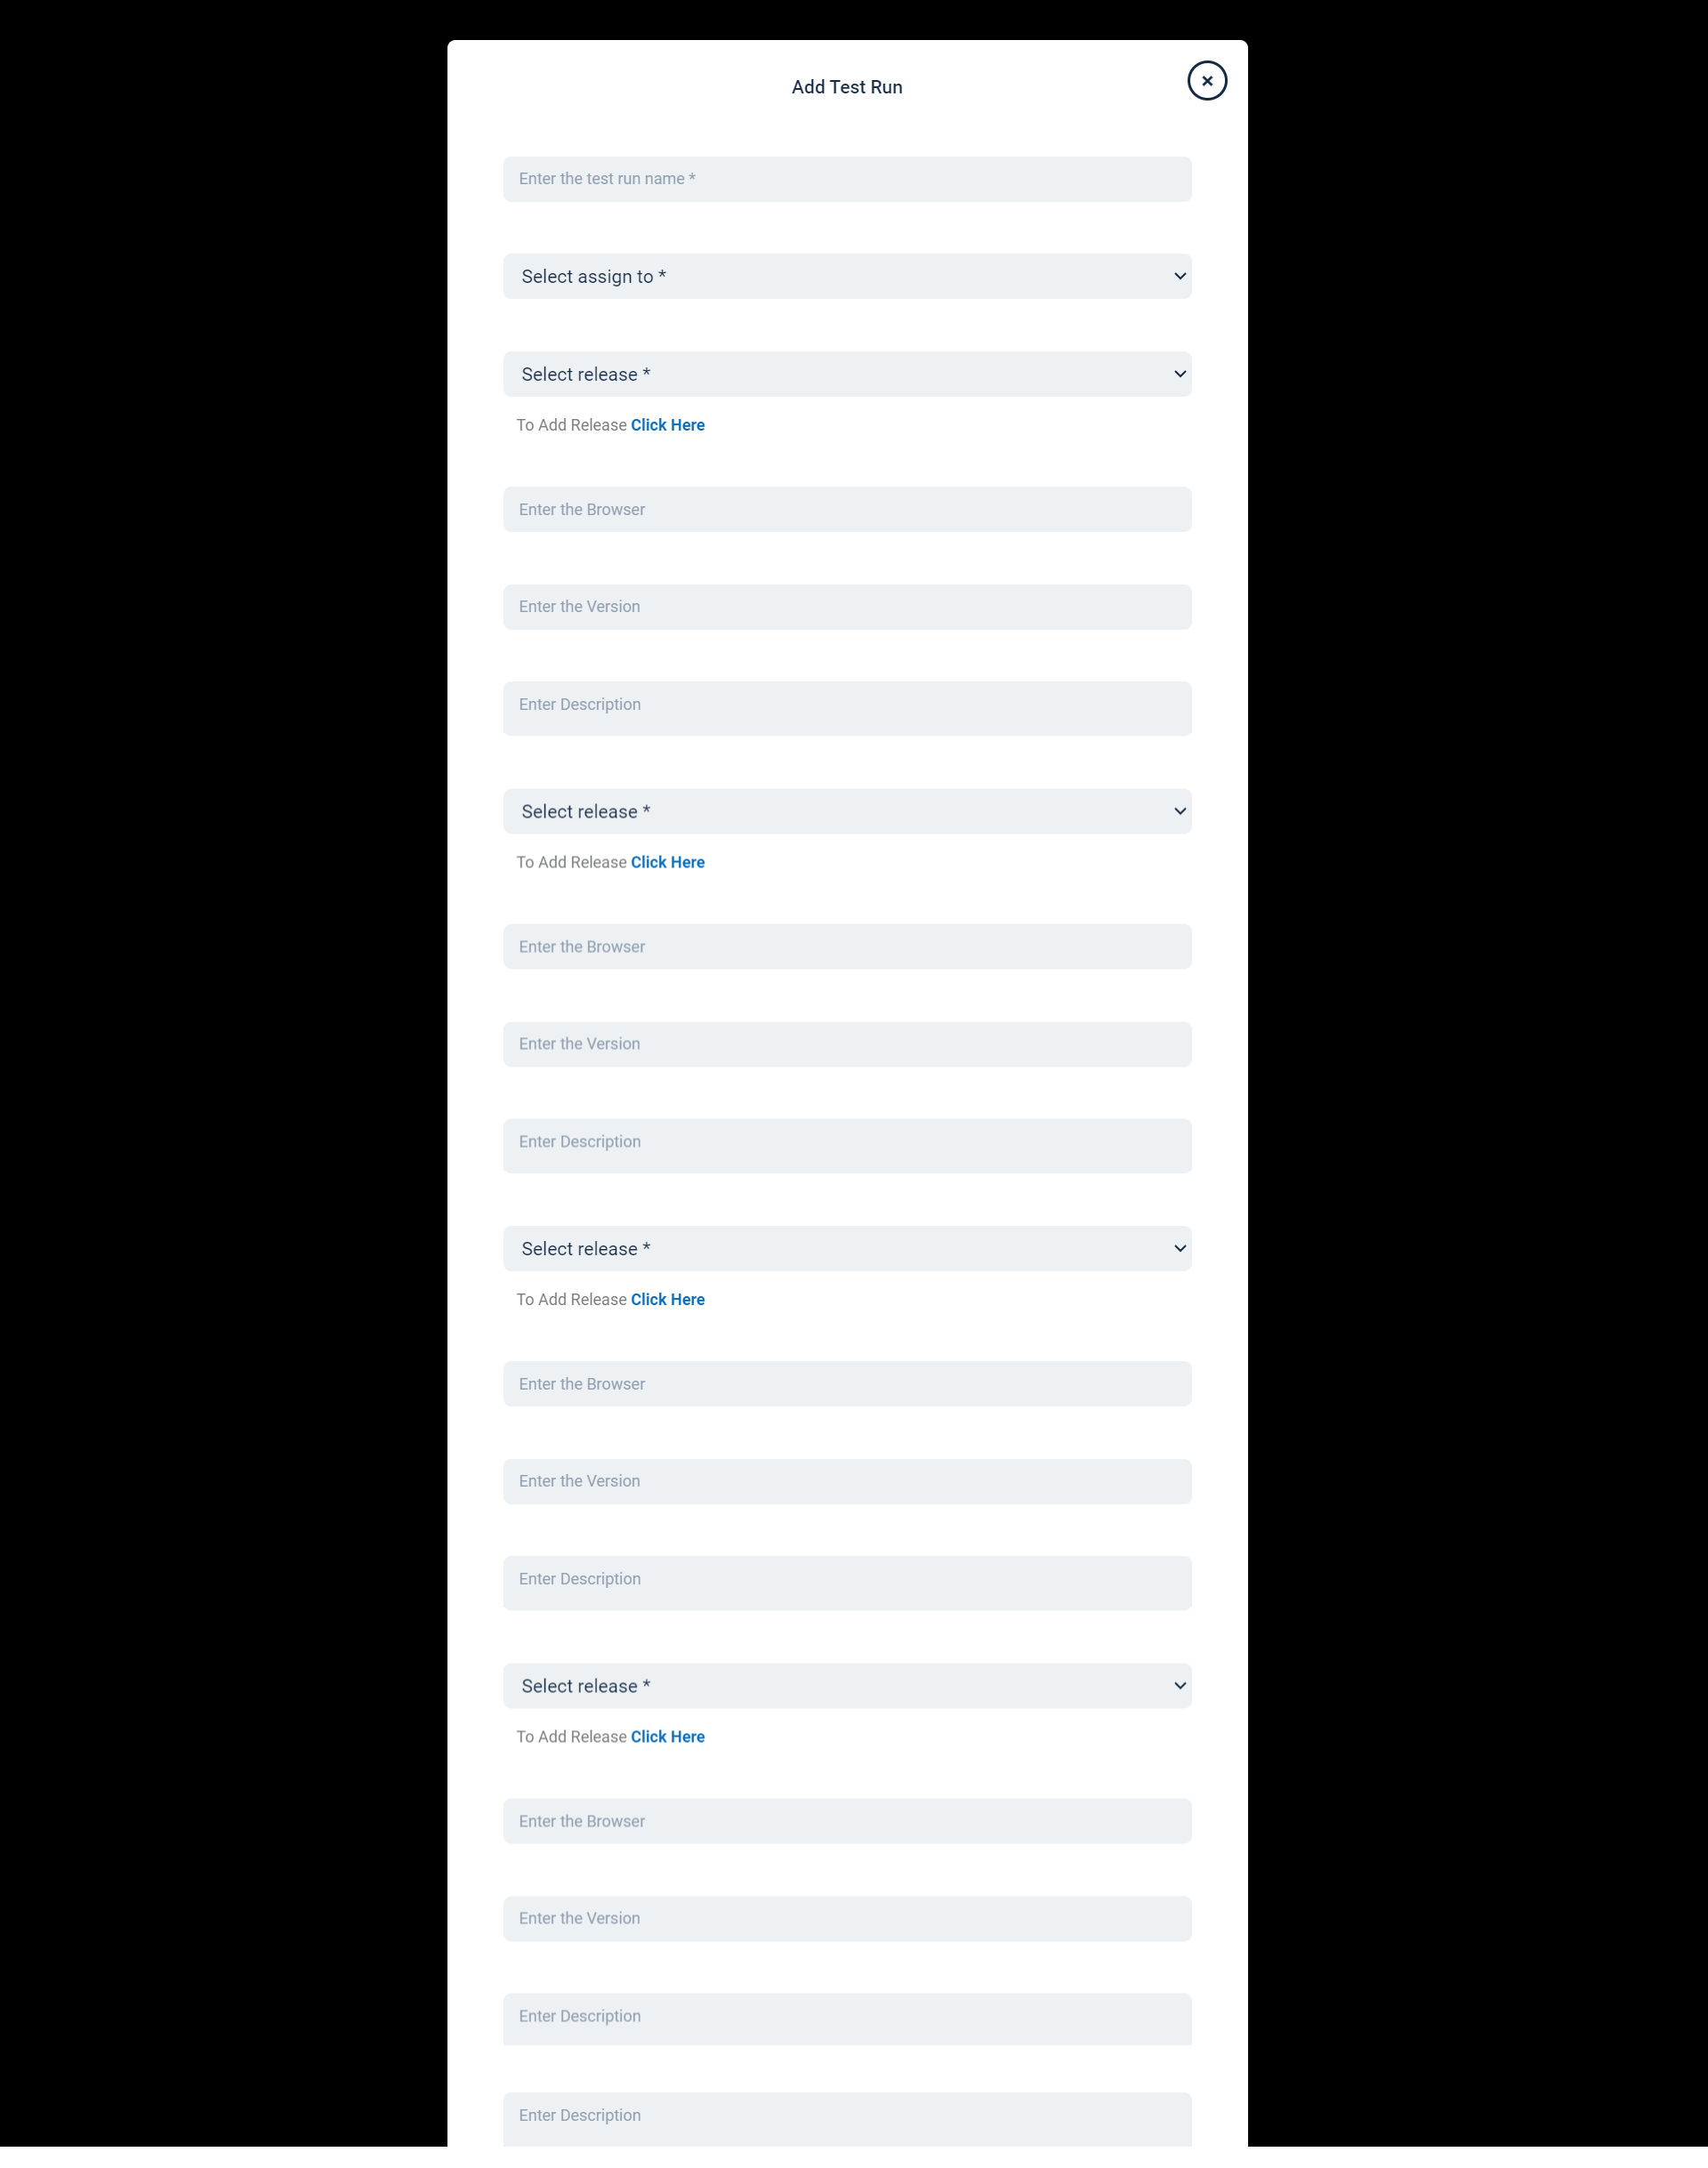
How to create a Test run from the test case search page ?
Creating a test run directly from the test case search page can be a convenient way to quickly organize and execute tests.
- Filter and Select Test Cases: Use the search and filter options available on the test case search page to narrow down the list of test cases you want to include in the test run. You can filter test cases based on attributes such as status, priority, tags, or tag, etc.
- Select Test Cases for Test Run: Once you've filtered the test cases, select the ones you want to include in the test run. Click on the checkboxes to select the desired test cases. Click on the Create Test Run button.
-
Specify Test Run Details: After initiating the test run creation process, you'll be prompted to specify details for the test run. This may include:
- Test Run Name: Enter a descriptive name for the test run.
- Release name: select the desired release for the test run
- Assign Testers: Assign testers or team members who will be responsible for executing the tests.
- Other Options: Select the additional options to configure for the test run.
-
Confirm and Create Test Run: Review the details you've specified for the test run and confirm your selections. Once confirmed, save the button to create the test run.
By following these steps, you can efficiently create a test run directly from the test case search page, allowing you to organize and execute tests more effectively