Project Management
Add Projects in QA Touch
To add Projects in QA Touch, follow these steps:
1.Login to QA Touch.
2.On the left panel, click on Project List and then Click on Add Project.
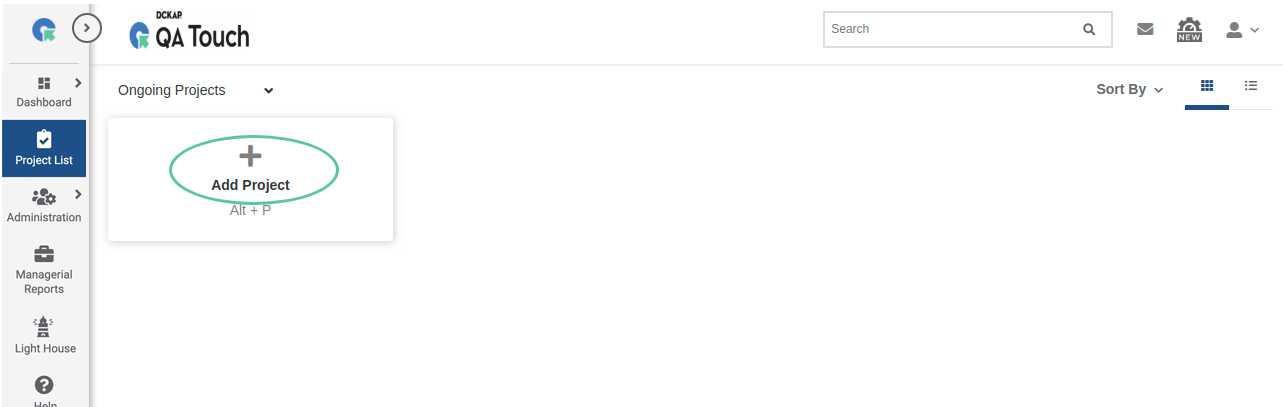
3.Enter the Project Name and click Save.


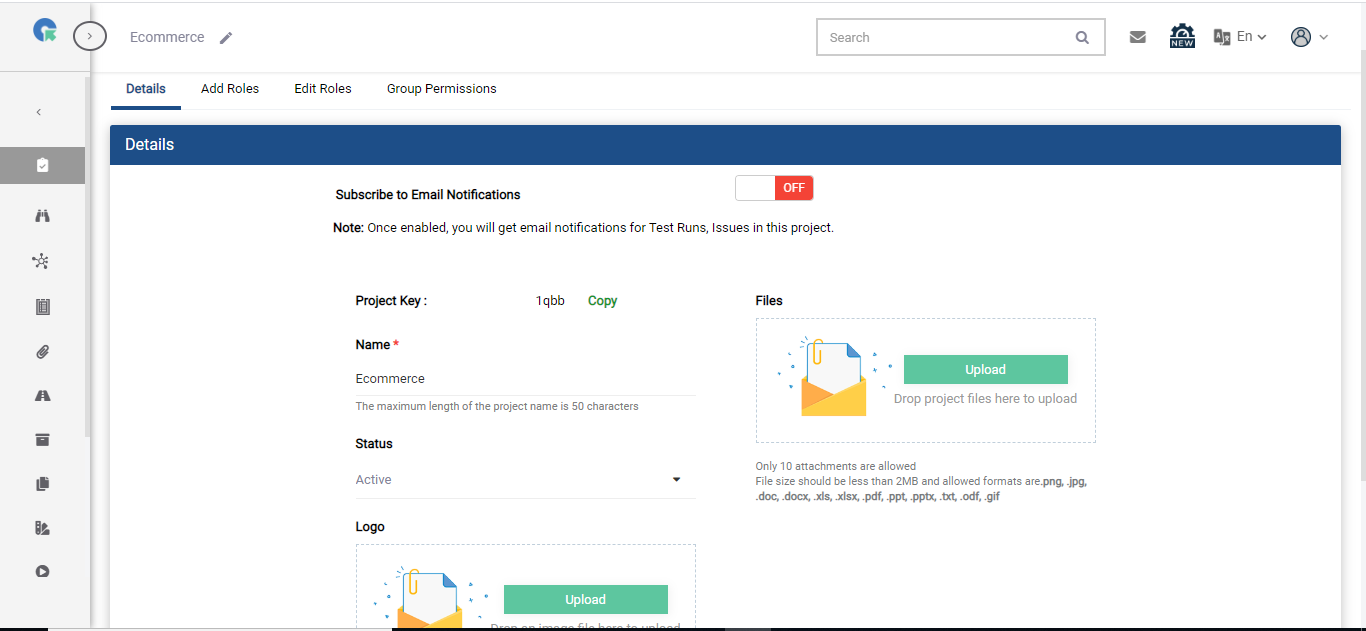
4.Click on the Edit button within the newly created project.
5.Enter the Project Details such as :
    -Status
    -attach a project logo
    -any Files (if applicable)
    -Click Update.
Fill in the Project details in Action below
“QA Touch - Add Users & Roles to Project“
Click to this to know how to add a user to a project:
Using the below mentioned steps, add different users into a Project, each with
1.Full Access Role
2.Basic Role
3.Custom Role
4.Developer Role (according to your requirements)
To know in the User Roles and corresponding project accesses for each role, refer to Role Management.
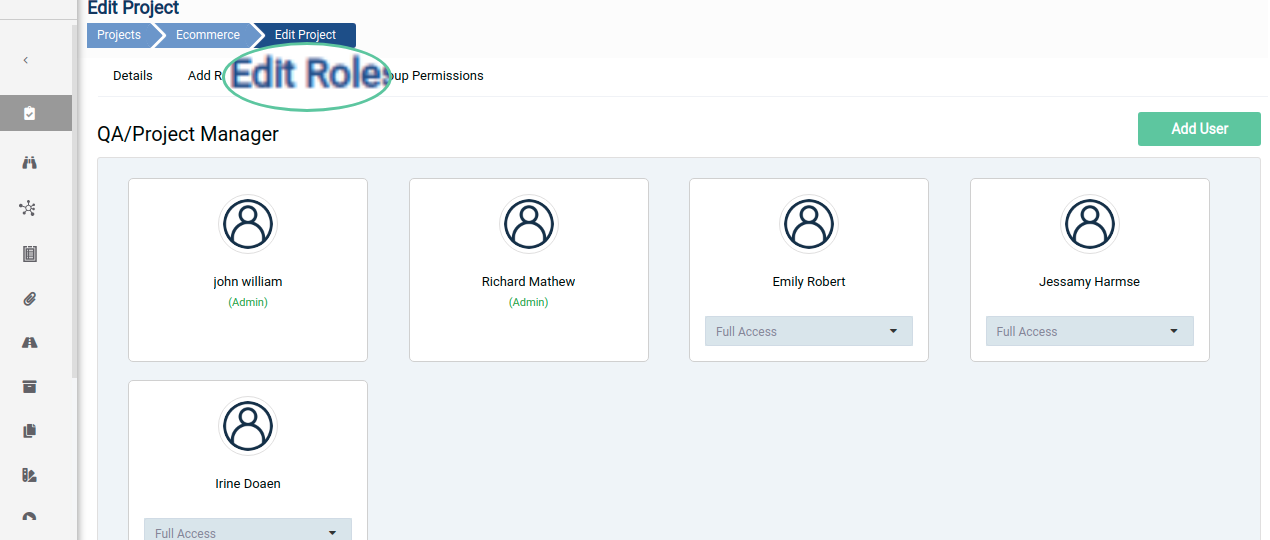
Note: A user with a developer designation can be assigned with only developer role within a project.After adding different users with different roles into your project, Click on Edit Roles tab. You will be able to view the added users and their roles into project. You can edit any user role from the corresponding dropdown
The dashboard of a user with a Full Access Role in a Project will look like below image.
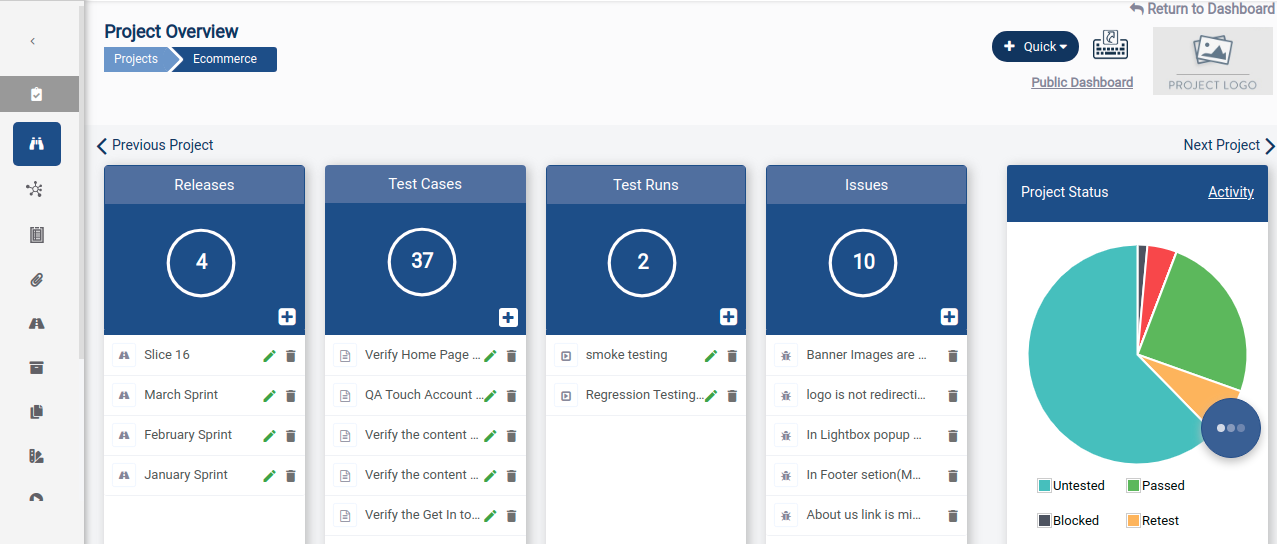
 The user will be able to edit and delete all features such as:

 1.Releases
 2.Test Cases
 3.Test Runs
 and be able to delete only in Issues.
The dashboard of a user with Custom Role in project will look like below image.
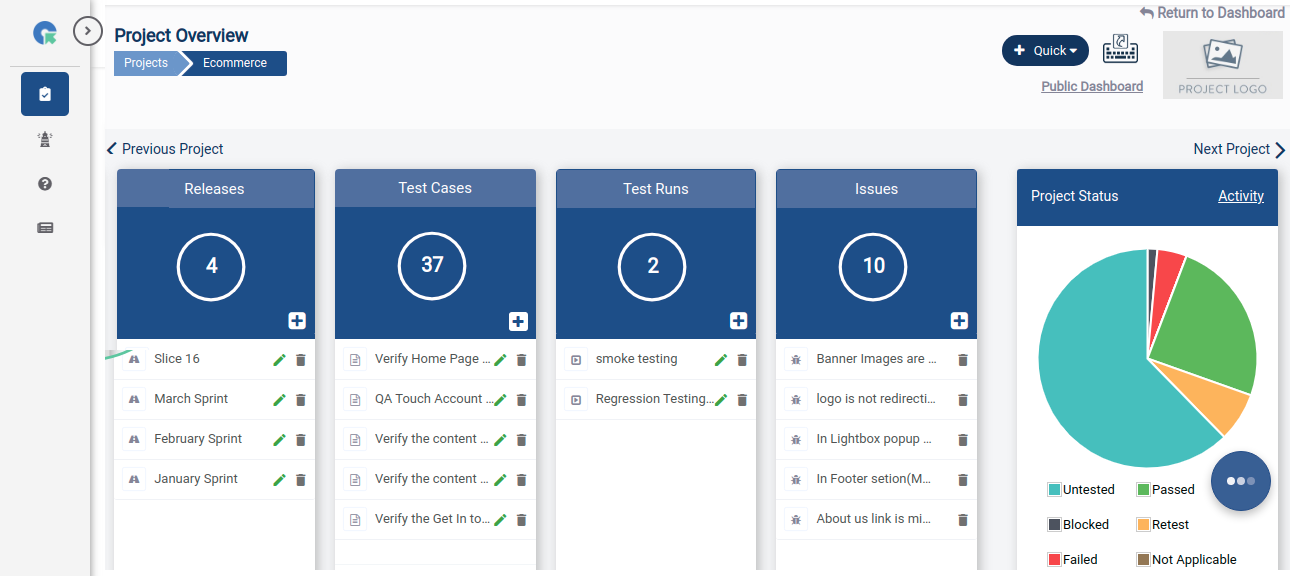
The edit and delete access will be custom assigned for each feature.
In the above image shows a user with a
custom role
, in which he has Edit Only access for Releases and Test Runs, Delete Only Access for Issues and both Edit and Delete access for Test Cases.
The dashboard of a user with Developer Role in project will look like the below image.
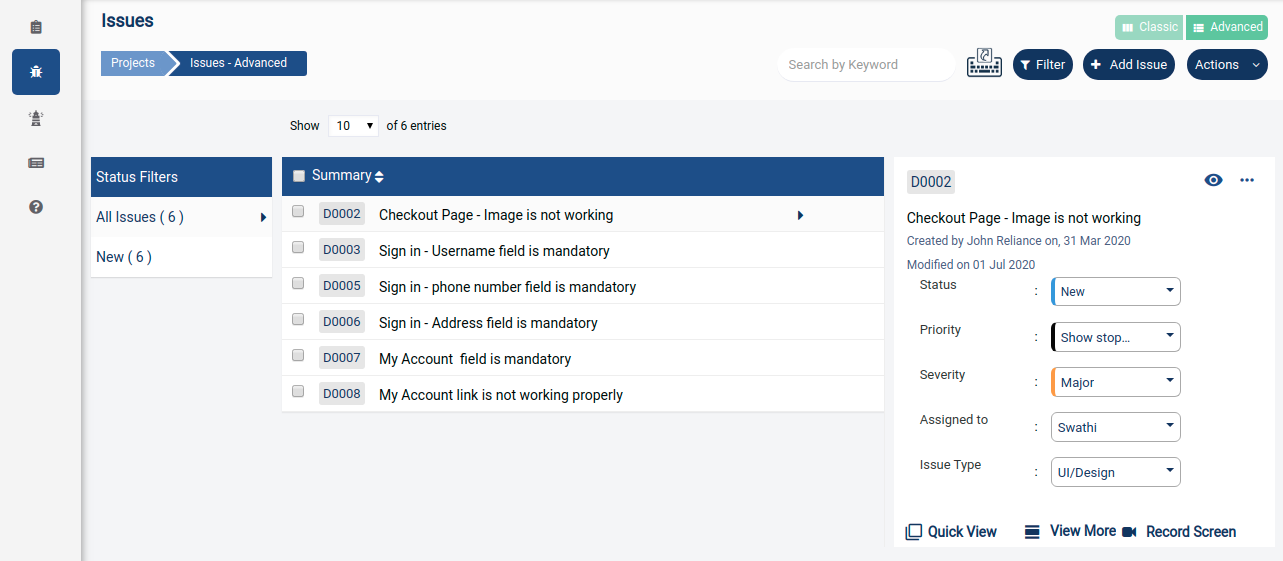
This user will only have access to Issues module and can only Add Comments and change Issue Status.